Amazon S3
Setting up credentials and an S3 bucket for Scheduled Data Exports
This article walks you through configuring an Amazon S3 destination for Scheduled Data Exports. You'll create a bucket, choose how RevenueCat authenticates to it, and supply the credentials to the integration in the dashboard.
Once you've configured the S3 integration in RevenueCat, allow up to 24 hours before the first file is delivered.
Choose a credential type
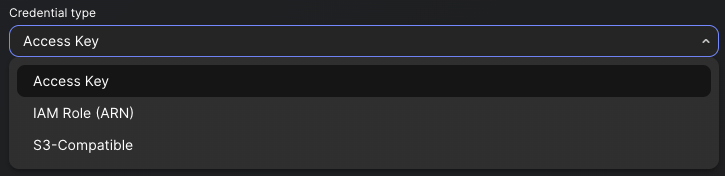
RevenueCat supports three ways to authenticate against an S3-compatible destination. Pick the one that best matches your security posture:
- Access Key. A long-lived IAM user with an access key ID and secret. Simplest to set up. Recommended for most customers.
- IAM Role (ARN). RevenueCat assumes a role you control via STS. No long-lived secret leaves your account.
- S3-Compatible. Any S3 API-compatible object store reachable at a custom endpoint URL (for example Cloudflare R2 or MinIO).
You can change the credential type later from the integration settings without losing the rest of your configuration.
Receive new and updated transactions only
When configuring the deliveries, you have the option to receive a full export daily or only new and updated transactions from the last export. The first delivery will always be a full export even if this option is selected.
Creating an S3 bucket
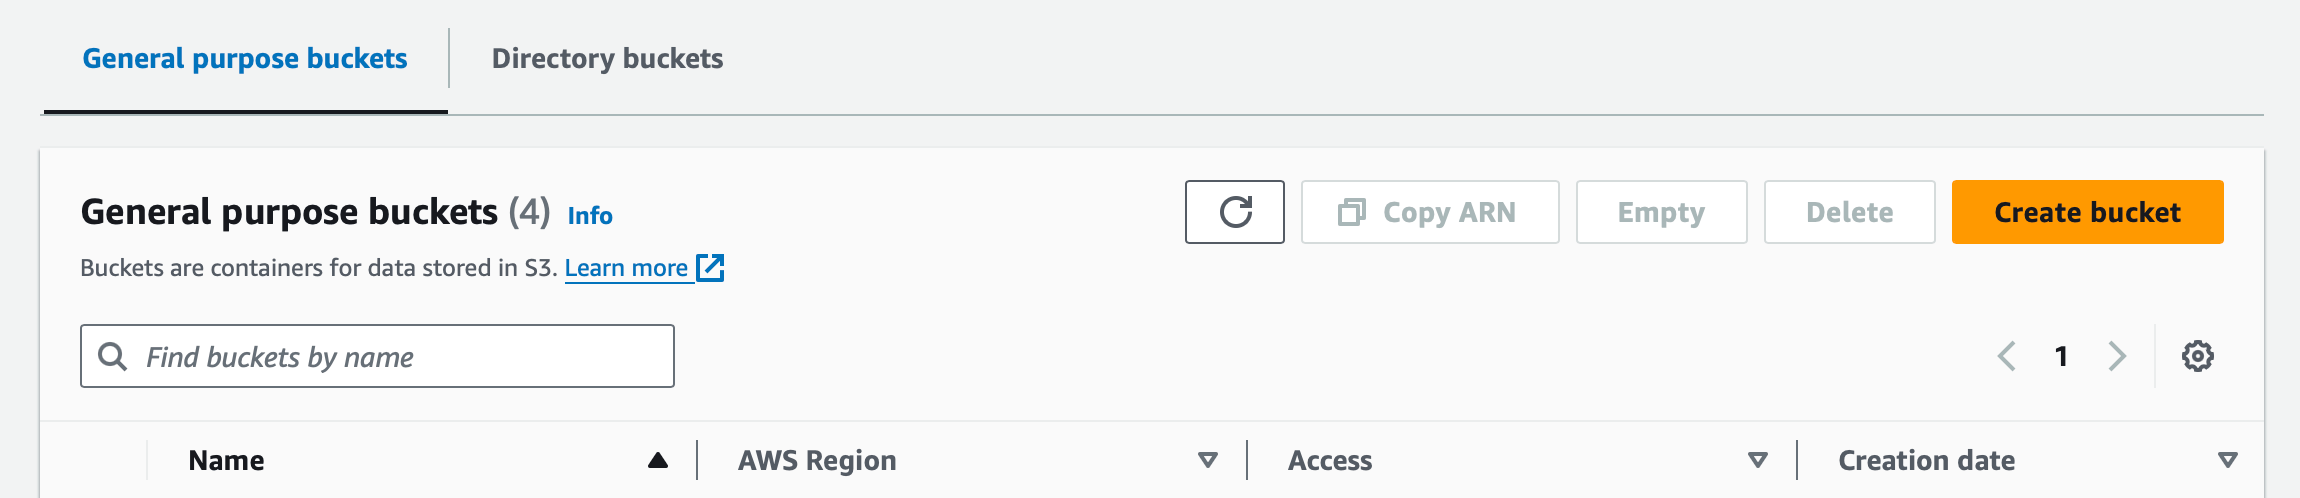
If you don't already have an S3 bucket, you can create one in the AWS console.
Navigate to the S3 dashboard in your AWS console and click Create bucket: https://s3.console.aws.amazon.com/s3/home
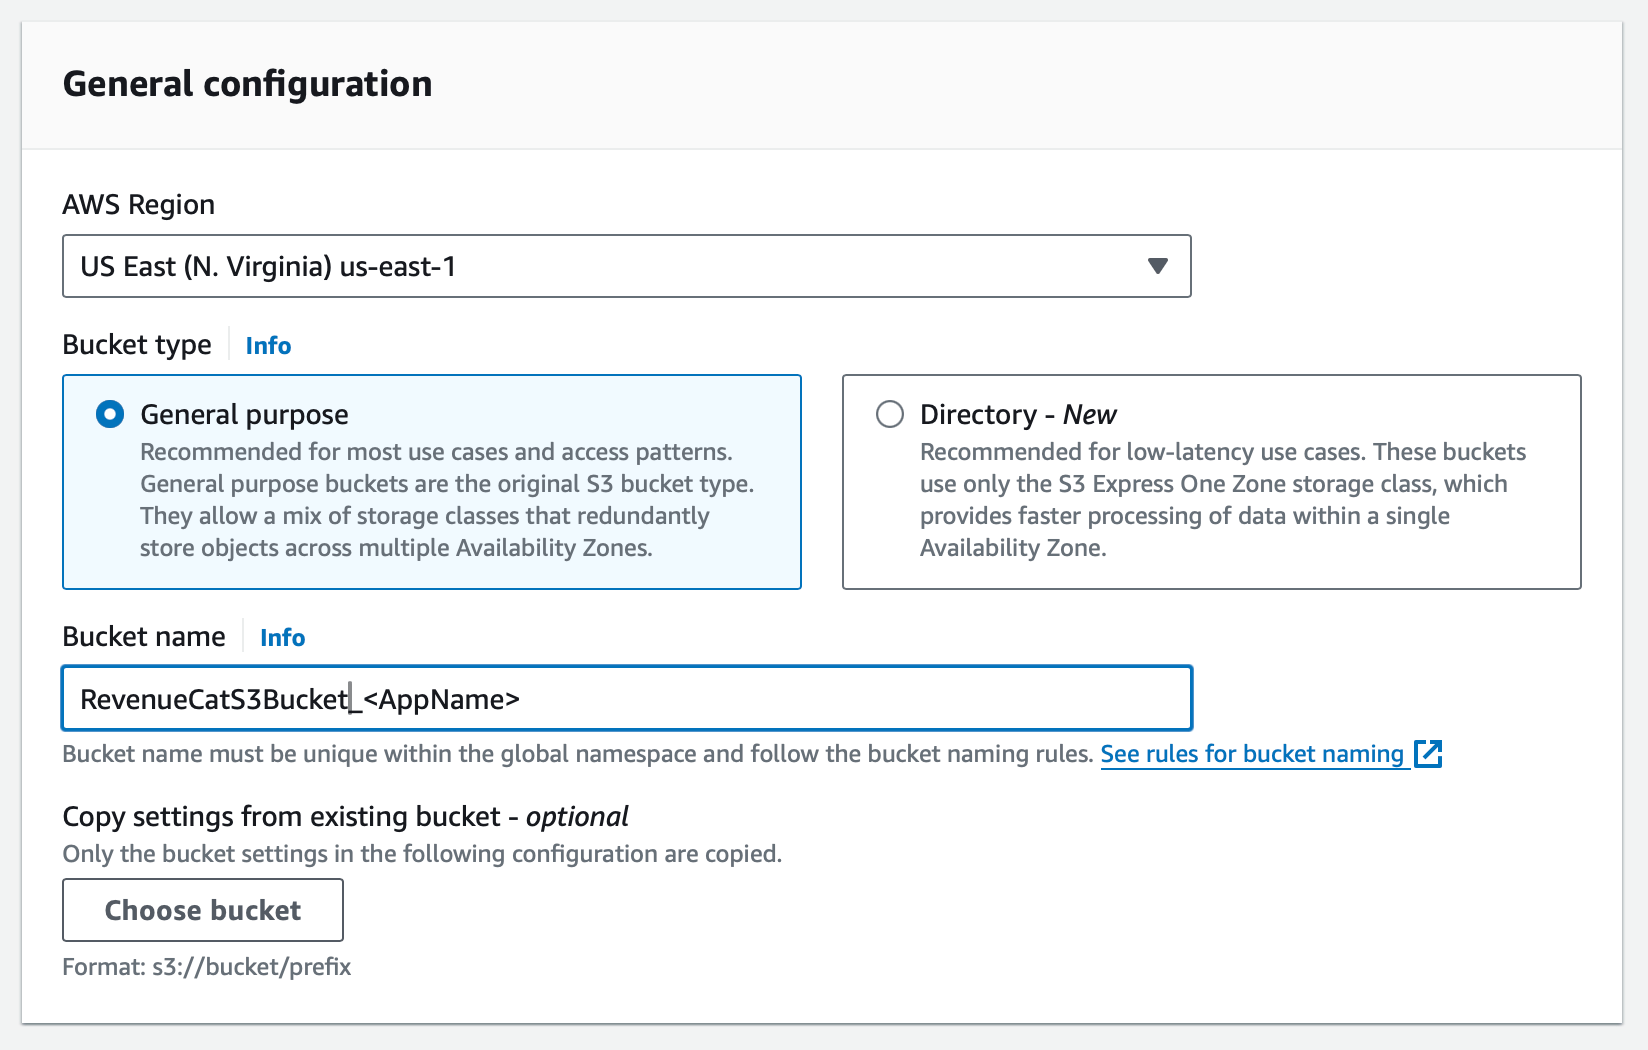
Enter a name for your bucket.
revenuecat-s3-bucket-appname
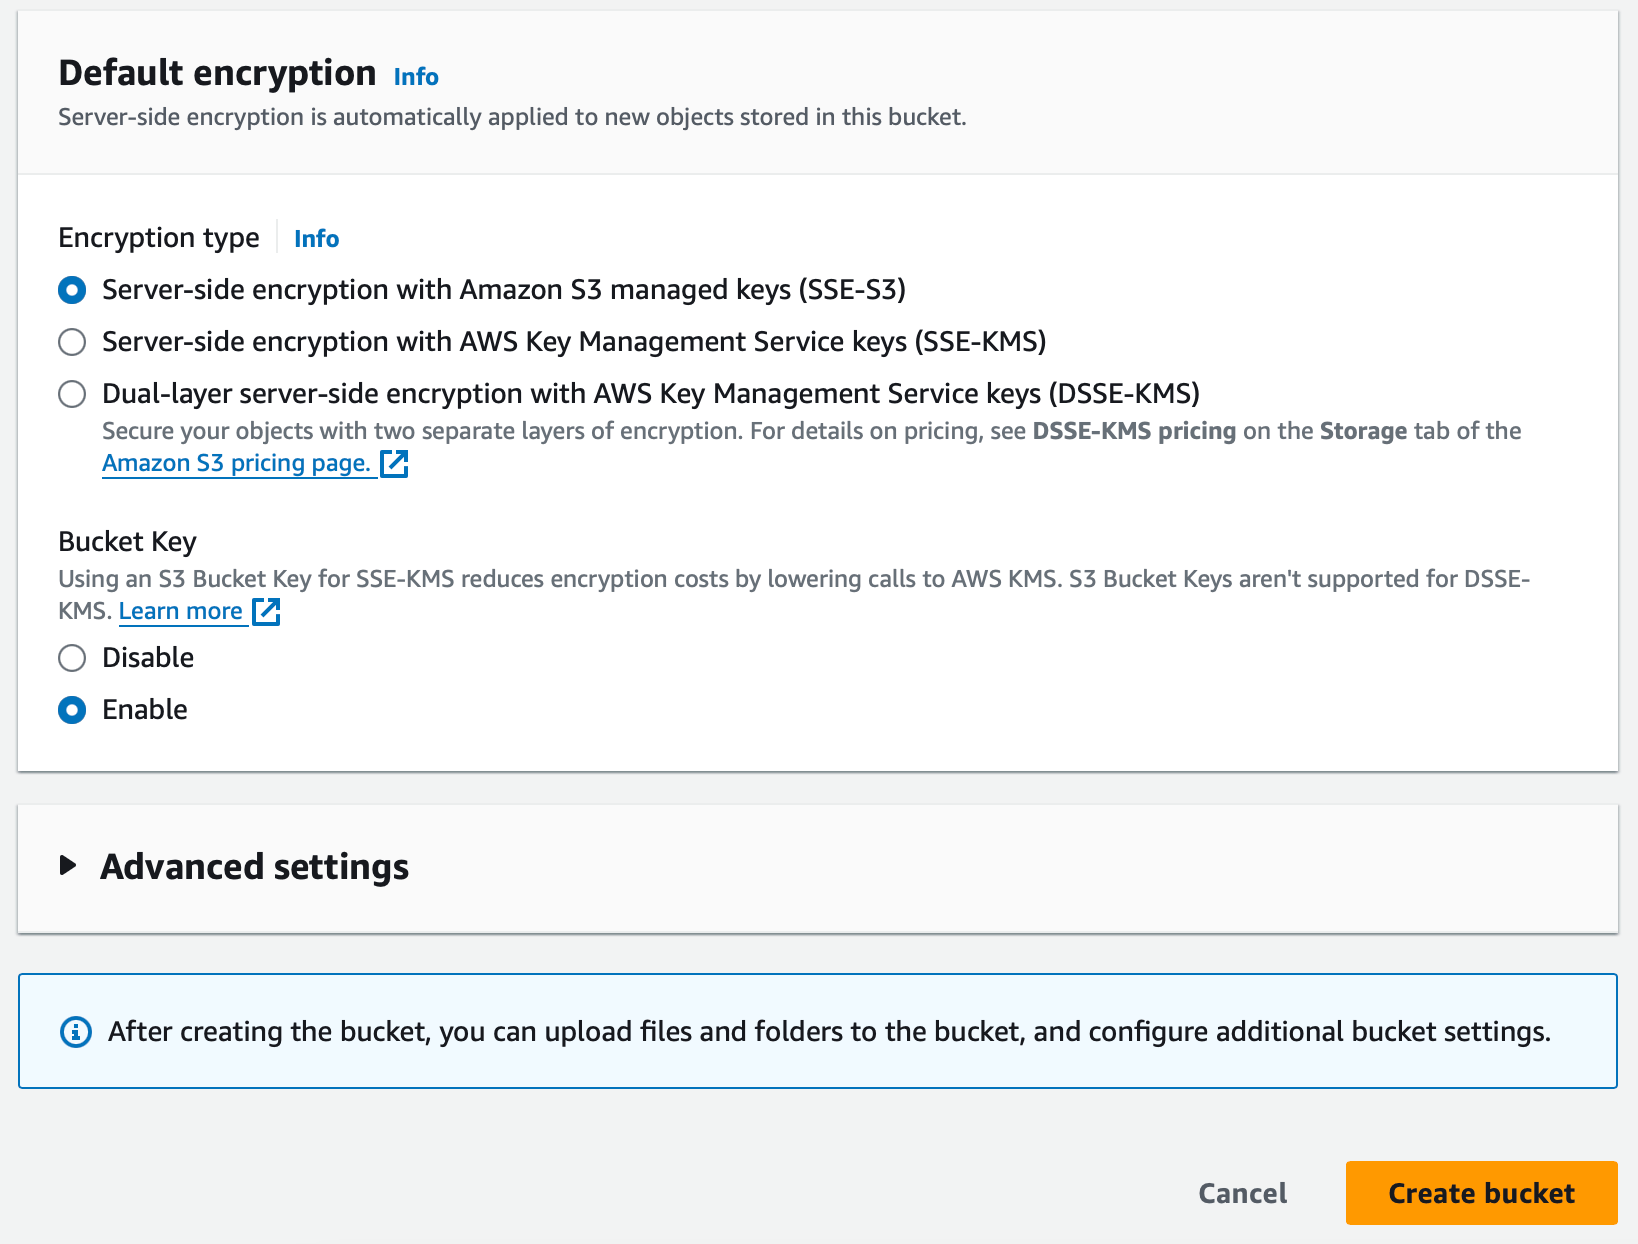
Scroll down to choose the encryption options for your bucket. The default option is fine for most use cases.
If you choose SSE-KMS, you'll need to add the kms:GenerateDataKey permission to the IAM policy you create in the next step.
Setting up Access Key credentials
The steps below create an IAM user and access key that RevenueCat uses to deliver data. Once you have the credentials, paste them into the integration's Credentials section in the dashboard with Credential type set to Access Key.
1. Create Access Policy
You should only give RevenueCat access to the minimum resources necessary. To do this, create a new policy that only allows access to the S3 bucket where you want your deliveries to go.
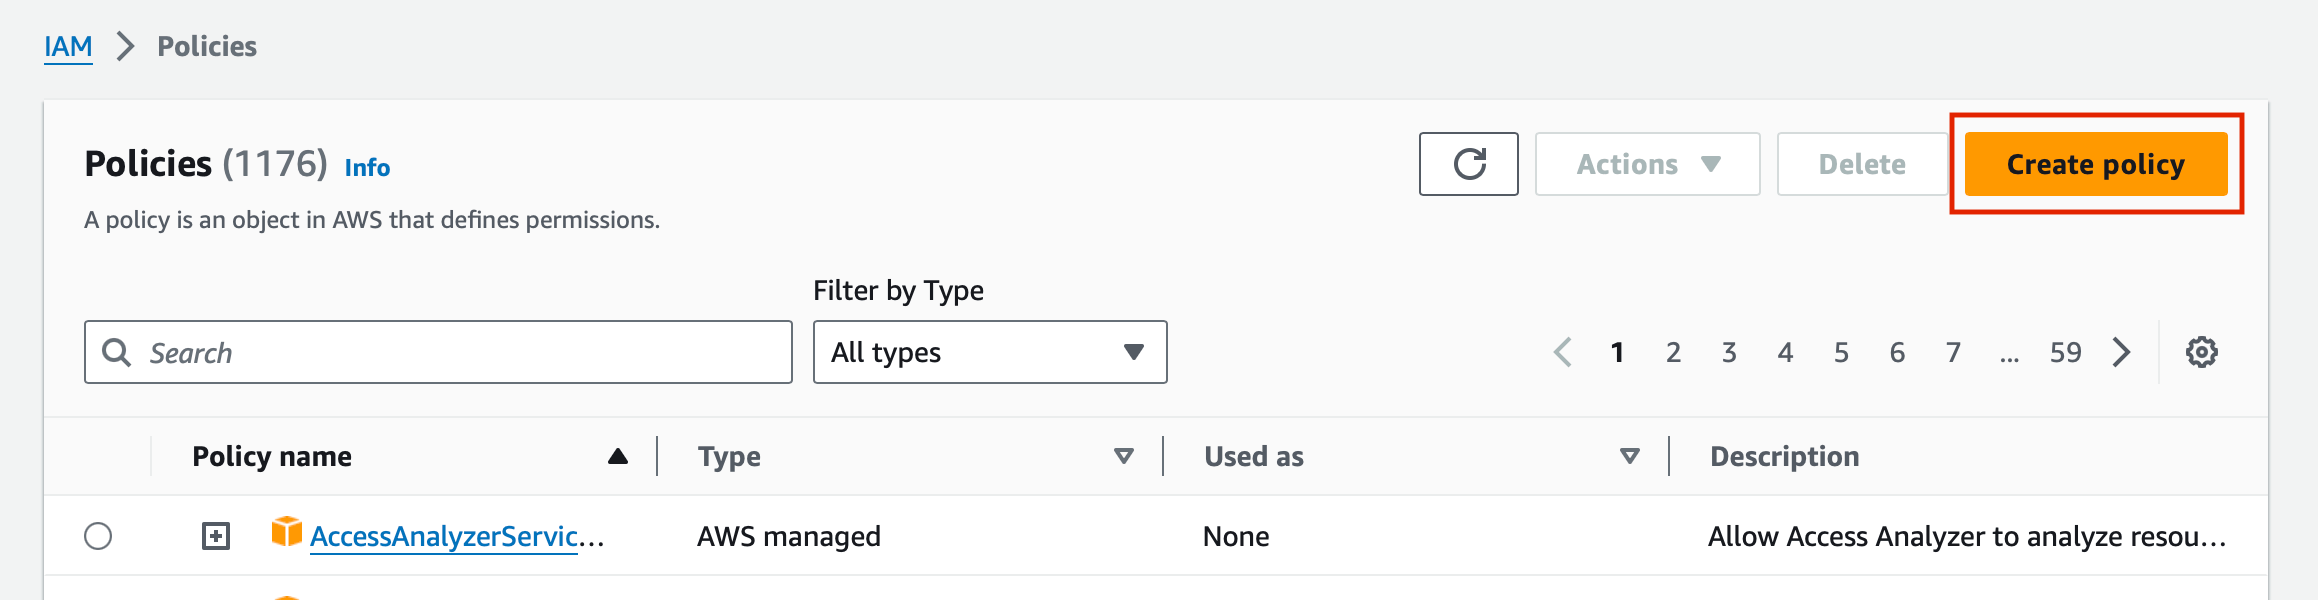
Navigate to the IAM Policy dashboard in your AWS console and click ‘Create policy’: https://console.aws.amazon.com/iam/home#/policies
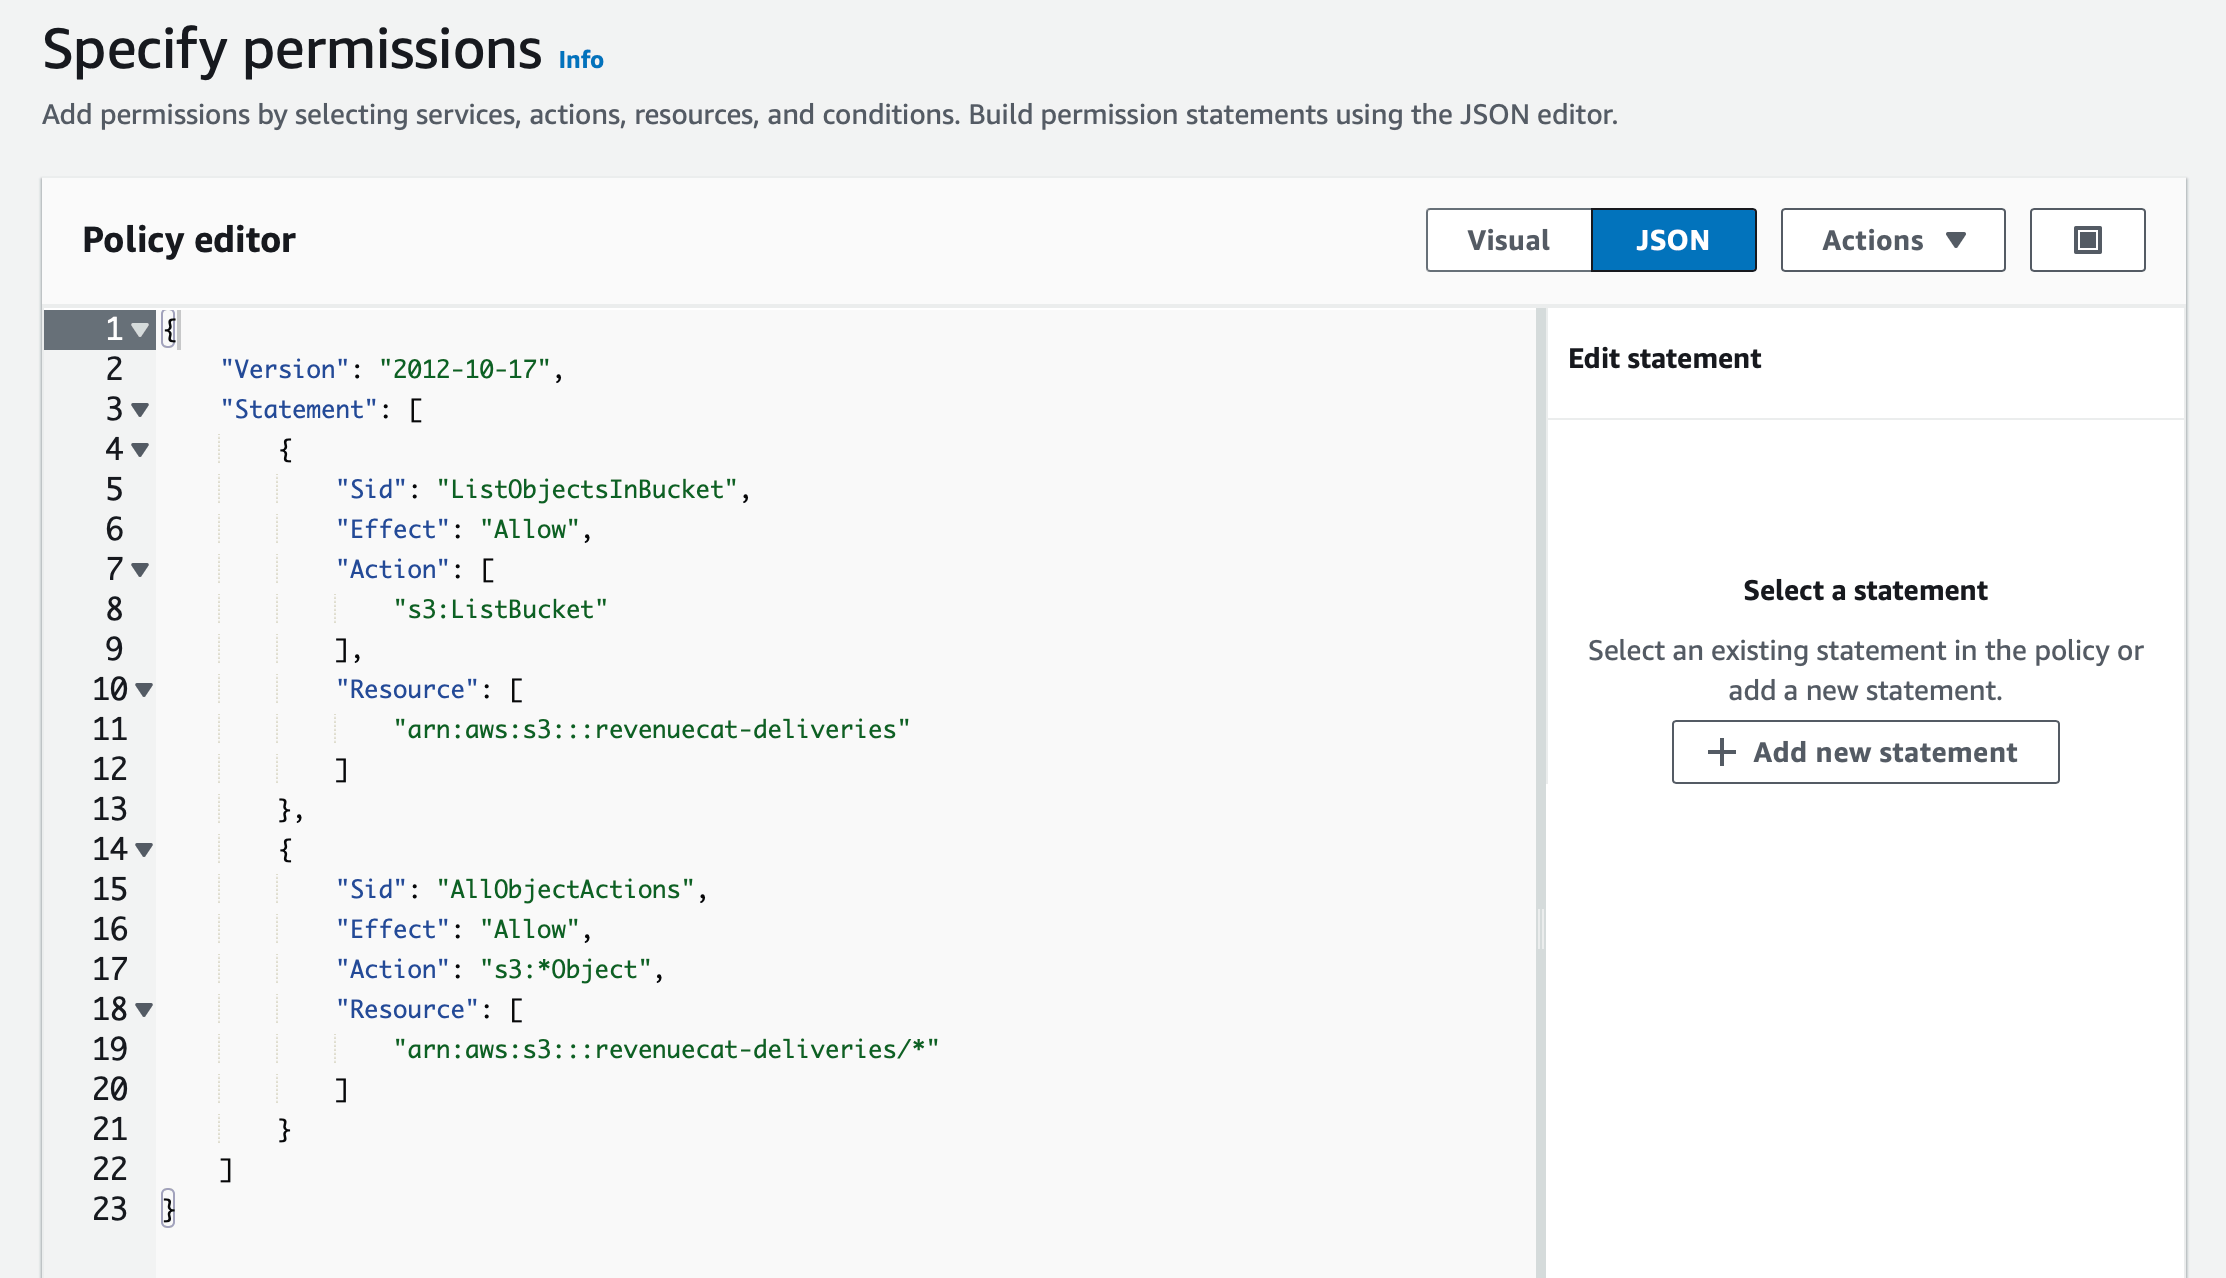
In the policy editor, switch to the JSON view and paste in the following code. Be sure to replace revenuecat-deliveries with the name of your bucket.
- Access Policy
{
    "Version": "2012-10-17",
    "Statement": [
        {
            "Sid": "ListObjectsInBucket",
            "Effect": "Allow",
            "Action": [
                "s3:ListBucket"
            ],
            "Resource": [
                "arn:aws:s3:::<YOUR_S3_BUCKET_NAME>"
            ]
        },
        {
            "Sid": "WriteObjects",
            "Effect": "Allow",
            "Action": [
                "s3:PutObject"
            ],
            "Resource": [
                "arn:aws:s3:::<YOUR_S3_BUCKET_NAME>/*"
            ]
        },
        // If SSE-KMS encryption is enabled on your S3 bucket, you will also need to add the following policy statement
        {
            "Sid": "KMSDataKeyGeneration",
            "Effect": "Allow",
            "Action": [
                "kms:GenerateDataKey"
            ],
            "Resource": [
                "arn:aws:kms:region:account-id:key/key-id" // <-- Replace with your KMS key ARN
            ]
        }
    ]
}
This policy allows RevenueCat to list bucket contents and write export files. When you've pasted in the code, click Review policy.
Finally, give the policy a name and description. Example:
RevenueCatS3Policy_<AppName>
Policy for RevenueCat to deliver Scheduled Data Export data to S3
2. Create IAM User
You'll next need to create an individual user that only has access to the policy you just created in Step 1.
Navigate to the IAM User dashboard in your AWS console and click Add user: https://console.aws.amazon.com/iam/home#/users

Enter a User name and click Next.
RevenueCatS3User_<AppName>

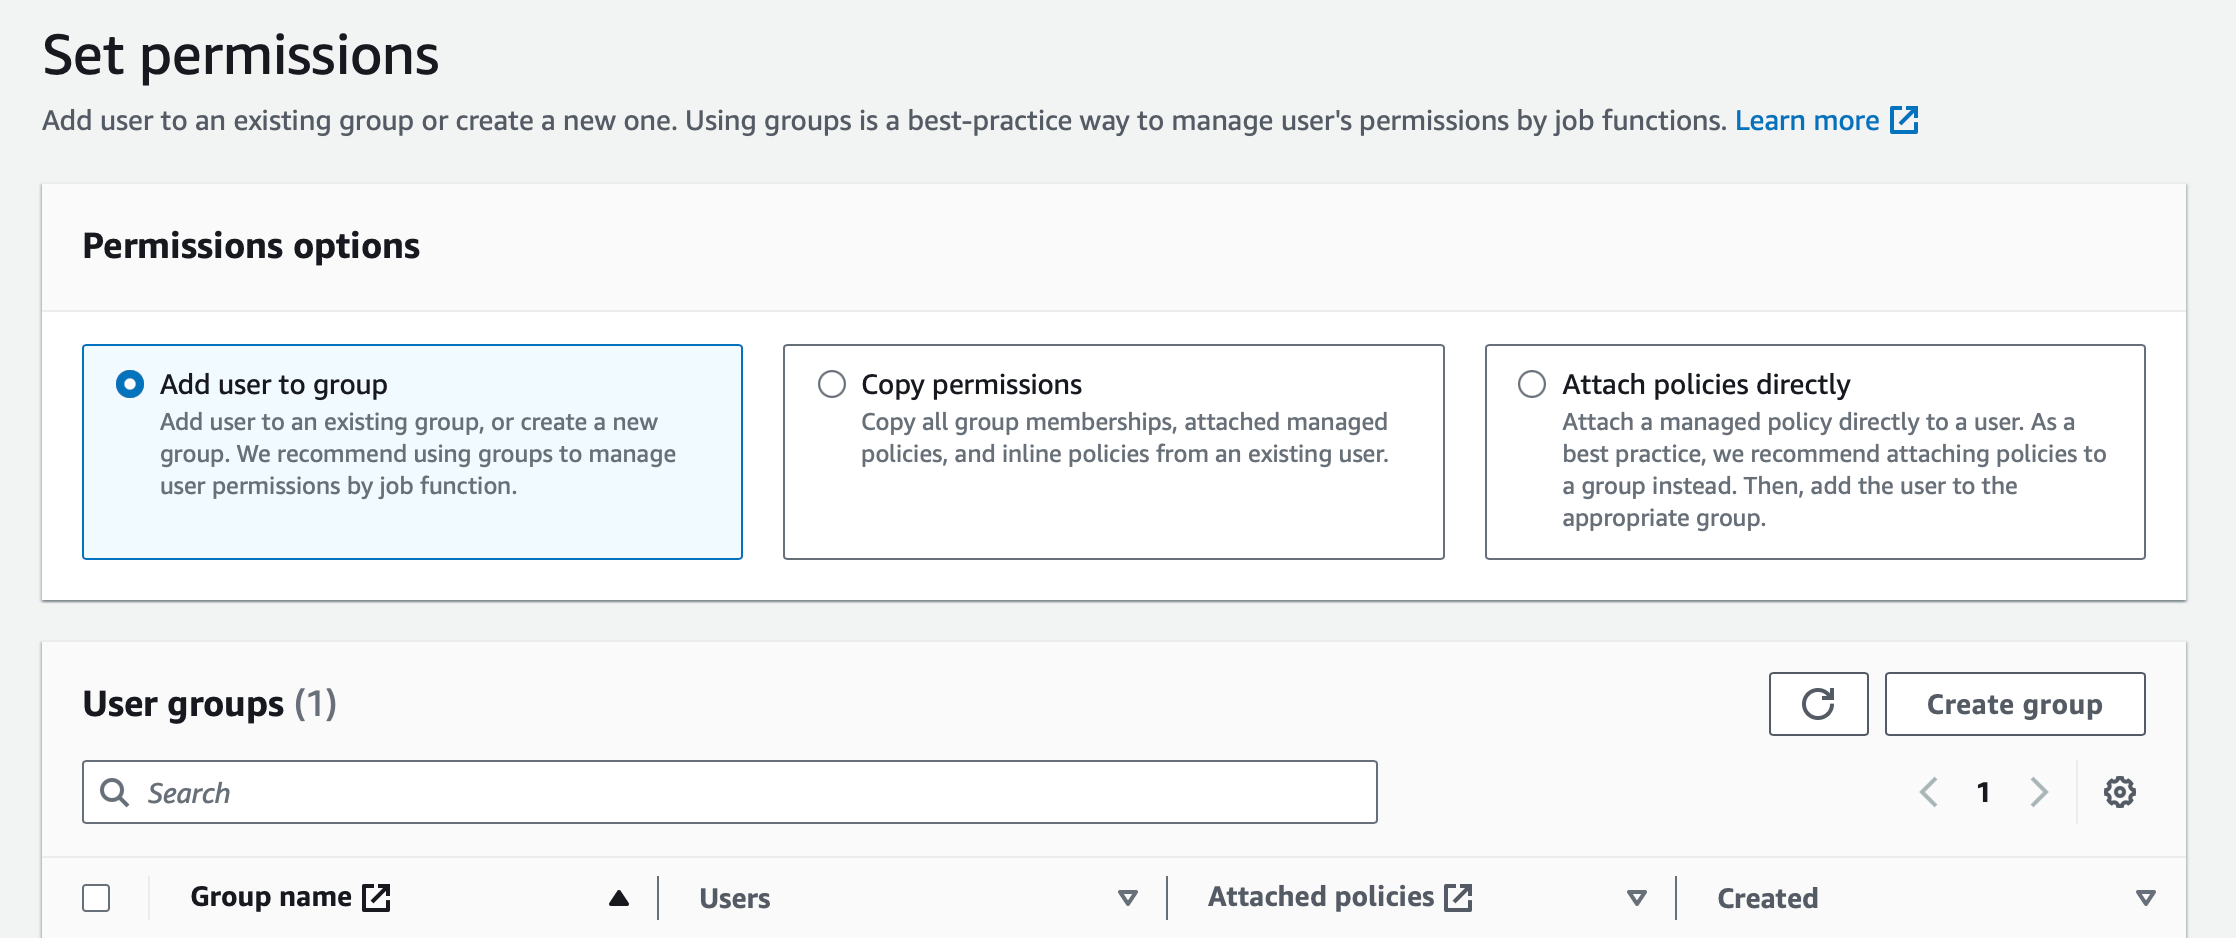
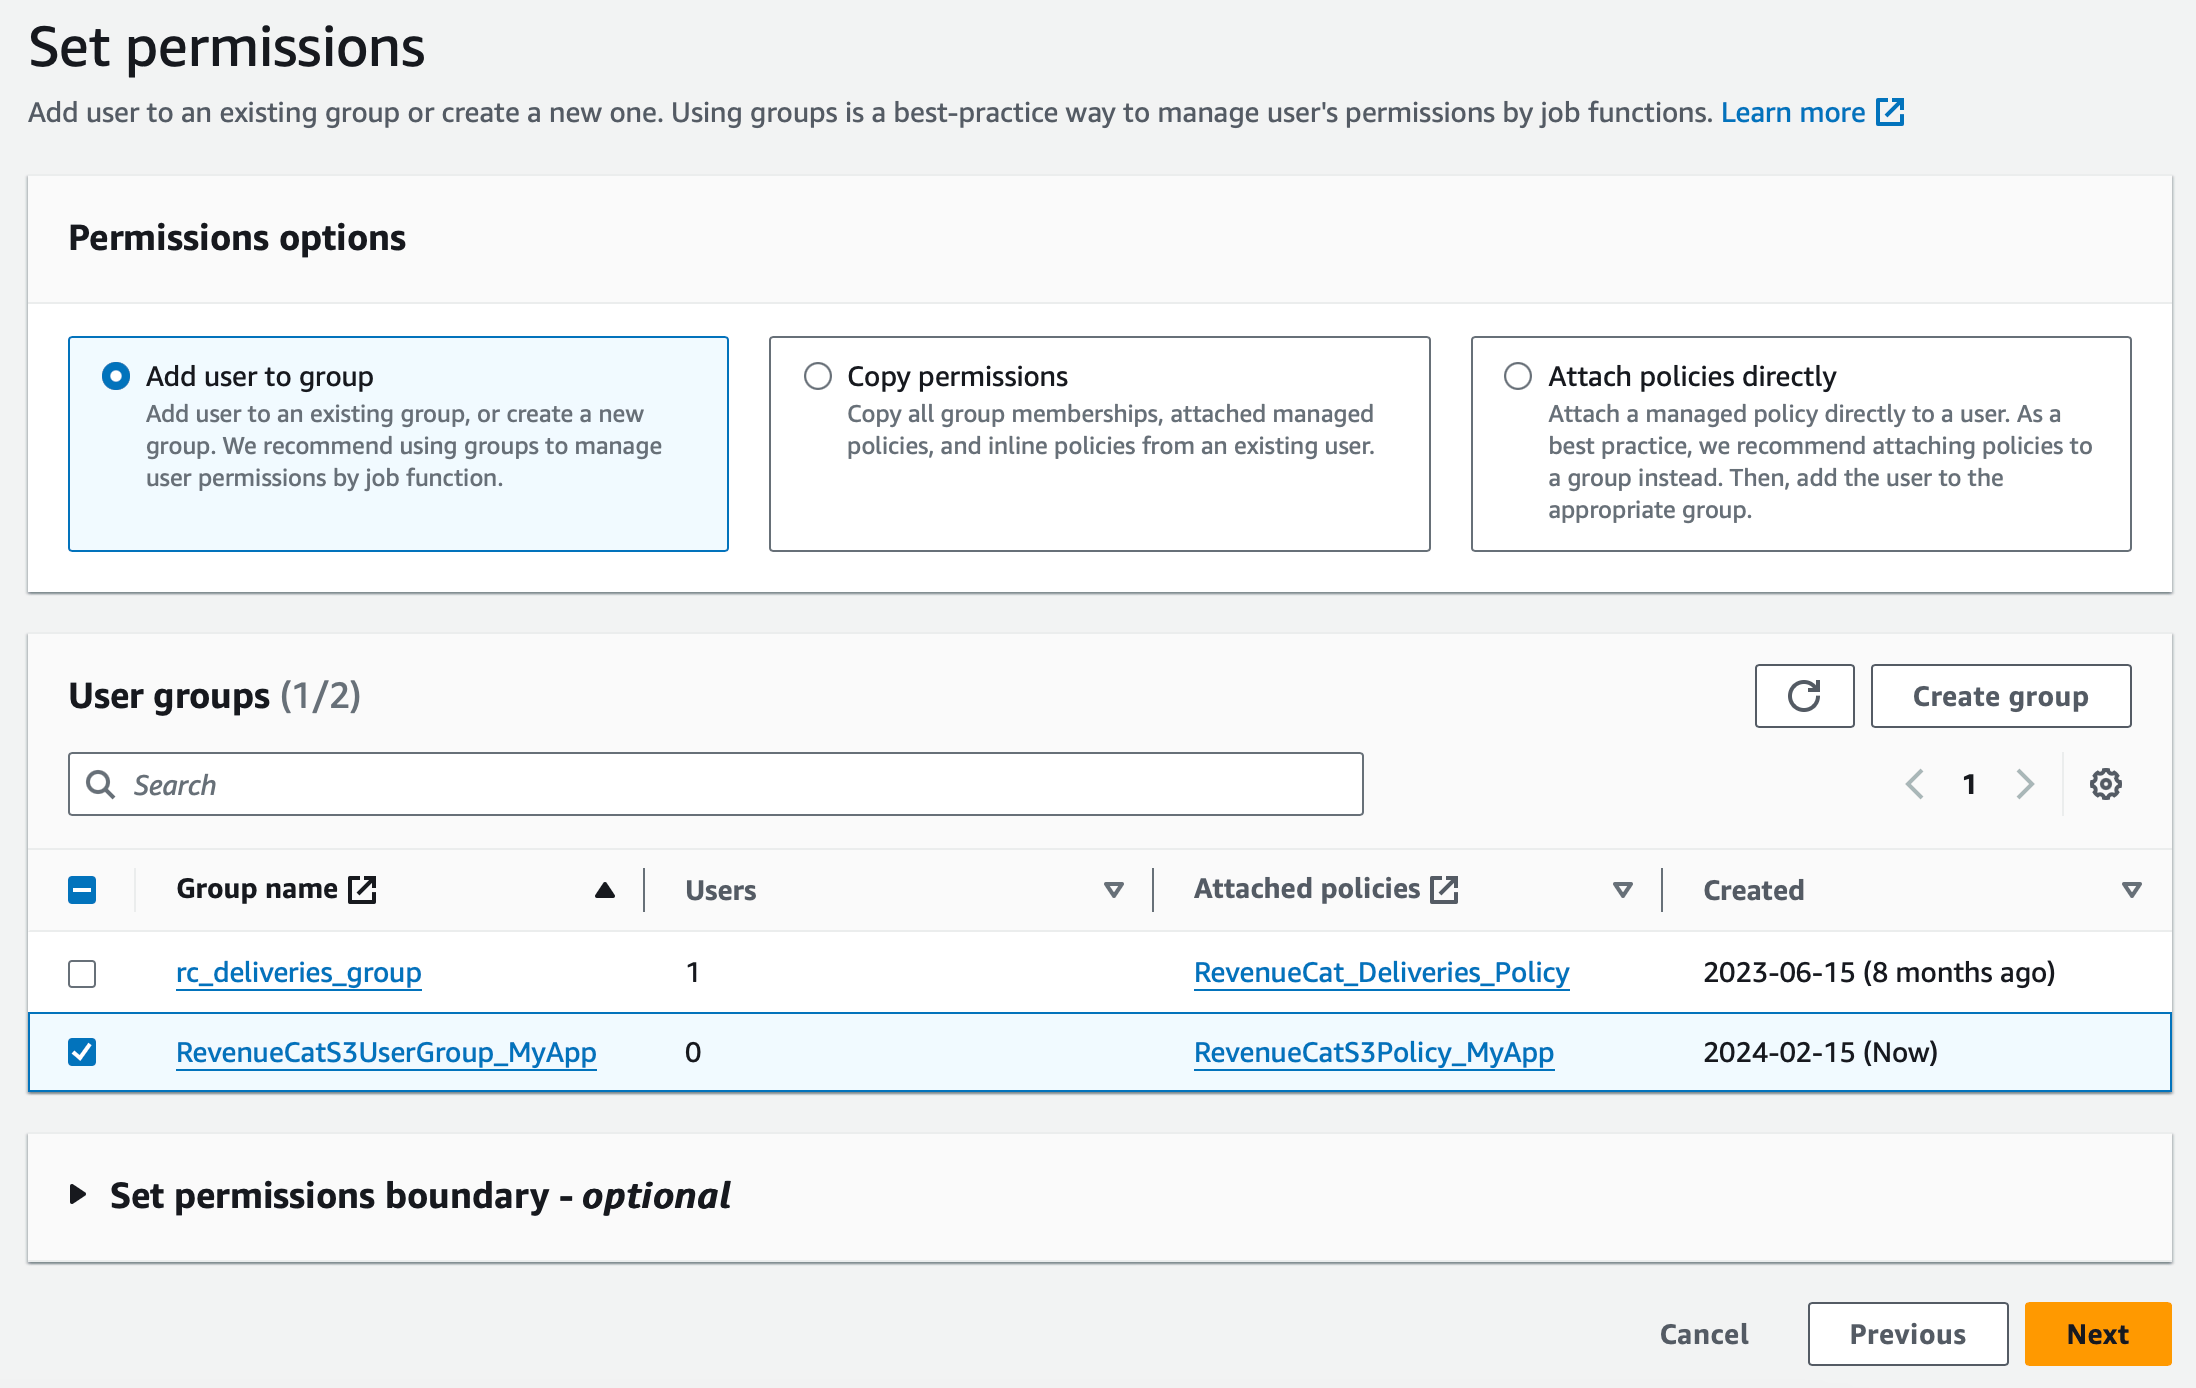
Choose the option to Add user to a group, and click Create group.
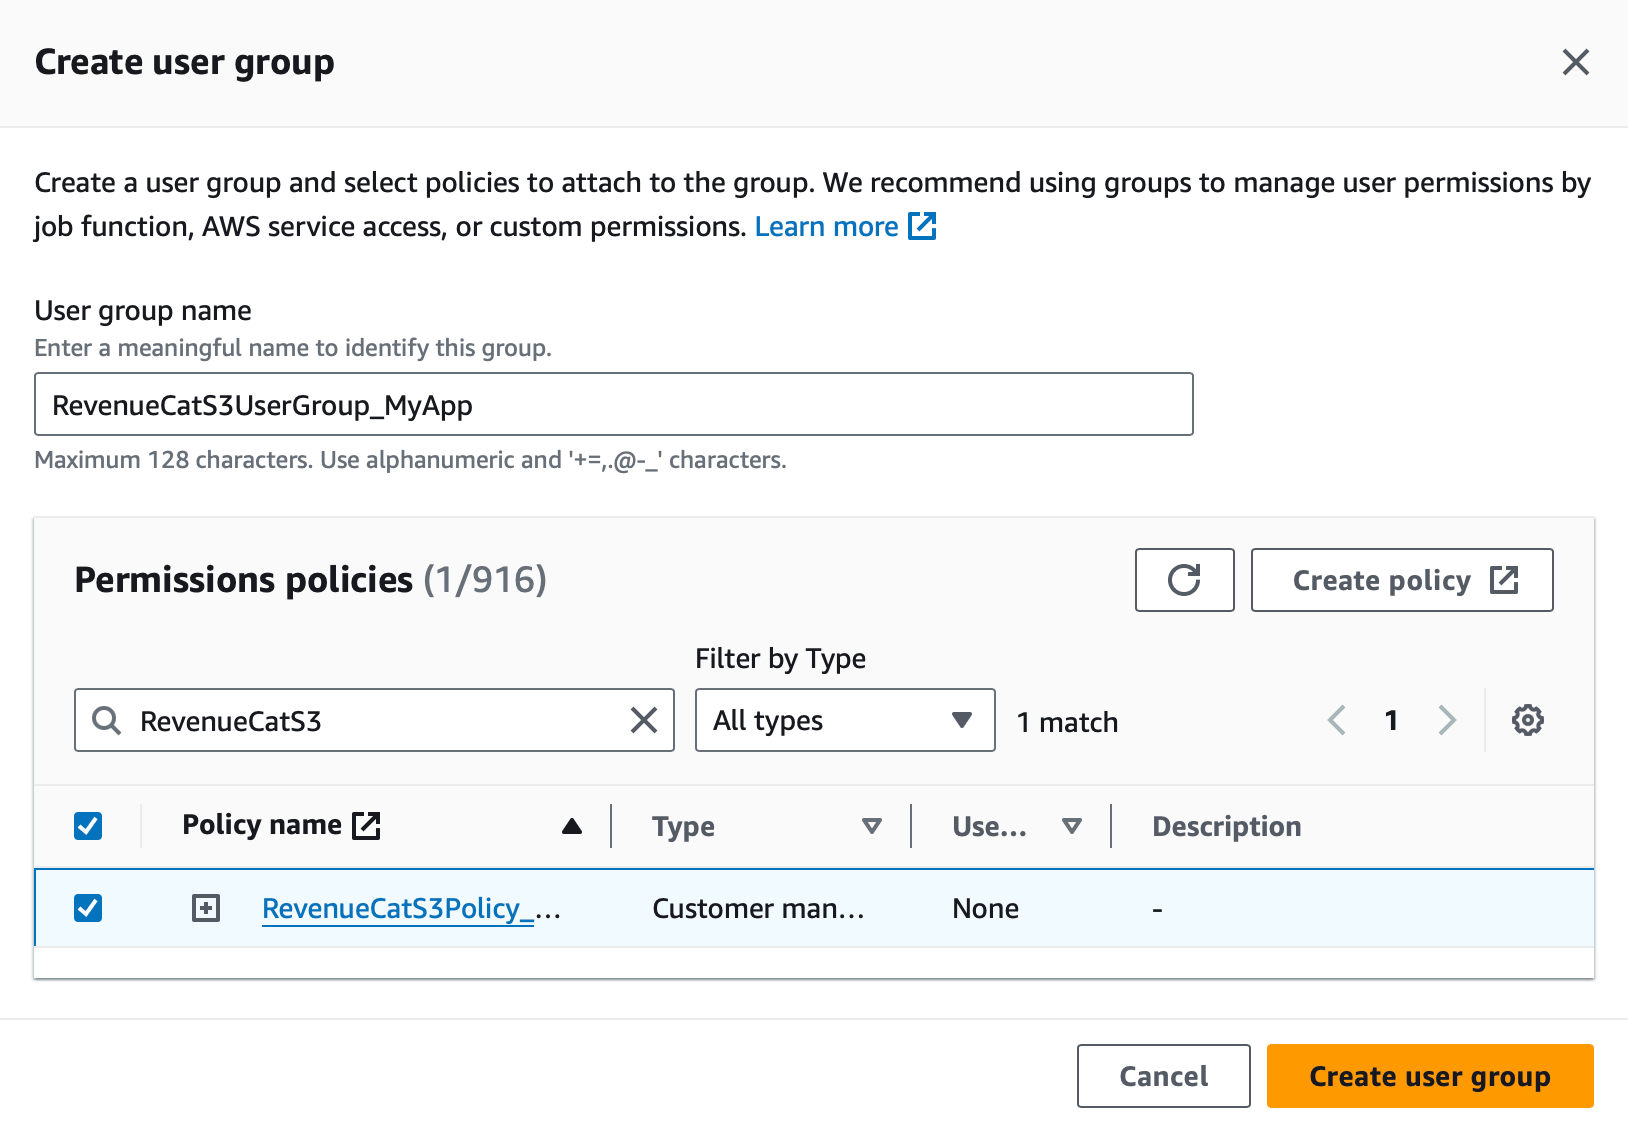
Select the Policy name you created from Step 1, and enter a name for the group, then click Create group.
RevenueCatS3UserGroup_<AppName>
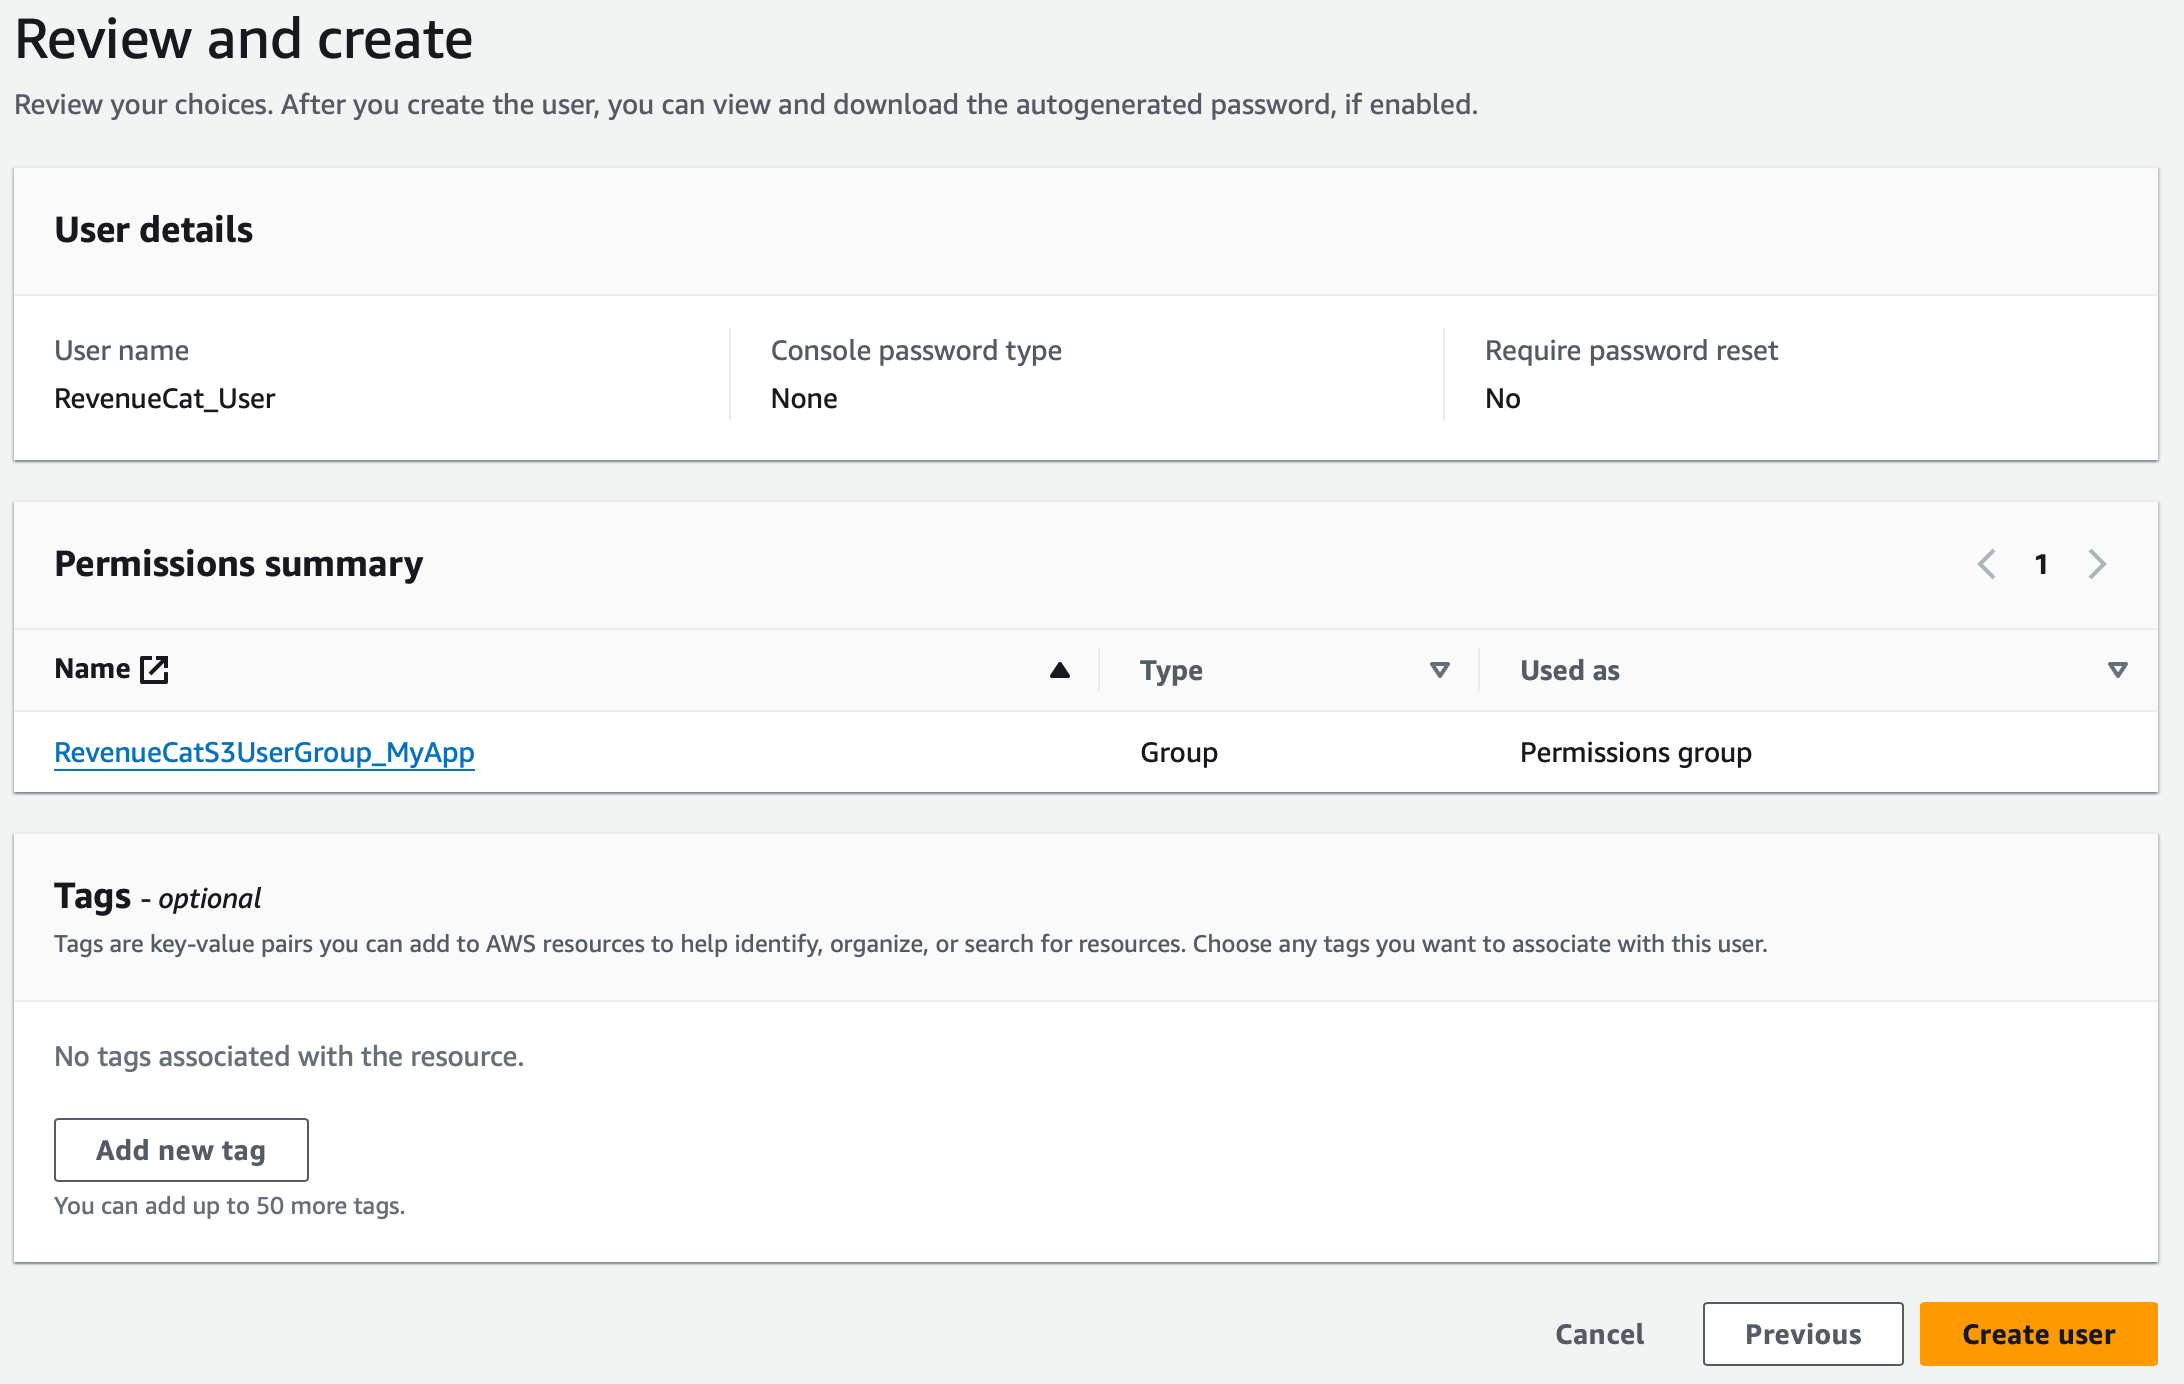
Once the group is created, select it and click Next, optionally add any tags to the group.
Review and click Create user.
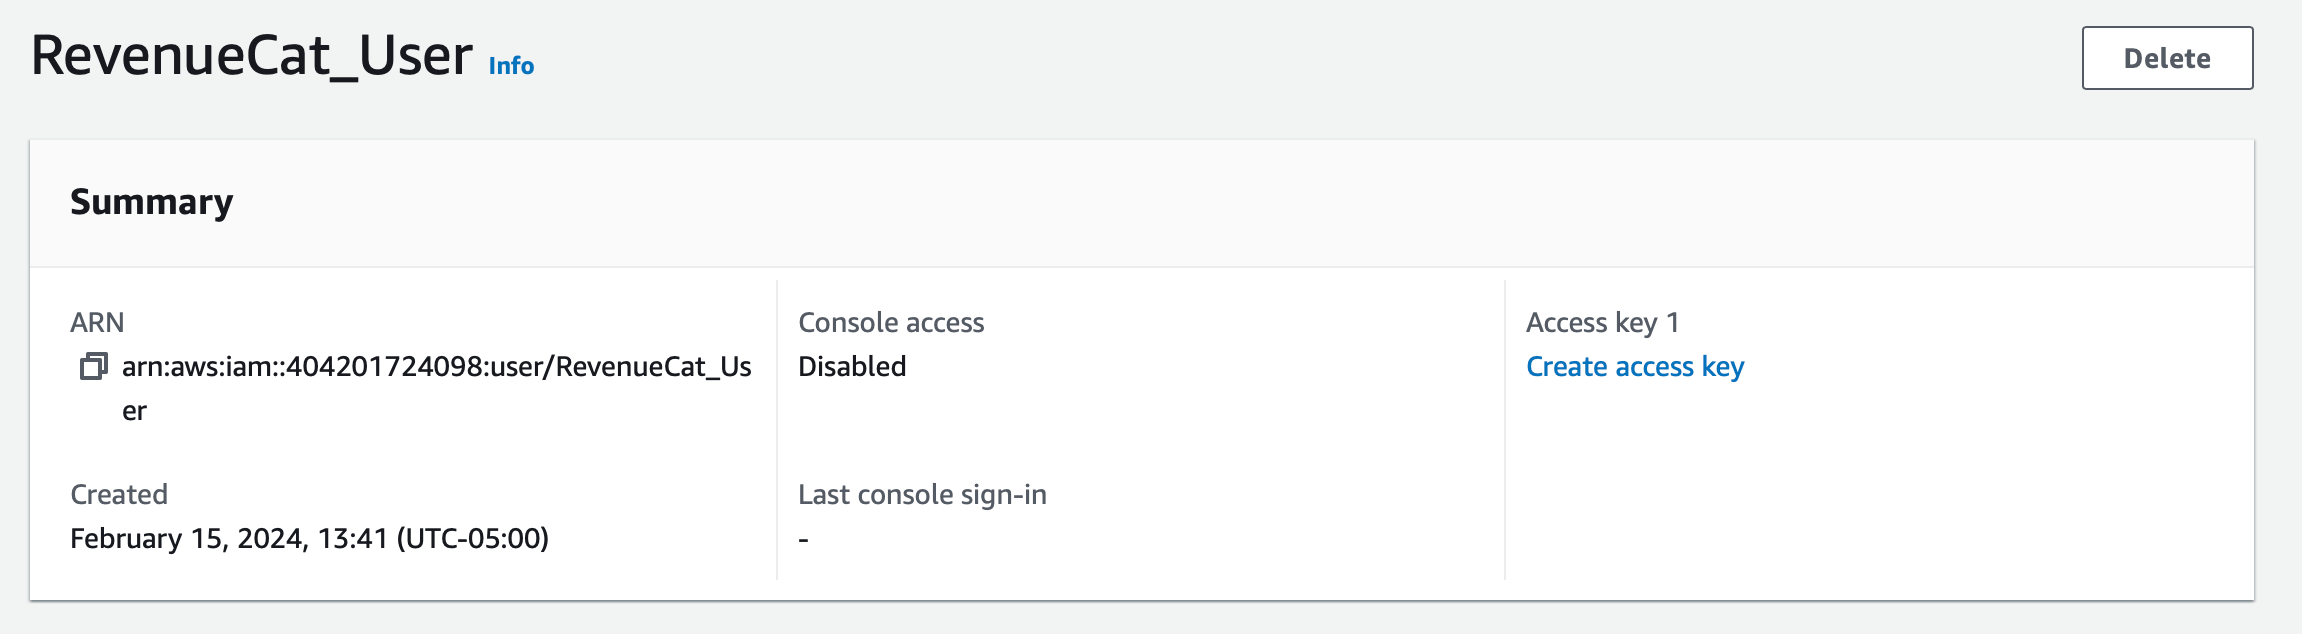
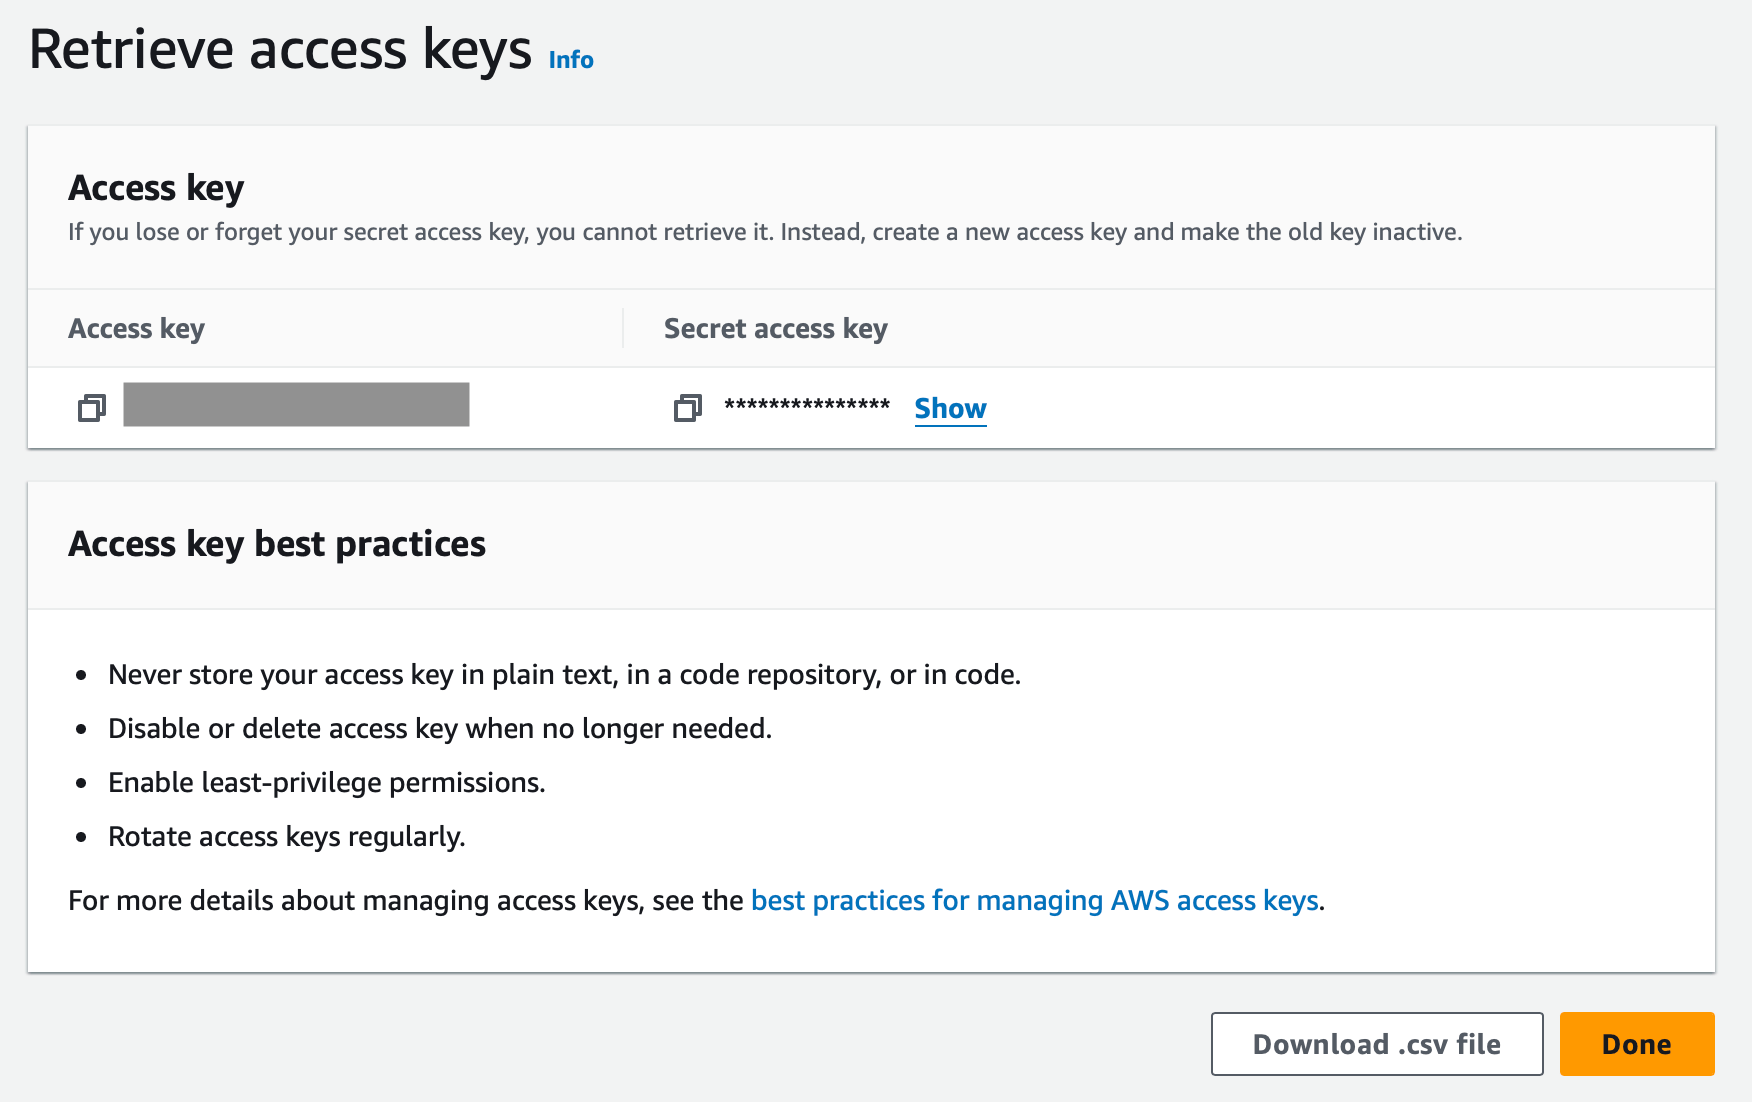
3. Download Access Credentials
After creating the user, select it from the list of users in the IAM dashboard and click 'Create access key'.
Select 'Other' and click Next.
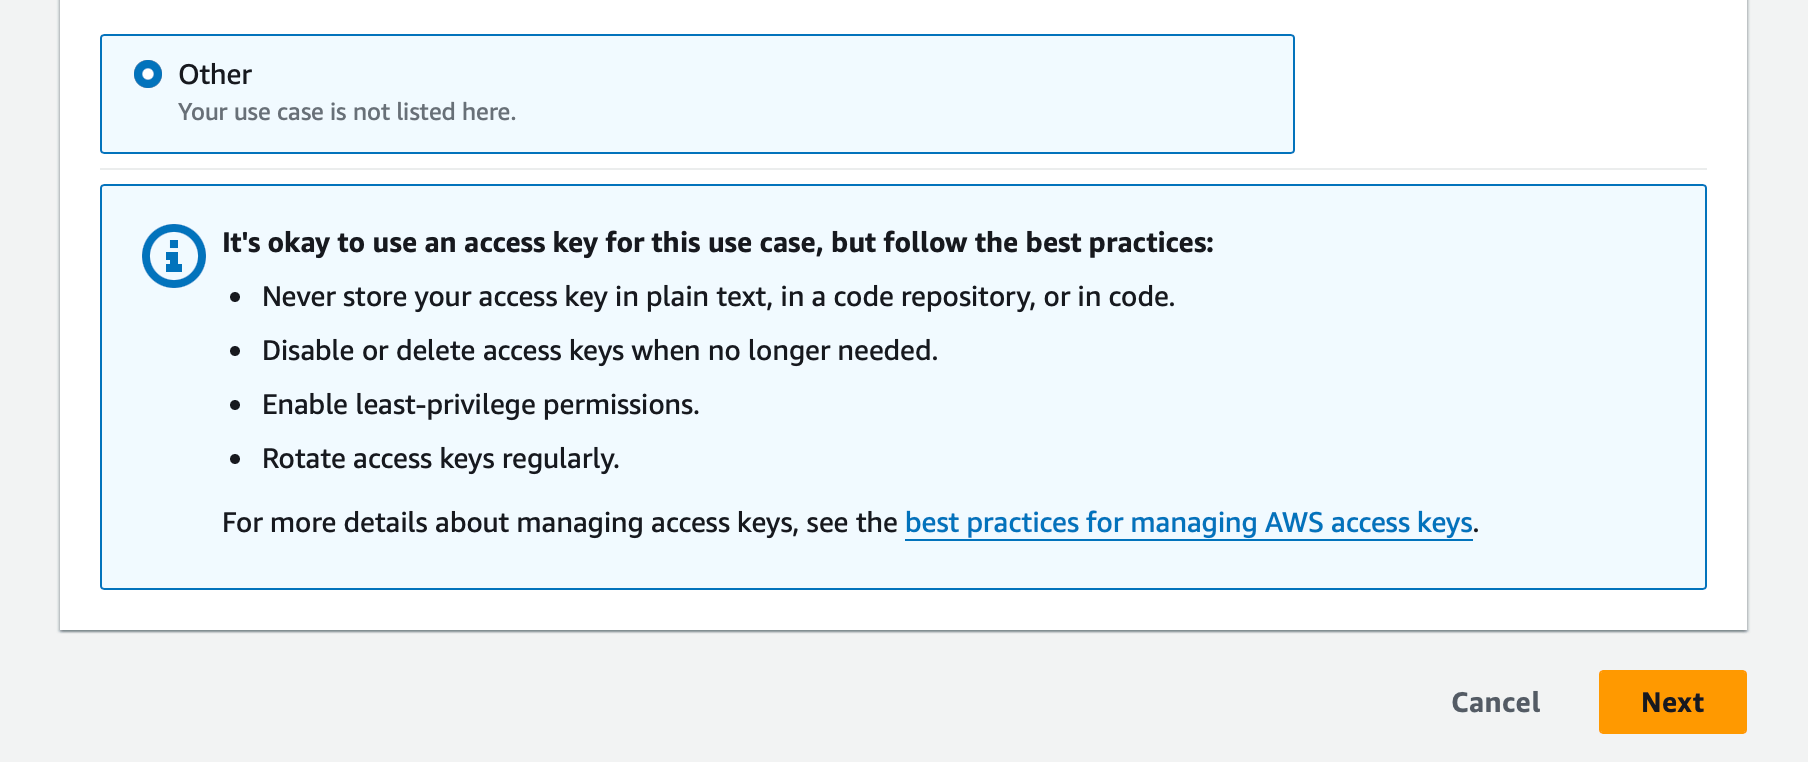
Download the CSV or enter your access key and secret access key into RevenueCat.
Setting up IAM Role credentials
IAM Role authentication lets RevenueCat assume a role in your AWS account using AWS Security Token Service (STS). No long-lived secret ever leaves your account.
1. Copy your External ID from the dashboard
Before creating the IAM role, open the Scheduled Data Exports integration settings in the RevenueCat dashboard and select IAM Role (ARN) as the credential type. RevenueCat displays a unique External ID for your project — copy this value. You'll need it for the trust policy in the next step.
2. Create the trust policy
In the AWS IAM console, create a new role of type Custom trust policy. The trust policy controls who can assume the role; it must allow RevenueCat's delivery account (602297180373) to assume it only when the correct External ID is presented.
Replace YOUR_EXTERNAL_ID below with the value you copied from the dashboard:
{
  "Version": "2012-10-17",
  "Statement": [
    {
      "Effect": "Allow",
      "Principal": { "AWS": "arn:aws:iam::602297180373:root" },
      "Action": "sts:AssumeRole",
      "Condition": {
        "StringEquals": { "sts:ExternalId": "YOUR_EXTERNAL_ID" }
      }
    }
  ]
}
The Condition block with sts:ExternalId is mandatory. It protects against the AWS confused-deputy problem by ensuring only your RevenueCat project can assume the role. RevenueCat rejects the connection if the role doesn't enforce the External ID condition.
3. Attach an access policy
Attach a policy granting the role the S3 actions RevenueCat needs to deliver exports. You can reuse the JSON from Step 1 of the Access Key flow.
4. Copy the role ARN into RevenueCat
After creating the role, copy its full ARN (for example arn:aws:iam::123456789012:role/RevenueCatS3Role). In the integration's Credentials section, paste the ARN. RevenueCat verifies that the role trusts the correct External ID before saving.
Setting up S3-Compatible credentials
If your destination is an S3 API-compatible object store (Cloudflare R2, MinIO, and so on), use the S3-Compatible credential type. RevenueCat connects to a custom endpoint with an HMAC access key.
- In your provider's console, create an access key and secret with read/write permissions to the bucket you'll use.
- Note the endpoint URL for your provider (for example
https://<account>.r2.cloudflarestorage.comfor Cloudflare R2). - In the integration's Credentials section, set Credential type to S3-Compatible and paste the access key, secret, and endpoint URL. Then enter the bucket name as usual.
RevenueCat signs S3-compatible requests as the us-east-1 region, and the dashboard has no field to set a different region. This works for providers that accept us-east-1 — including Cloudflare R2, which aliases us-east-1 to its auto region, and most default MinIO deployments. Providers that strictly validate a different region (for example, Wasabi buckets outside us-east-1) aren't supported yet. If your provider requires a specific region or path-style addressing, contact your Customer Success Manager.
Debugging
Error: The provided ETL credentials or bucket name are incorrect.
RevenueCat validates the destination by calling the S3 HeadBucket operation before saving, and this error means that check failed. The two common causes are:
- Wrong bucket name. Make sure the IAM policy references the exact bucket name. If you changed the bucket name, update the policy to match.
- Missing
s3:ListBucketpermission.HeadBucketrequires thes3:ListBucketaction on the bucket — there is nos3:HeadBucketaction. Confirm the policy grantss3:ListBucketon the bucket ARN (arn:aws:s3:::<YOUR_S3_BUCKET_NAME>, with no/*suffix), as shown in the access policy above.
Error: Access denied when assuming the IAM role.
The role's trust policy rejected RevenueCat's STS request. Two conditions must both hold:
- The principal allows
arn:aws:iam::602297180373:root. - The
sts:ExternalIdcondition exactly matches the External ID shown for this project in the dashboard. External IDs are unique per project, so a value copied from another project or a previous configuration is rejected.