Offerings
Group products together to display to users in a paywall
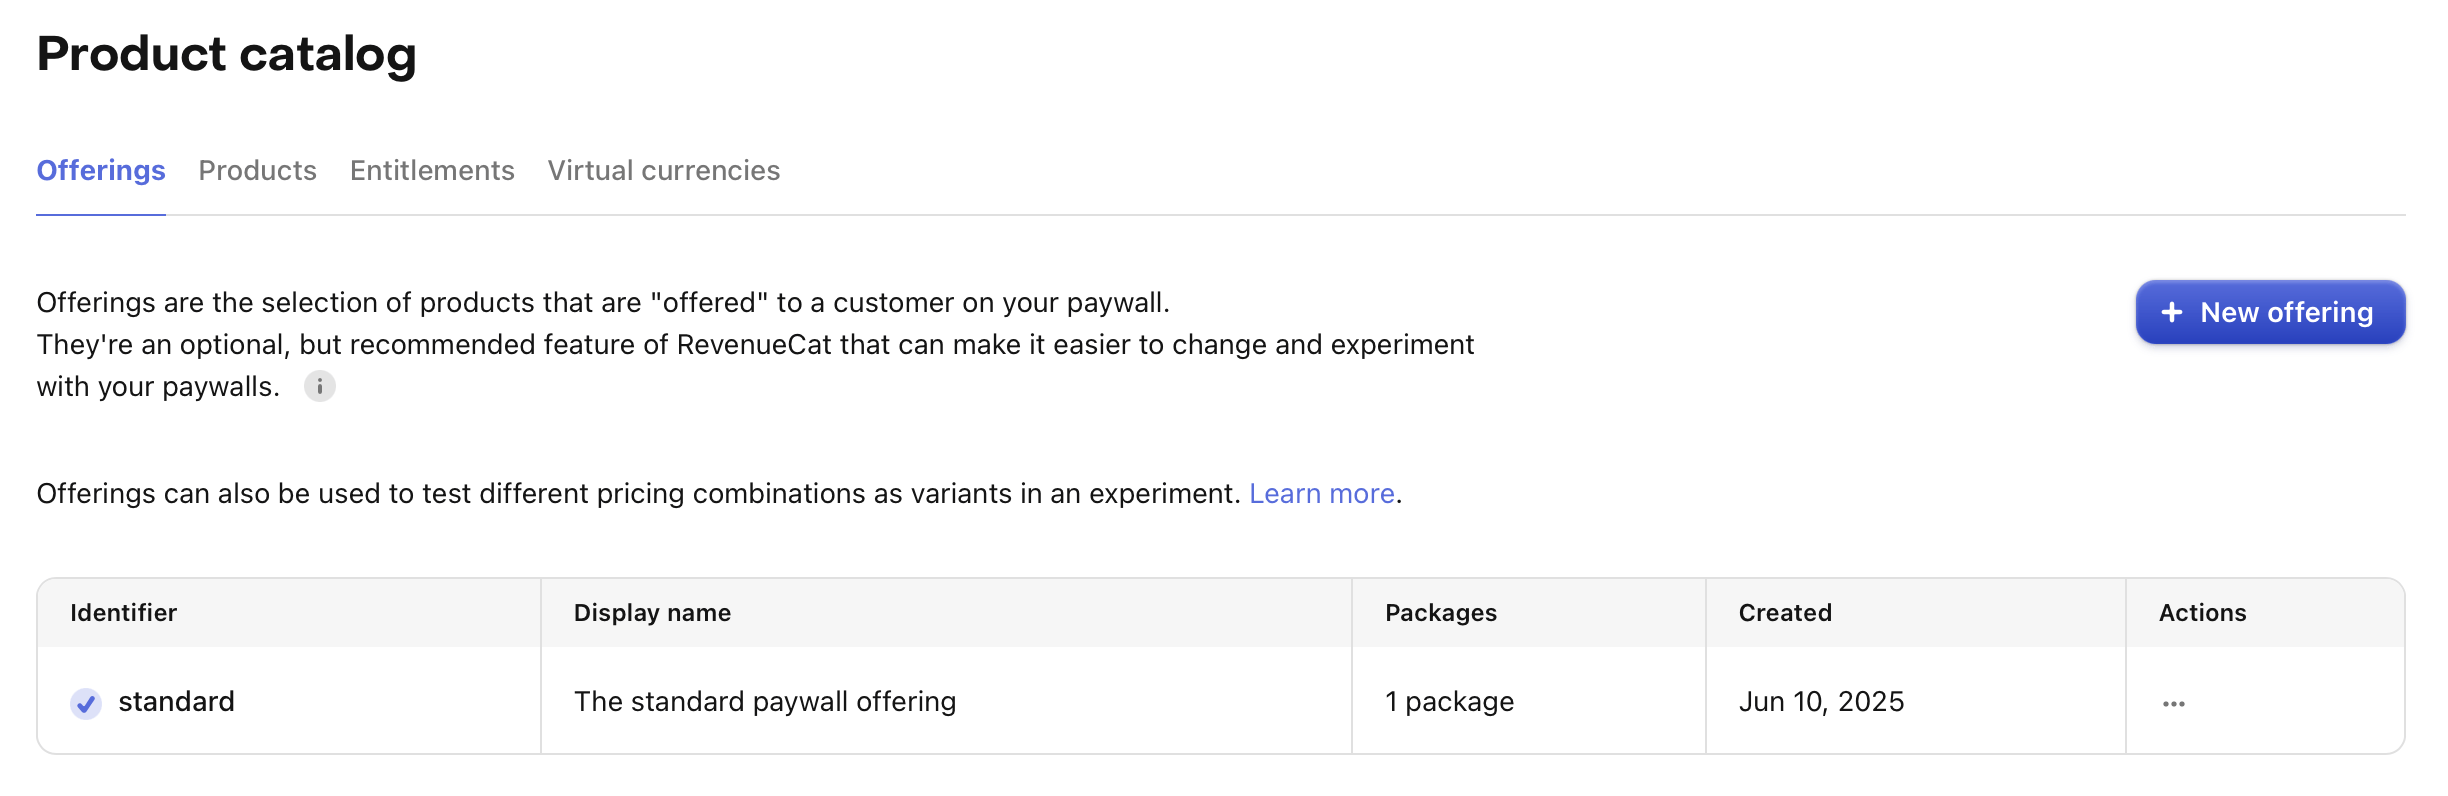
Offerings are the selection of products that are "offered" to a user on your paywall. Using RevenueCat Offerings is optional, but enable features like Paywalls, Experiments, and Targeting.
How Offerings Work
Offerings are a way to group products together to display to users. You can think of them as a "paywall" that contains a set of products.
Offerings are created and configured in the RevenueCat dashboard. When using RevenueCat Paywalls, you'll configure a single paywall that is paired to a single Offering.
Packages
Within each Offering, there must be one or more Packages. Packages are simply a group of equivalent products across iOS, Android, and web. If your app is available on multiple platforms, then a Package would contain all of the equivalent product identifiers from each platform.
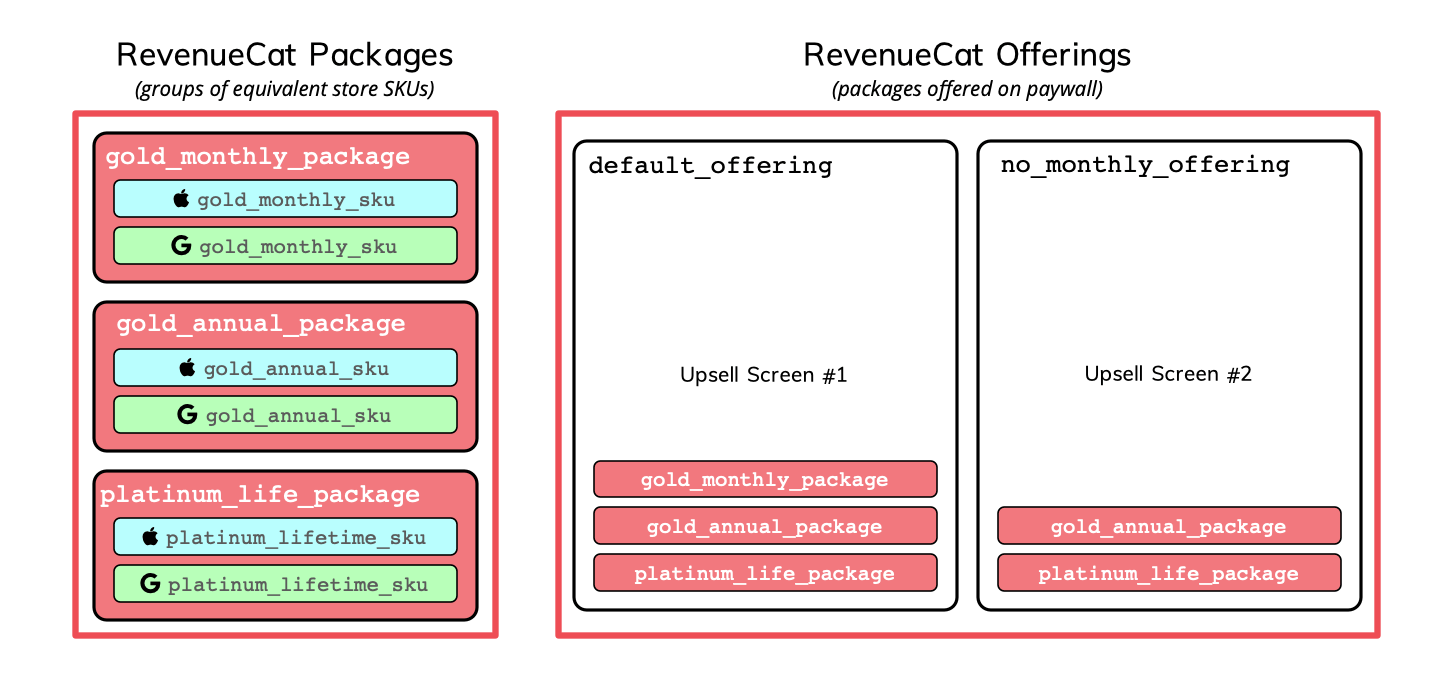
Default Offering
The RevenueCat dashboard allows you to choose which Offering should be the Default Offering for customers in your Project. This Default Offering will be returned in the Purchases SDK as a customer's current Offering when using the getOfferings method if no other conditions apply to them.
If you build your paywall to reference the current Offering, instead of hardcoding an identifier value, you can change this Offering from the dashboard to dynamically display different Offerings at any time, either by modifying your Project's Default Offering or by utilizing features like Targeting and Experiments. We strongly recommend utilizing the current Offering feature. See Displaying Products for more info.
Creating an Offering
To create an Offering, navigate to the Offerings tab to your project settings in the RevenueCat dashboard, and click + New to get started.
You'll be prompted to enter an Identifier and Description for your offering. Note that the offering identifier cannot be changed later. Once you've entered this information, click Save.
Adding Packages
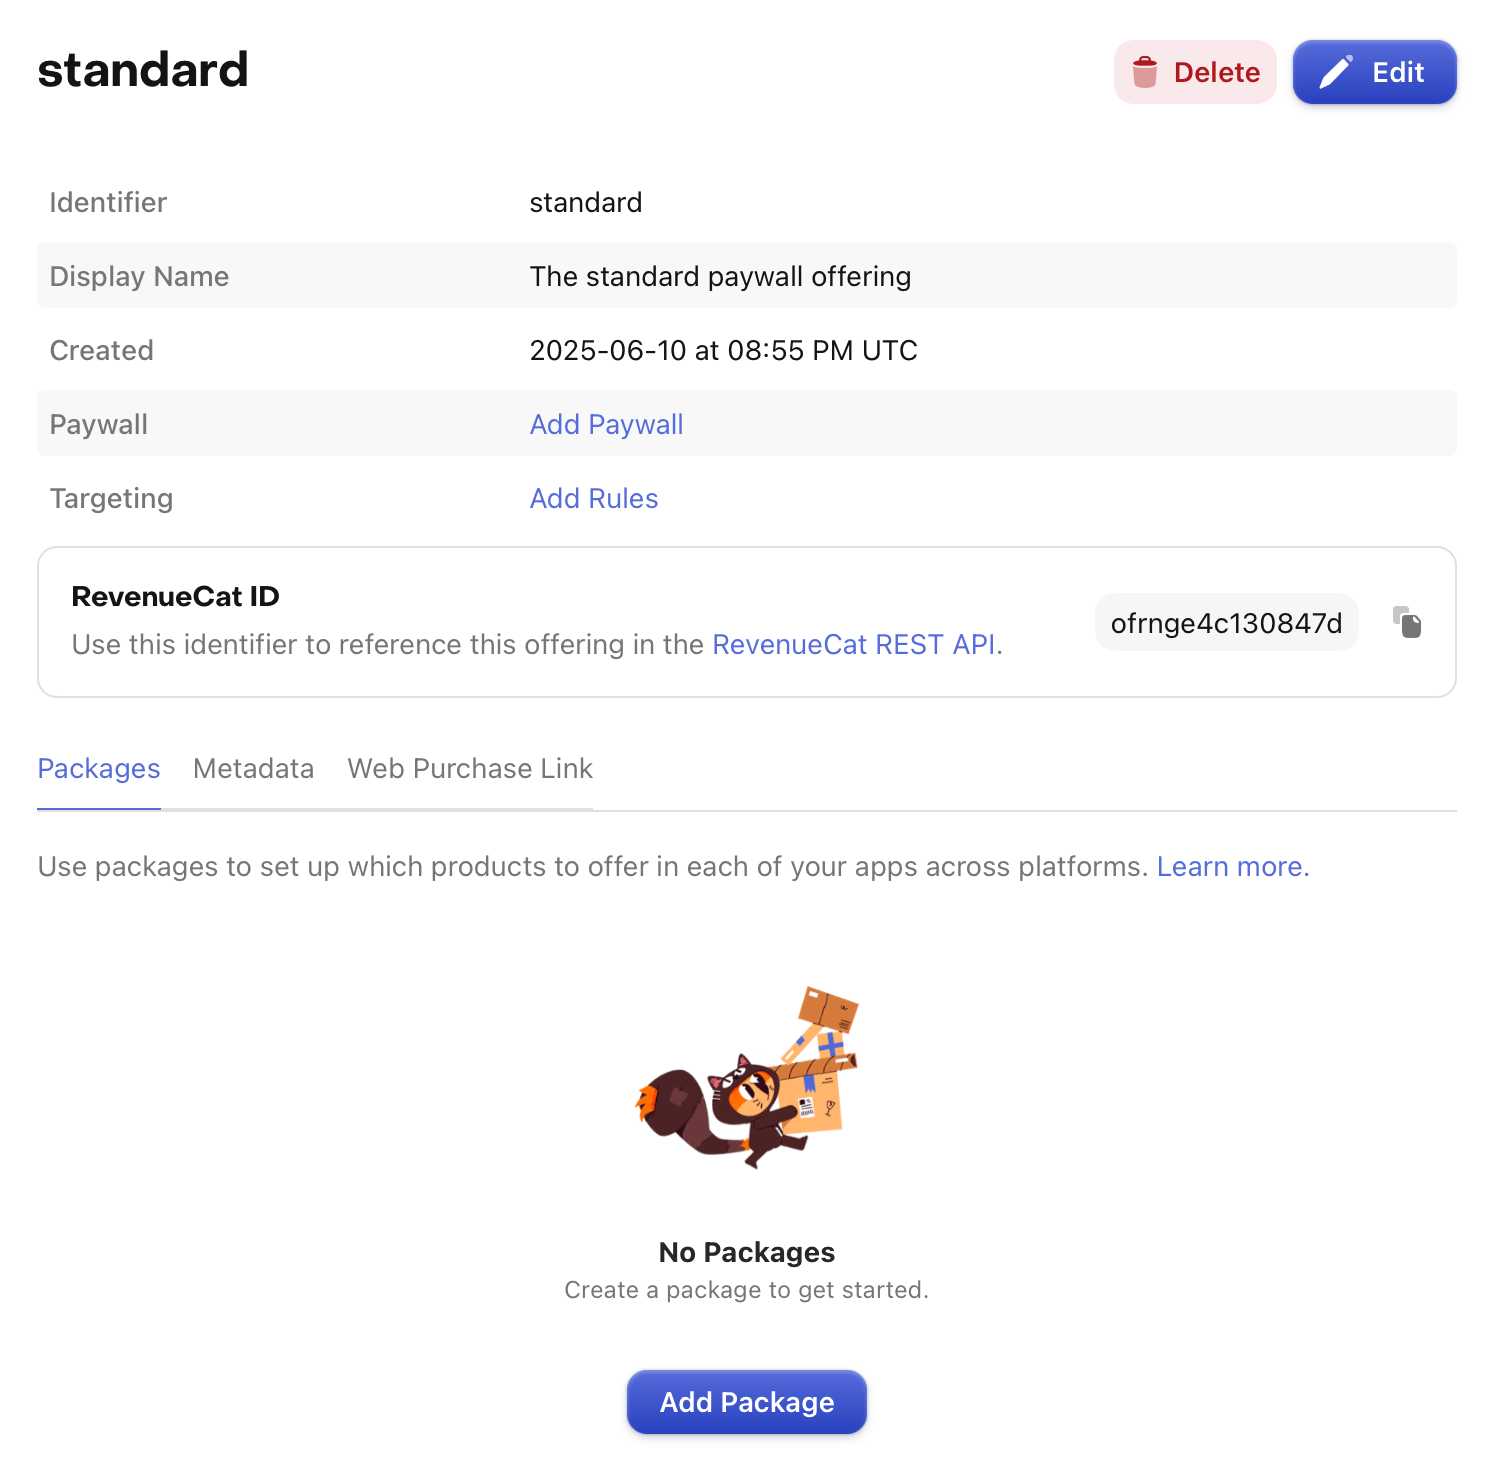
Each Offering you create should contain at least one Package that holds cross-platform products.
To create a package, click into your new Offering, then click + Add package in the Packages section. Choose an Identifier from the dropdown that corresponds with the duration of the package. If a duration isn't suitable for your package (e.g. consumable purchases), then you can choose a custom identifier. Include a Description.
Attach the relevant products (i.e., the products with the same duration you chose) for this Offering, then click Save.
Google Play backwards compatibility
For Google Play store products, if you select a non backwards-compatible product and the app compatibility setting is set to "SDK v6+ and backwards compatible", you will have the ability to configure a backwards compatible fallback product. This product will be available for purchase in previous versions of the SDK which don't yet support non backwards compatible products.
Any product can be added to an Offering, even if it's not part of any Entitlement. This can come in handy if your app's paywall contains a combination of subscription products that unlock Entitlements, and consumable products that do not.
Continue this process until all of the packages are created for your Offering, and all Offerings are created.
The packages within an offering can be updated at any time, and their display order can be modified by dragging their position in the table. This display order will be reflected in the SDK when you fetch Offerings.
Removing Packages
Packages can be removed from an Offering at any time. This can be useful if you want to update your paywall on-the-fly without an app update.
Removing a package from an Offering does not remove the products from RevenueCat, remove transactions, or remove the products from any Entitlements. You can re-add a package and products at any time.
Paywalls
Offerings can be paired with a paywall that is configured in the RevenueCat dashboard. RevenueCat Paywalls are an easy way to display a set of products to a user, and can be configured remotely.
You can read more about how to create and configure paywalls in our Paywalls guide.
Fetching Offerings
Offerings are fetched through the SDK via the getOfferings method. These are pre-fetched in most cases on app launch, so the completion block to get offerings won't need to make a network request in most cases.
For more information on how to fetch Offerings, see our Displaying Products guide.
To fetch a user's Offering configuration via the REST API, see our API Reference.
Next steps
Once you've created an Offering, you can design a paywall to display to your users.
Create a paywall →