
Configuring in-app subscriptions on Android can be difficult. At RevenueCat, we want to help you navigate this process as much as possible. The following is a guide to take you from zero to subscriptions on Android.
In this post we’ll show you how to:
- Set up your products in Google Play Developer Console
- Set up your app in RevenueCat
- Configure entitlements in RevenueCat
Getting Started
The first step is defining what in-app products you are going to be offering to your users. In our case, we are going to create an app that charges a subscription to display random cat GIFs. Look out Y-Combinator, here we come.
The subscriptions model looks something like this:
- $0.99/month – Unlimited cat GIFs
- $2.99/year + trial – Unlimited cat GIFs with a 1 week trial period
- $5.99 – Unlimited access as a one-time purchase
Configuring Google Play Billing
Google Play Billing is Google’s in-app purchase system. Have a look at their overview to get the basic concepts that we will be talking about in this guide.
In order to configure Google Play Billing you need access to your app’s Google Play Console.
Our guide won’t be using the Billing Client directly (we’ll be using RevenueCat’s Purchases), but the configuration following steps will be the same if you use RevenueCat or not.
First, you need to set up your payments profile in the Google Play Developer Console. Follow this guide from Google to get it set up.
Next, create an app in the Google Play Console (assuming you haven’t done so already), open that app in the Console, and access the in-app products section under the “Store presence” menu in the side bar.
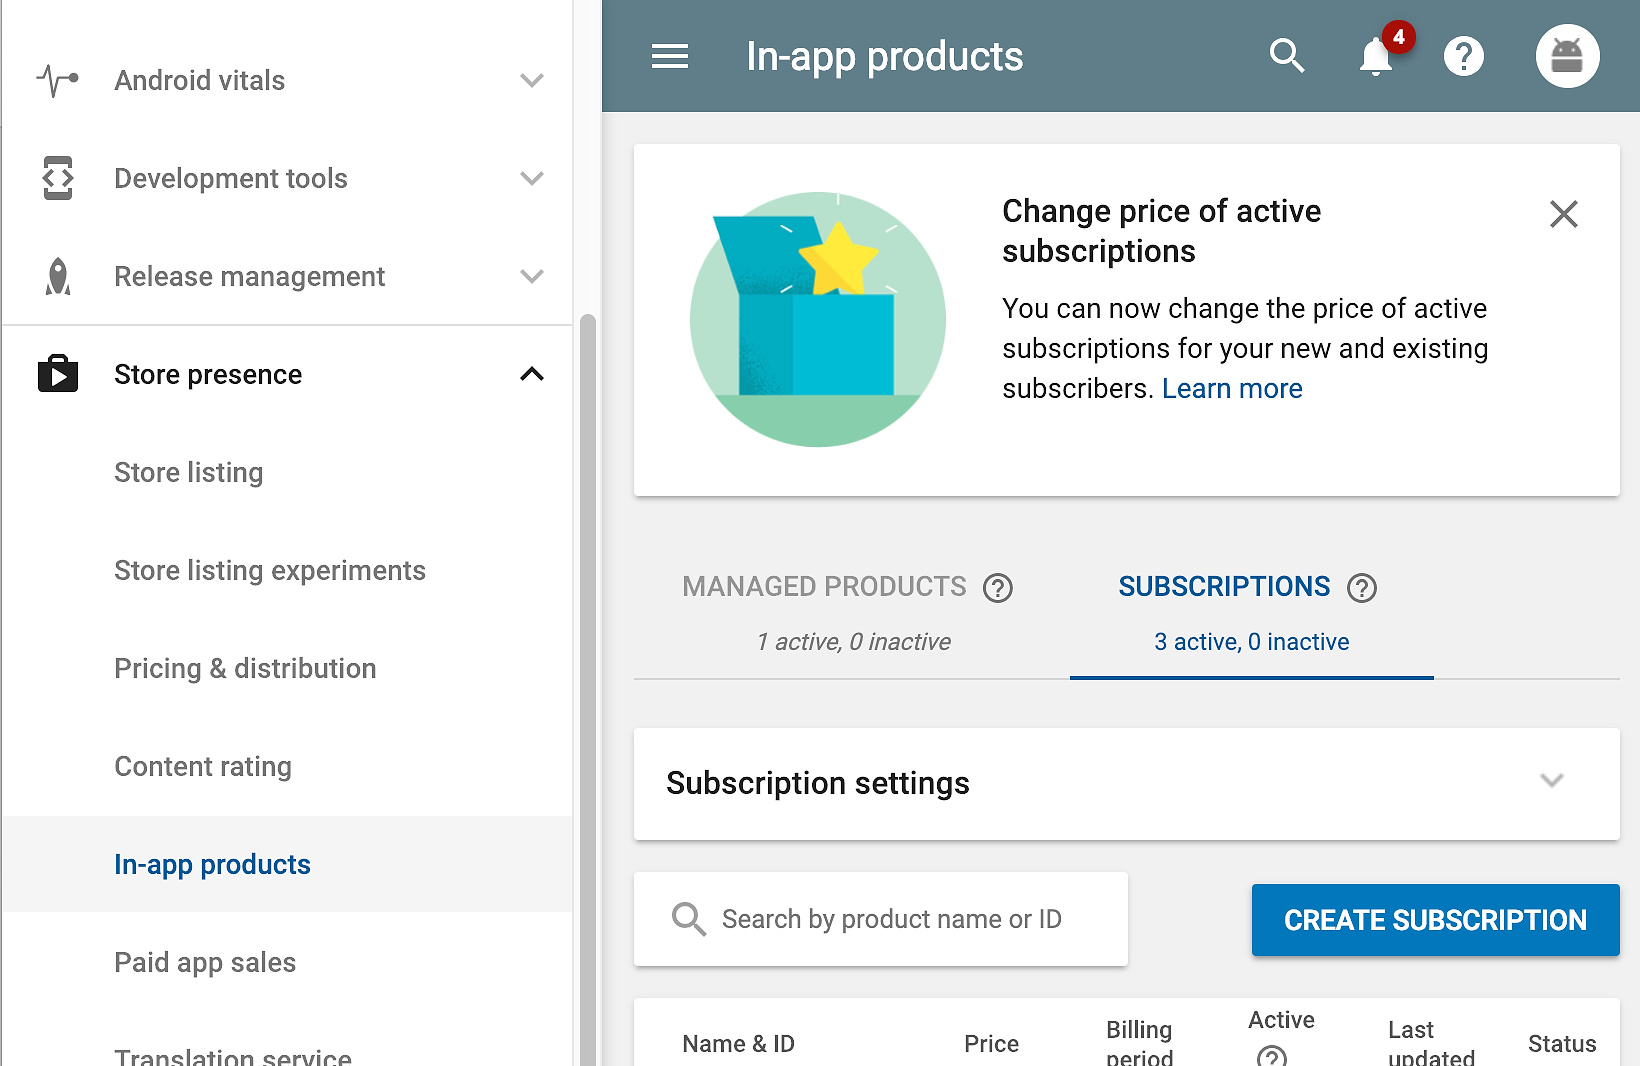
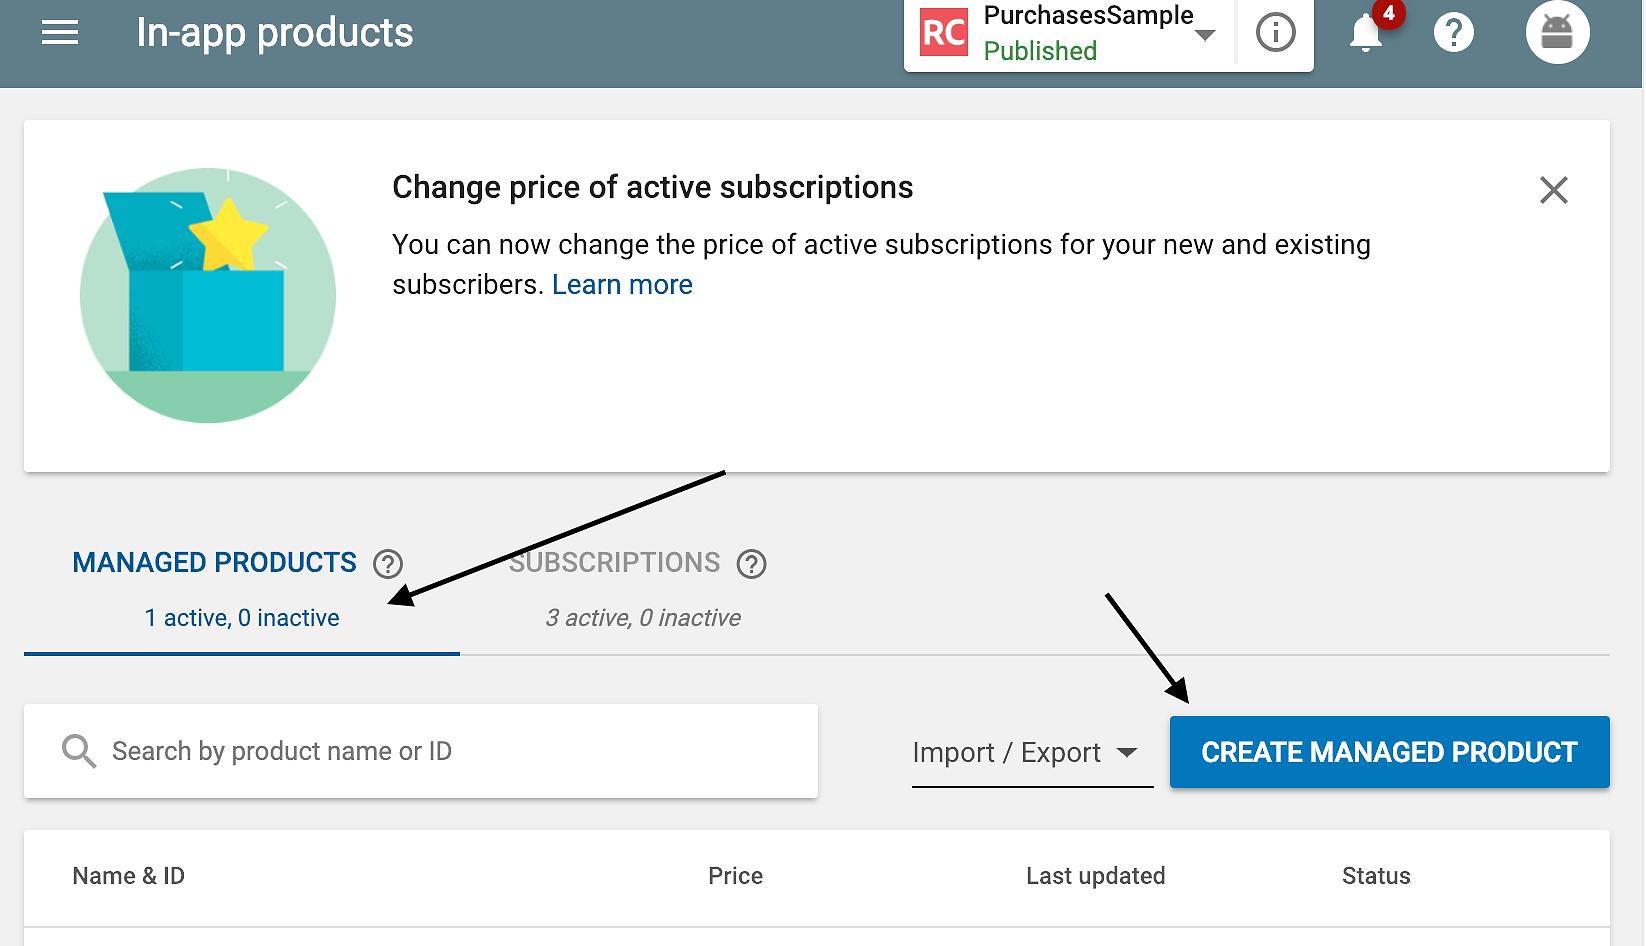
There are two tabs in this section: “Managed Products” and “Subscriptions”. “Managed Products” are one time purchases and “Subscriptions” are recurring. For our example, we have designed two subscription products (monthly and annual) and a single one-time product (unlimited lifetime access).
We are going configure the subscriptions. Press that “Create Subscription” button to start filling out the details of your first subscription product.
Creating Products
The product ID is used it uniquely identify this particular subscription product. Take into account that you can’t modify this and you can’t reuse a product ID inside the same app. Don’t worry about what you decide here since it’s not public facing. Use an ID that’s easy to identify by you, and contains details about the product. In our example we will be giving the following product ids to our two subscriptions:
Product IDPriceonemonth$0.99annual$2.99
Give the products a title and a description. You can change this later, but this will be the title and the description your users will see when purchasing.
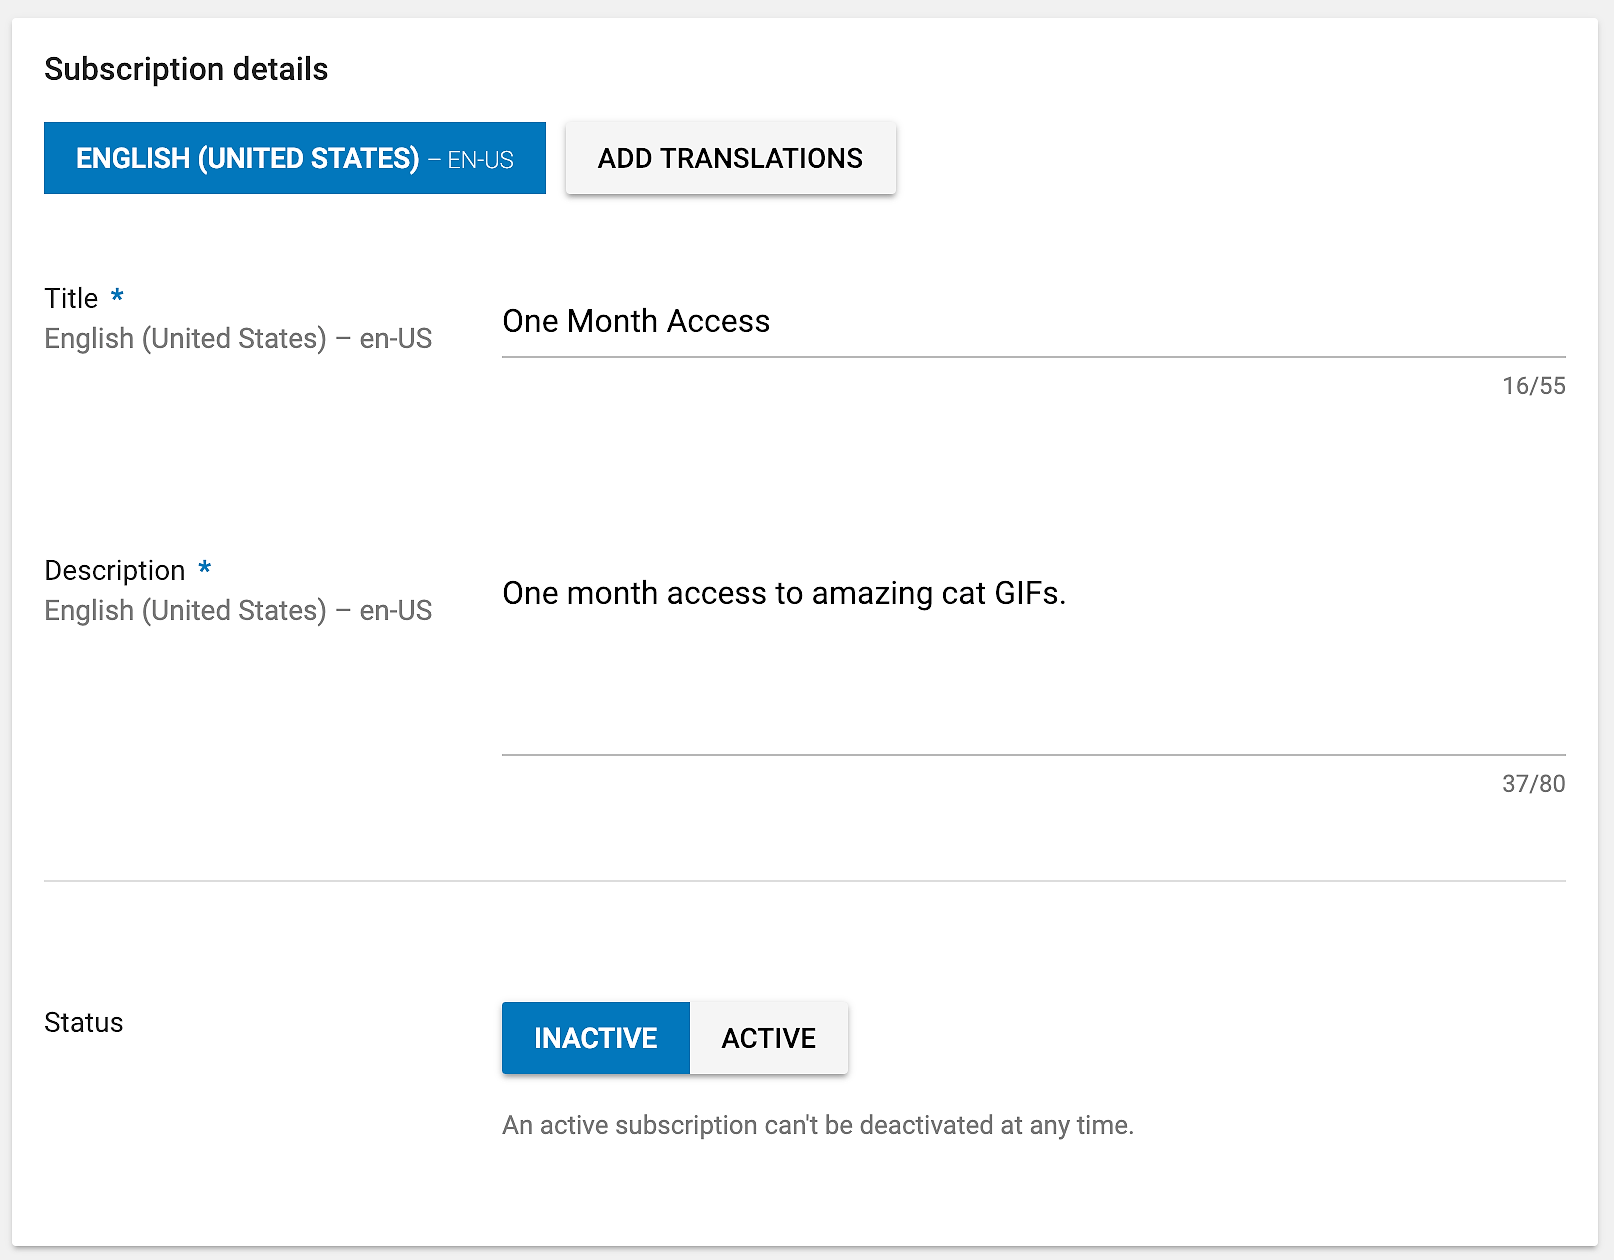
Make sure to mark your subscription as “Active”, just be careful, they cannot be deactivated afterwards.

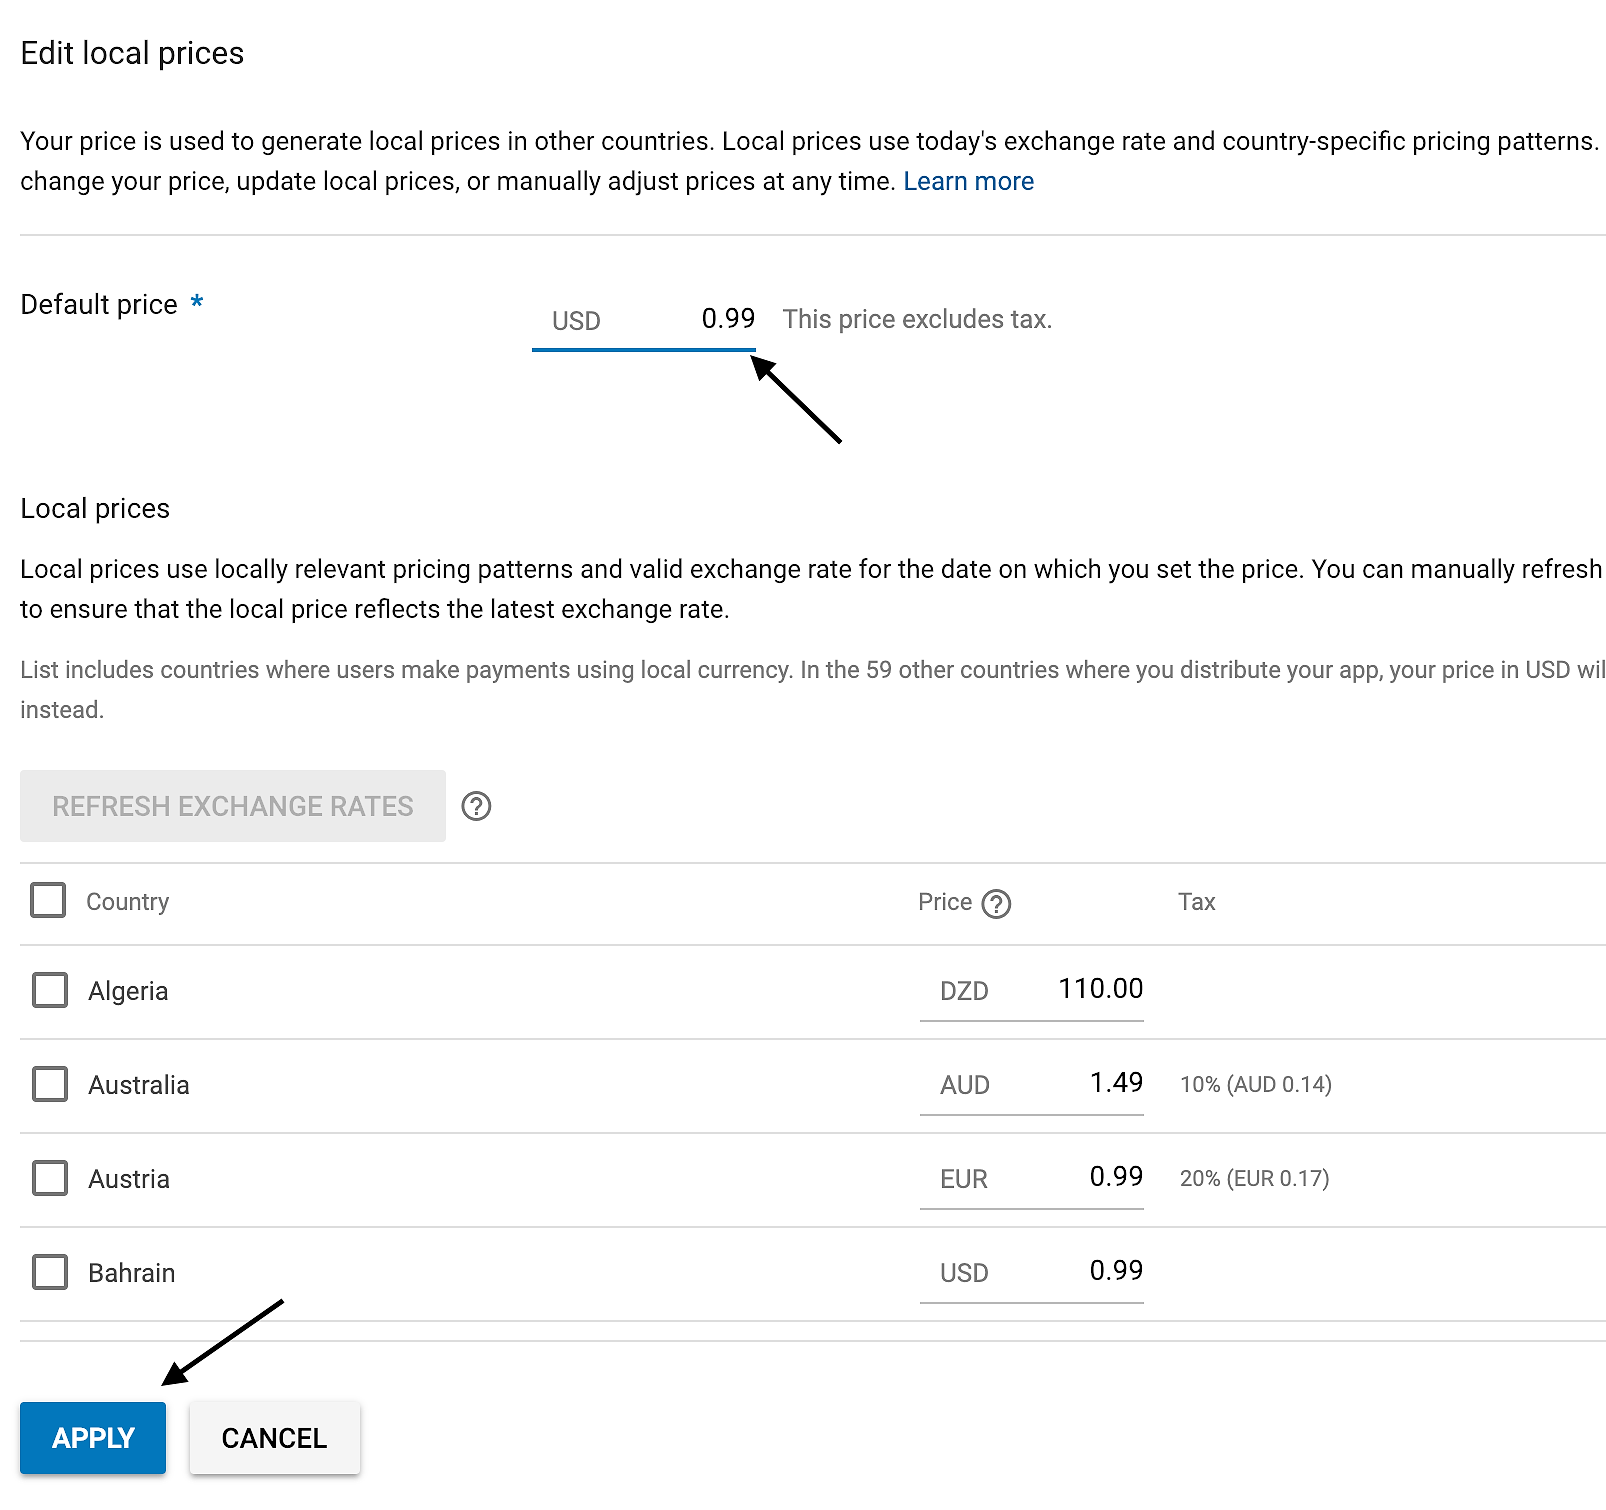
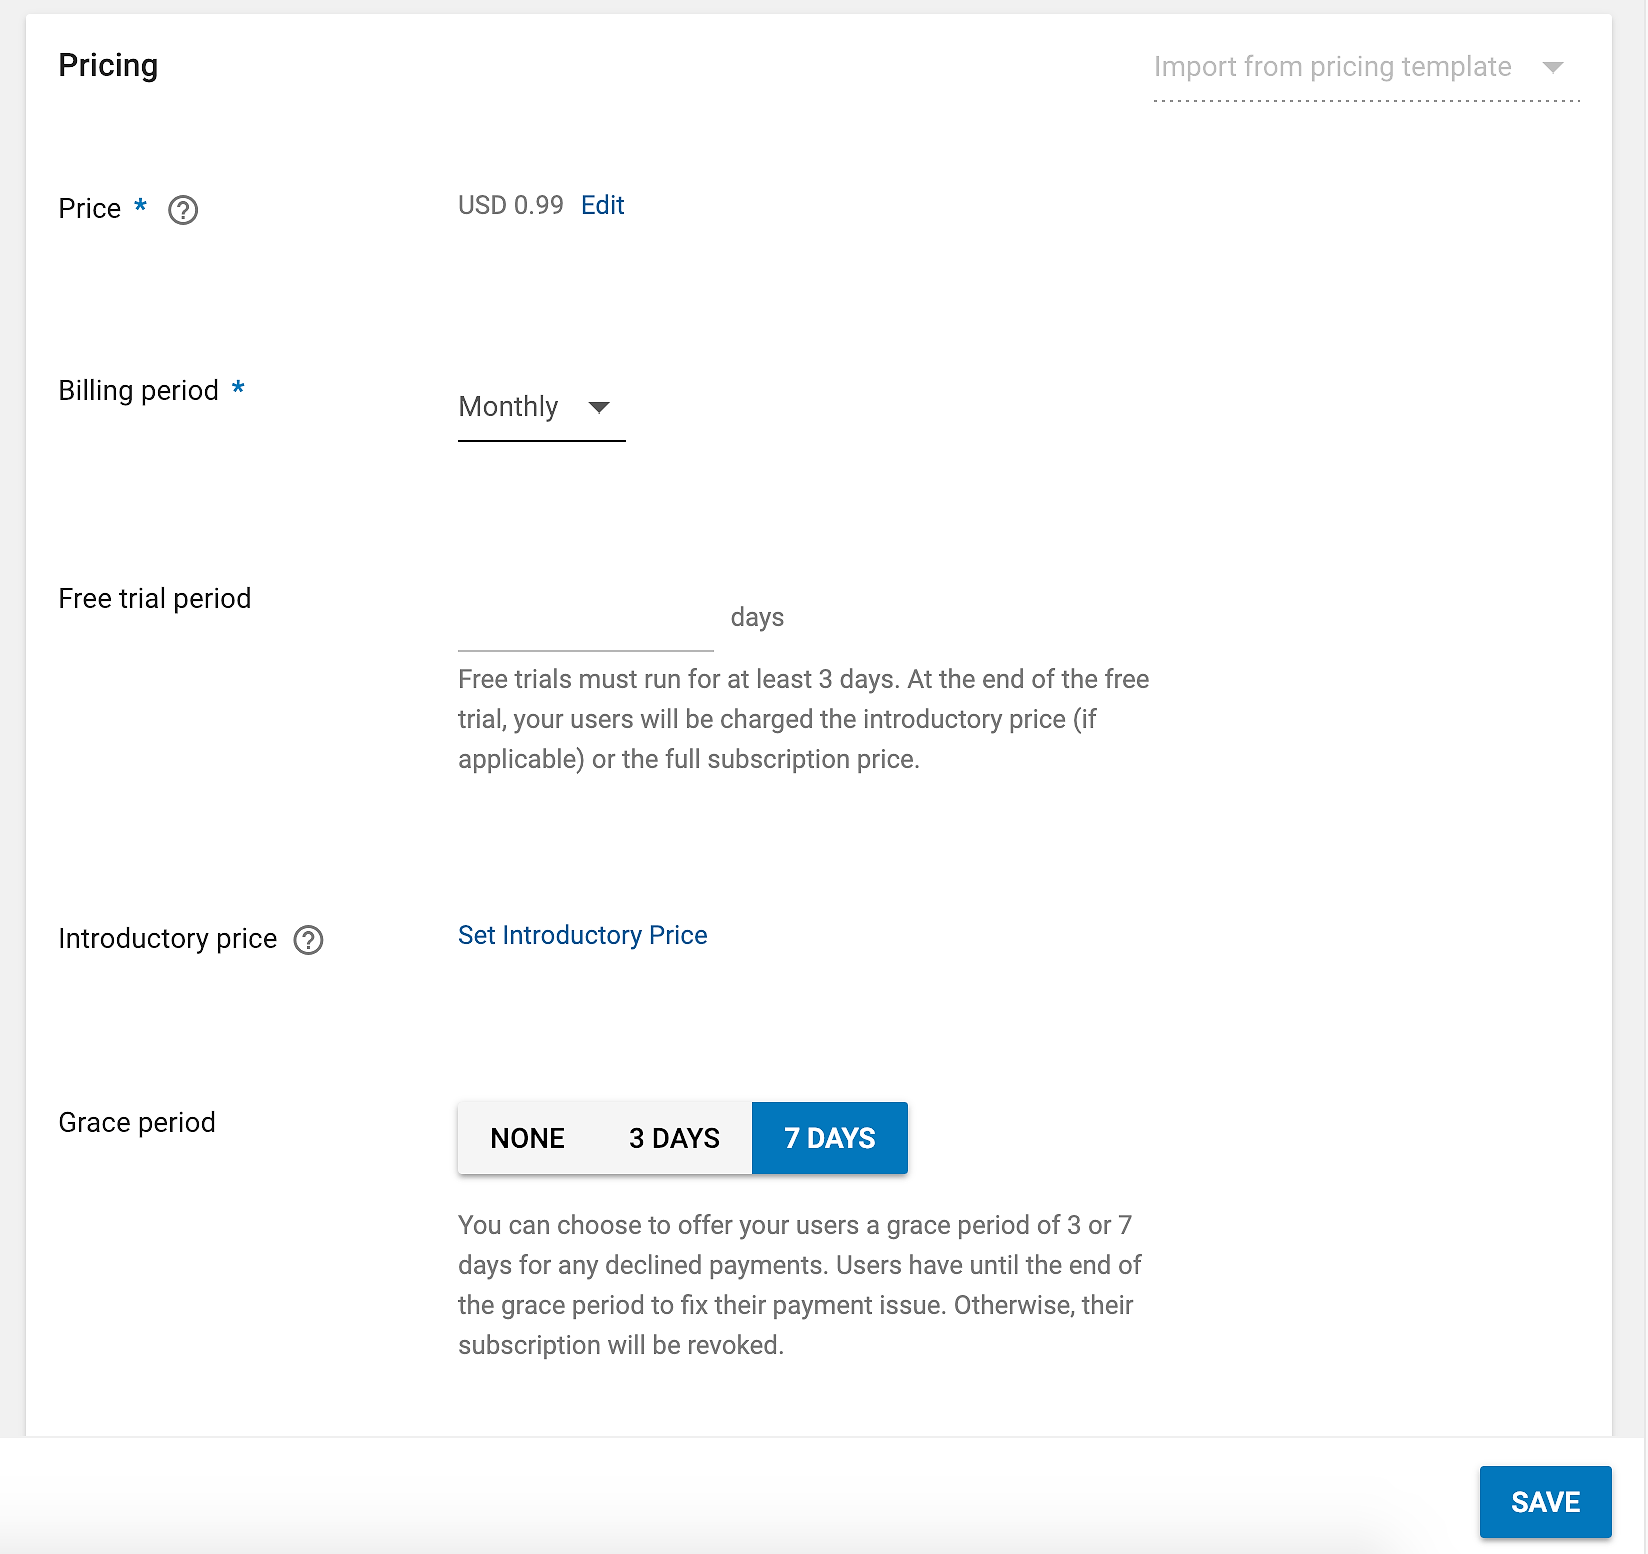
Now it comes to pricing. There are a lot of different ways of setting this up: you can set trials, introductory prices and grace periods. For simplicity, we are not going to use any introductory prices.
Press in “Add Price” and a modal will appear. You can set different prices depending on the country. Ignore this for now.
The rest of the pricing details for the monthly subscription will look like this:
Our annual subscription has a free trial of 7 days. Here’s the setup:
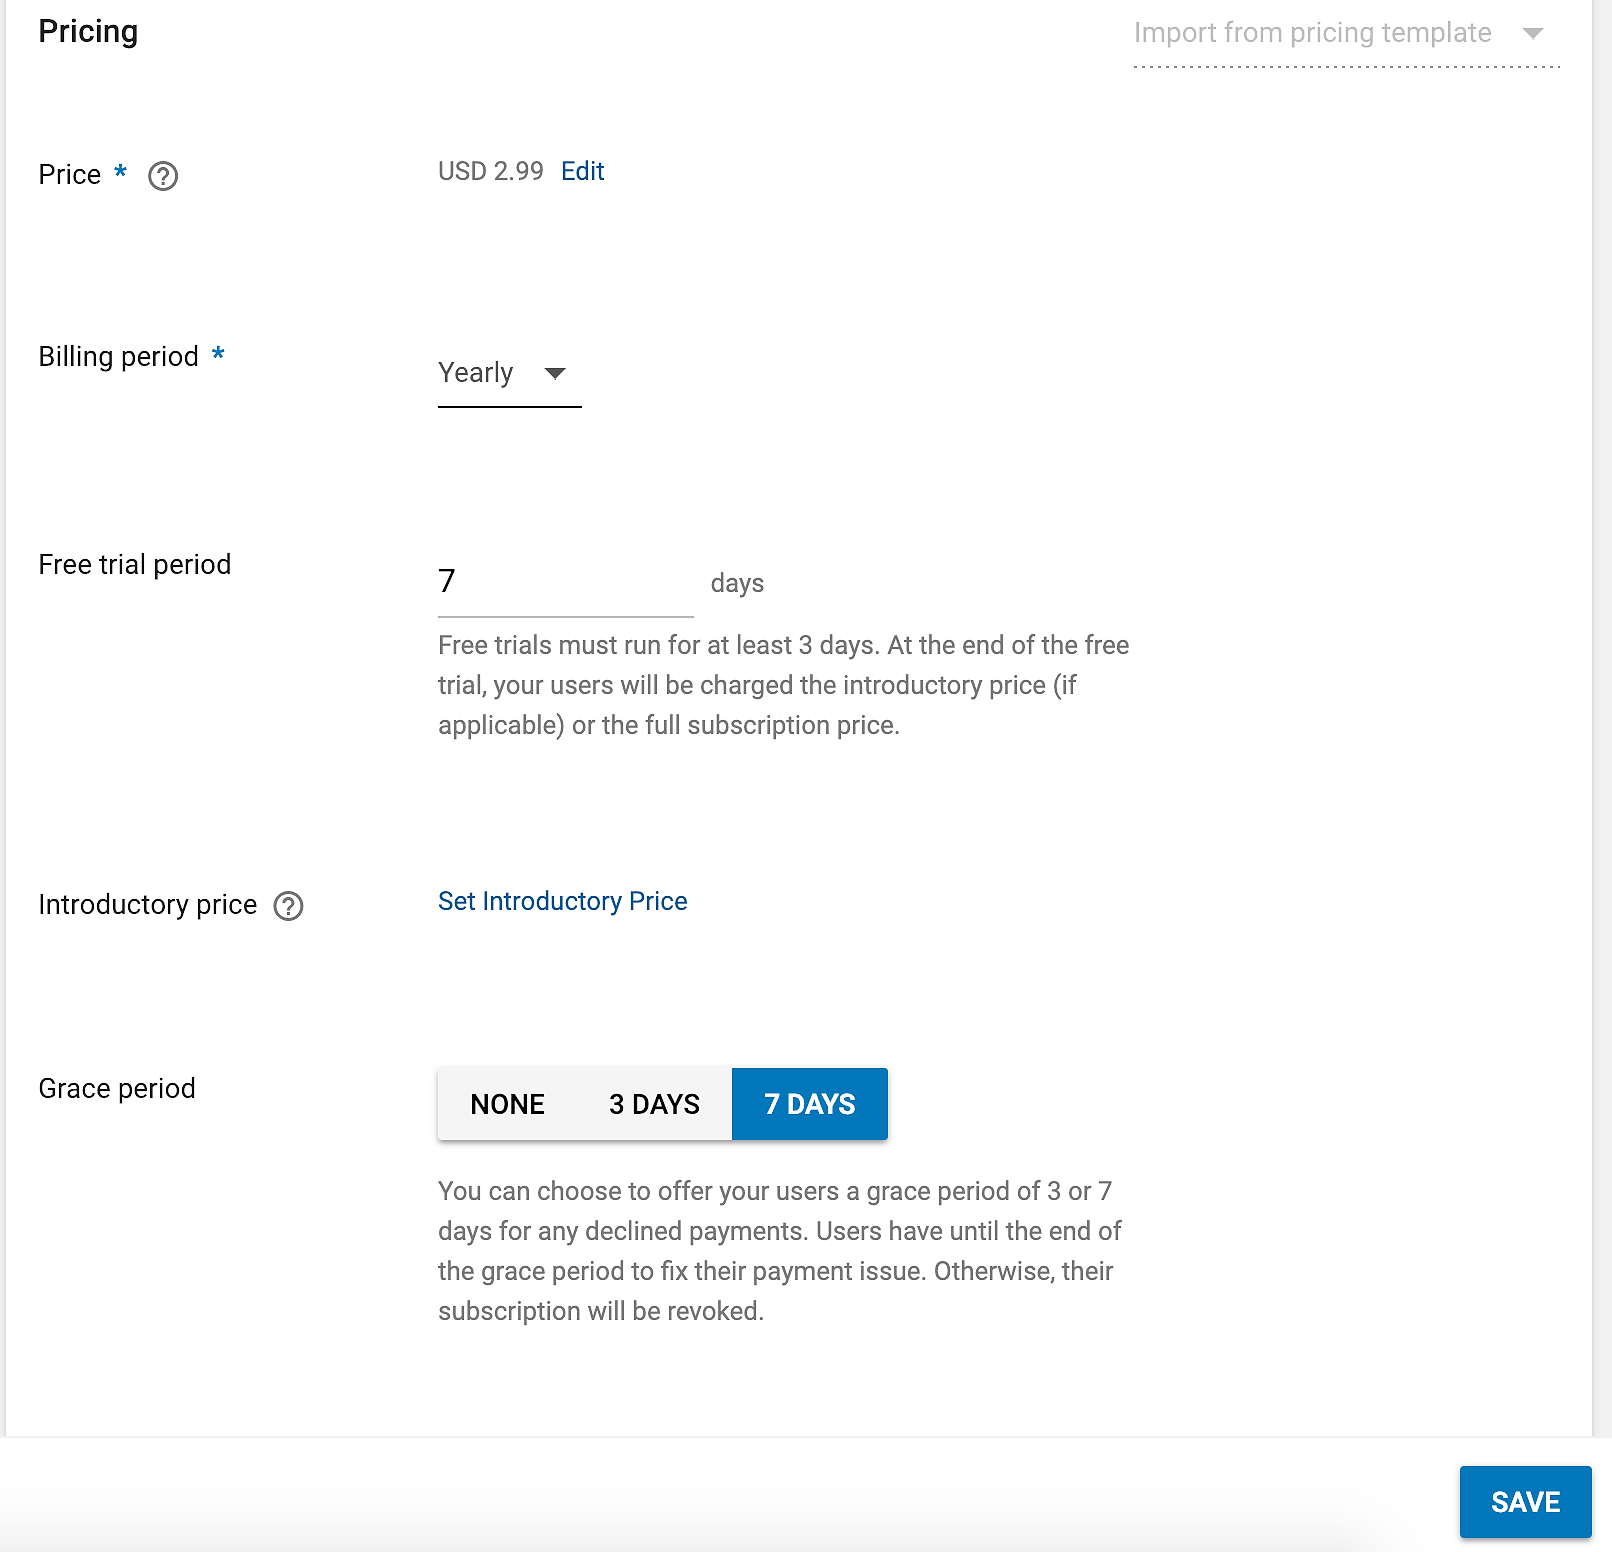
The grace period determines how long a user can continue to access content while they experience a billing issue. Set it to your preference.
Great! Now we’ve set up our subscriptions in Google Play successfully. Now we need to switch to the “Managed Products” tabe to create our one-time purchase. We will create a product with a product ID onetime.
The settings for a Managed Product are basically the same as for subscriptions (even simpler since they don’t offer trials or periods), with the difference that they can be made inactive at any time.
For more information on configuring in-app products, refer to Google’s guide for managed and subscription products.
If you’re not using RevenueCat, you can continue to integrate the Google Play Billing client. What follows is setting up RevenueCat for managing your in-app subscriptions and purchases.
Configuring RevenueCat
Creating service credentials
In order for RevenueCat’s servers to communicate with Google on your behalf we need a set of service credentials. The process for configuring these credentials is a bit complex, but improves security by only providing RevenueCat with the access we need.
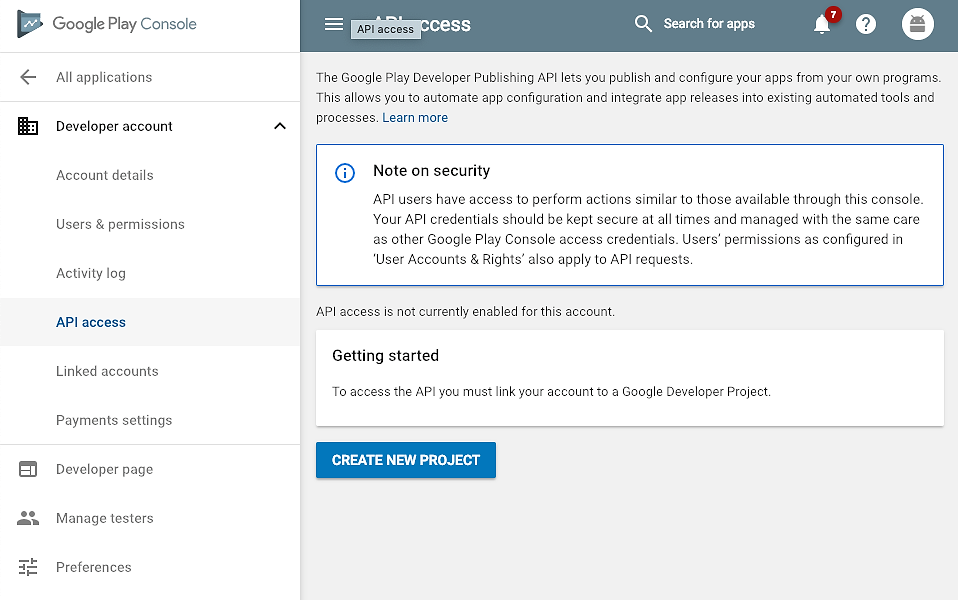
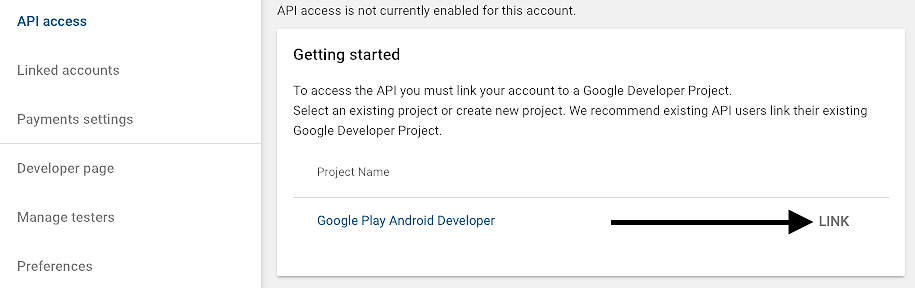
Access the API access section under Developer Account in the Google Play Console and Create a new project.
If you already have a Project you can Link your account to your existing project by pressing the Link button.
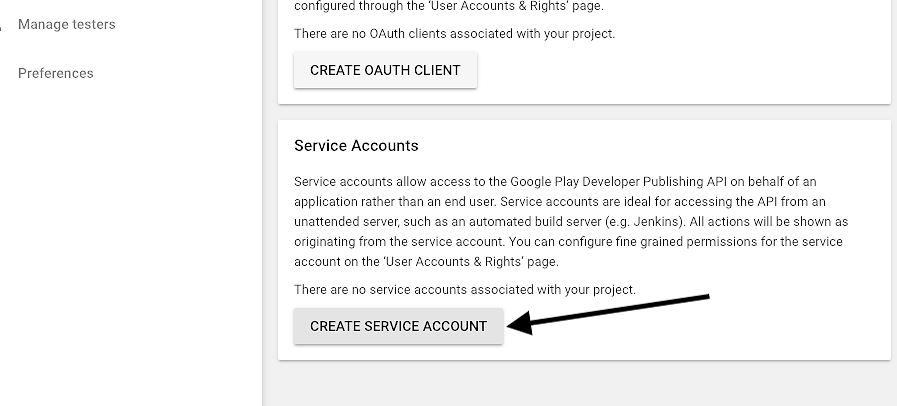
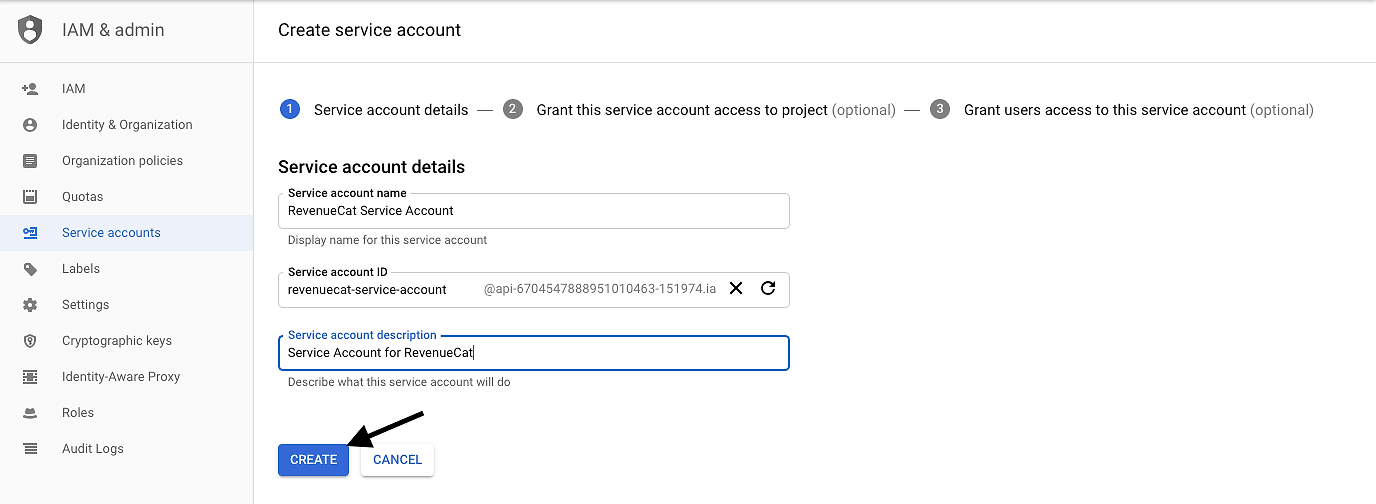
And Create Service Account associated with that project.
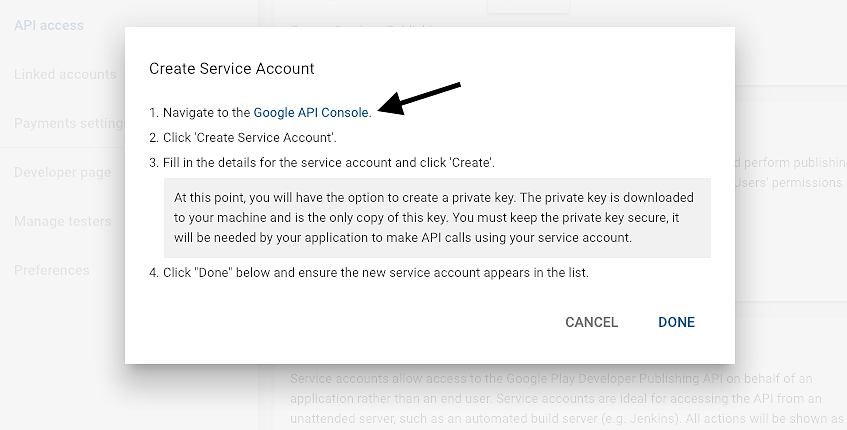
Follow the link to the Google API Console
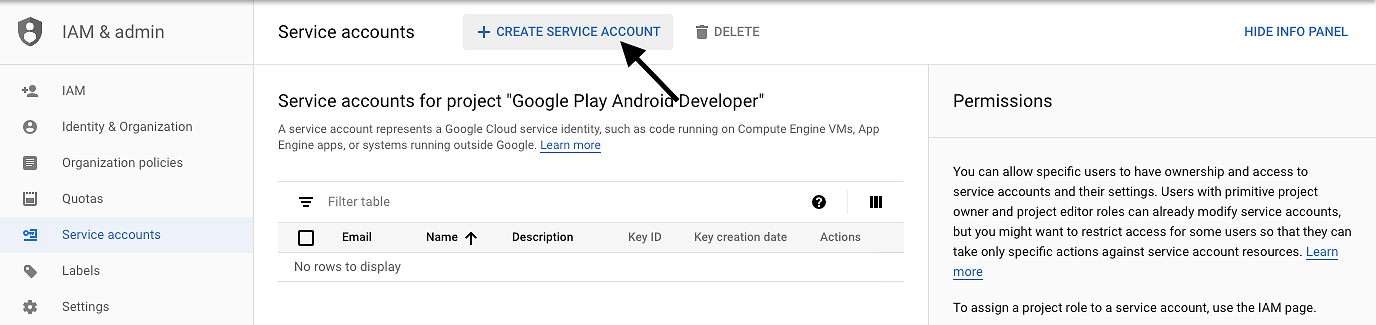
And Create a Service Account
Give it a name and a description and press Create
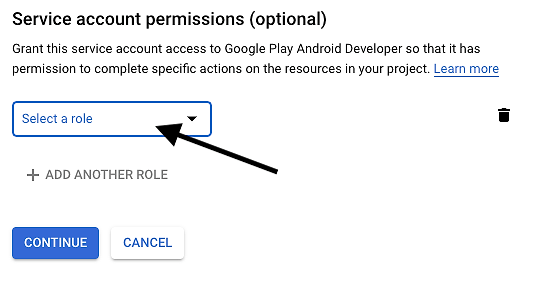
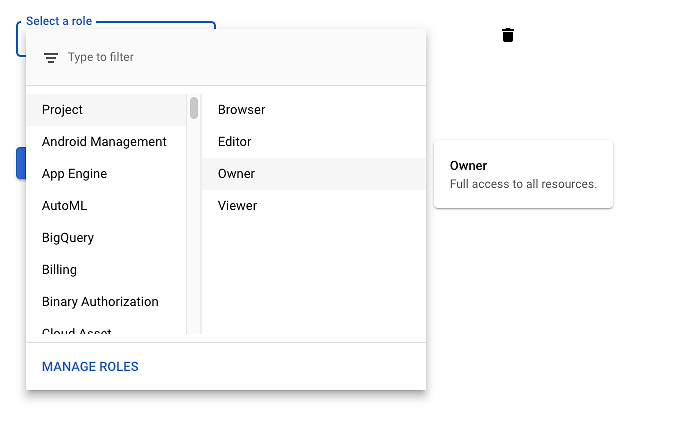
Give Owner permissions to the service account and press Continue
Then finally create a JSON Key and store it in a safe place. You can press Done in the Google API console and go back to the Google Play console.

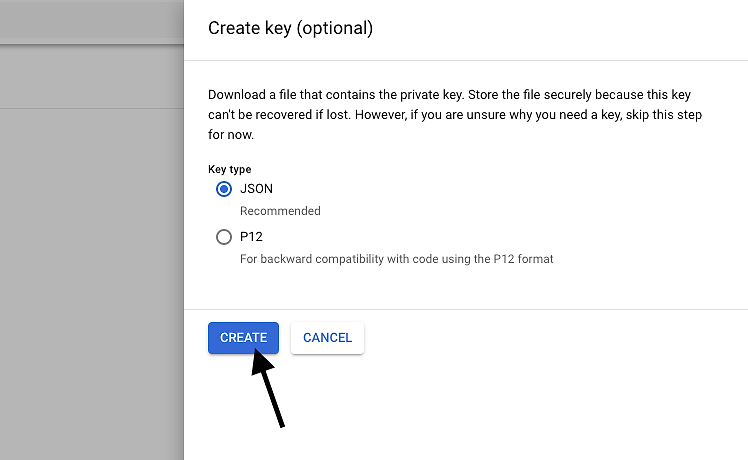
Create will actually download the JSON key
Back in the Google Play console, press Done in the modal. The page will refresh and you will see a new service account. You can grant access now to that new Service Account. Select Finance in the Role dropdown and press Add user to give finance access to this service account.

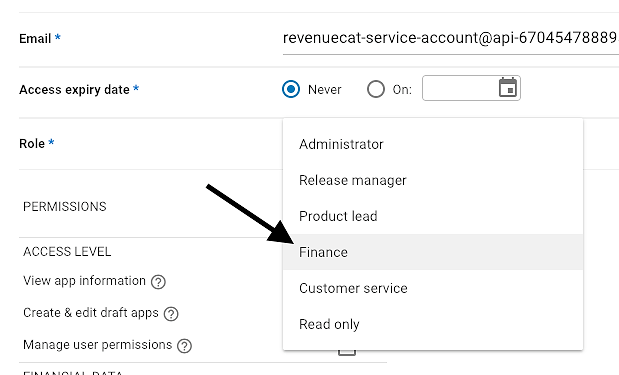
Don’t select Release Manager here, select Finance
Remember that JSON you saved a few steps back? RevenueCat needs it to be able to communicate with Google and track your data.
Let’s add it in the RevenueCat panel. If you don’t have an account at RevenueCat, create one, log in, and add an app to your account.
Name your app and jump into the “Android Configuration” section. Add the name of your Google Play Package (the package you configure in your AndroidManifest) and the contents of the JSON file you previously downloaded from Google (you can open this file with a text editor and copy the contents).
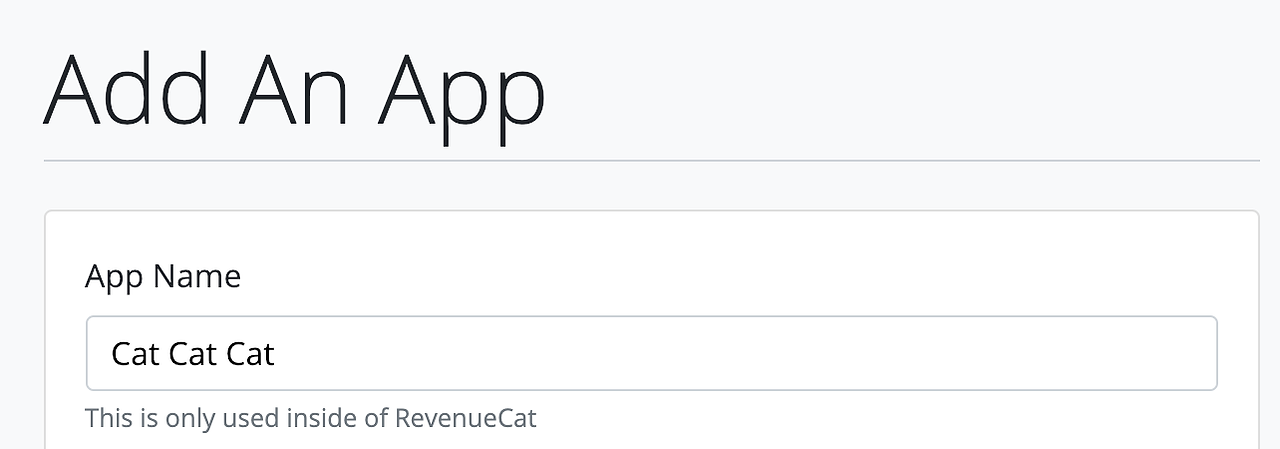

Give the App a name and keep that JSON safe
Press Add to create the app.
Creating entitlements
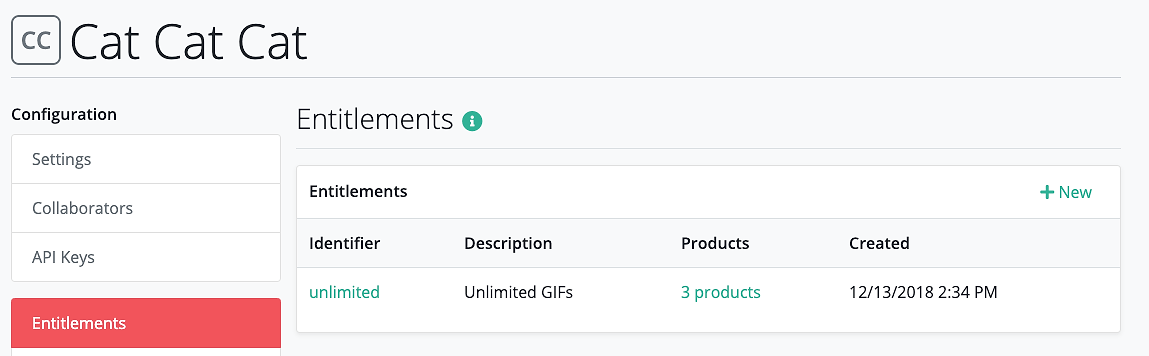
Entitlements are RevenueCat’s system for organizing in-app products. An “entitlement” is something a user is entitled to, usually based on a purchase. In our case we want to create an unlimited entitlement that will let users get unlimited cat GIFs.

Let’s add an entitlement
Next, under the Products tab, let’s add all the Play Store products we previously configured to RevenueCat.
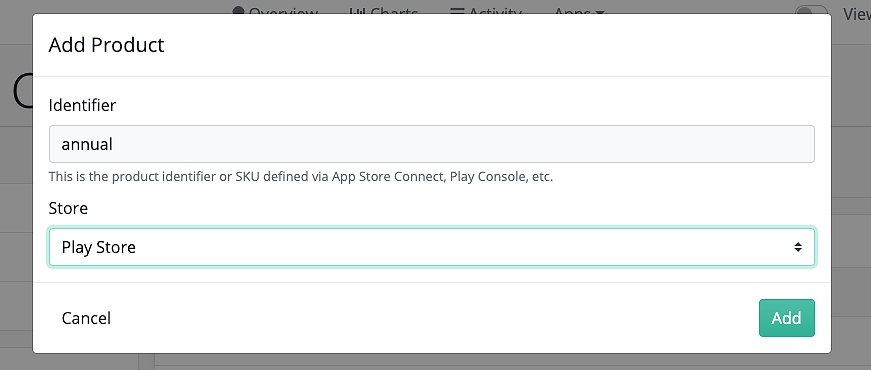
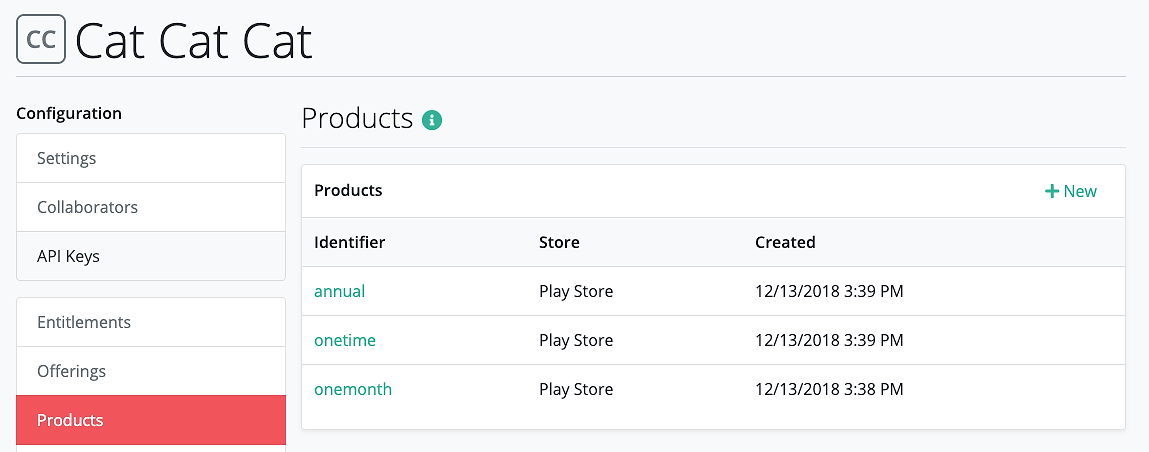
We’ll add all of our products from Play Console into RevenueCat
Finally, back in the Entitlements tab, we’ll attach all of the products to the “unlimited” entitlement we previously created. This allows a user to unlock unlimited access by purchasing any of these products.
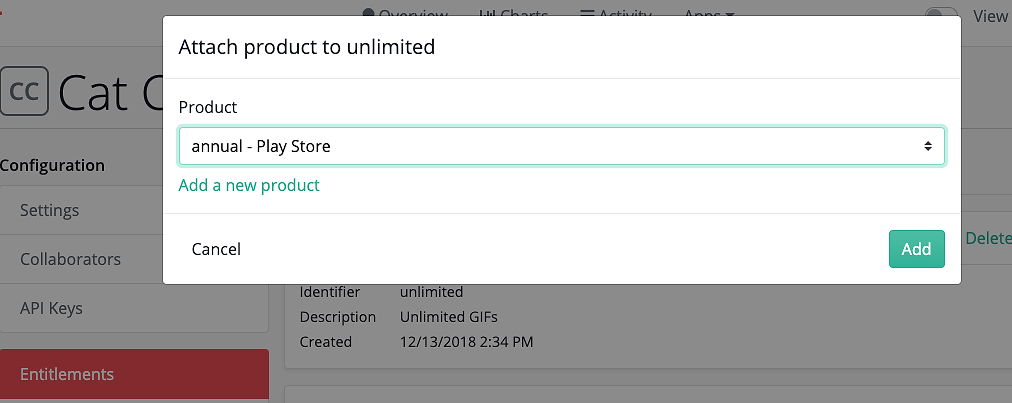
Users can unlock unlimited GIF access by purchasing any of the 3 products we’ve configured
Offerings are the selection of products that are offered to a user. Offerings allow you to choose which combination of products are shown to a user on your paywall or upsell screen. In our simple case, we’ll have a single Offering that contains our monthly, annual with trial and a one-time products.
In the future, you may want to experiment with different Offerings, maybe one with a shorter or longer trial duration. Since everything is configured remotely in RevenueCat, you can easily set this up without requiring an app update.
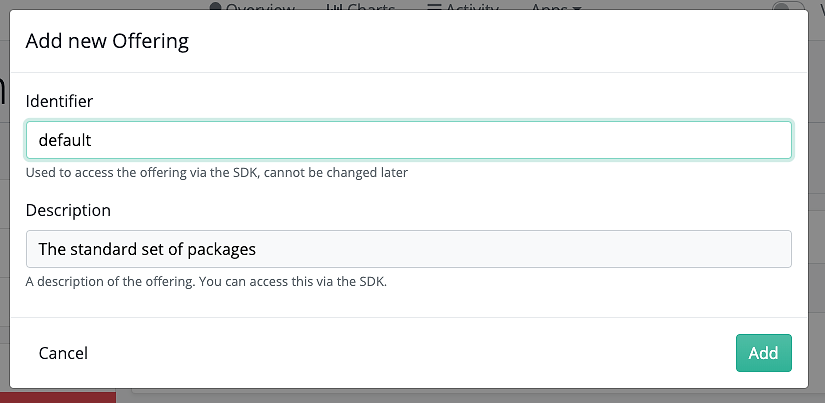

Create an offering and attach packages with the products you configured previously
And thats it! Next you can head over to our docs and see how to integrate the RevenueCat SDK into your app.