iOS & Apple Platforms
Instructions for installing the RevenueCat SDK for iOS


This tutorial shows you how to install the RevenueCat SDK in your iOS or other Apple-platform app. By the end, you'll have the SDK added to your Xcode project, verified with a successful build, and be ready to configure the SDK.
The installation steps are the same. RevenueCat supports universal purchases for macOS apps, letting you share purchases across the iOS, iPadOS, tvOS, watchOS, and macOS versions of your app. If you need support for legacy Mac App Store purchases, contact support.
Prerequisites
You need the following before you start:
- A RevenueCat account.
- A project in your RevenueCat account.
- Your app open in Xcode.
1. Install the SDK

Install the RevenueCat SDK with Swift Package Manager, the dependency manager built into Xcode. CocoaPods and Carthage are also supported for projects that already depend on them — see Other installation methods.
Install via Swift Package Manager
- In Xcode, select File > Add Package Dependencies. The package dialog appears.
- Paste the repository URL into the search field at the top right:
https://github.com/RevenueCat/purchases-ios-spm.git
- Set Dependency Rule to Up to Next Major Version, from
5.0.0. - Click Add Package. The Choose Package Products for purchases-ios-spm.git sheet appears.
- Set your app as the target for the RevenueCat and RevenueCatUI package products.
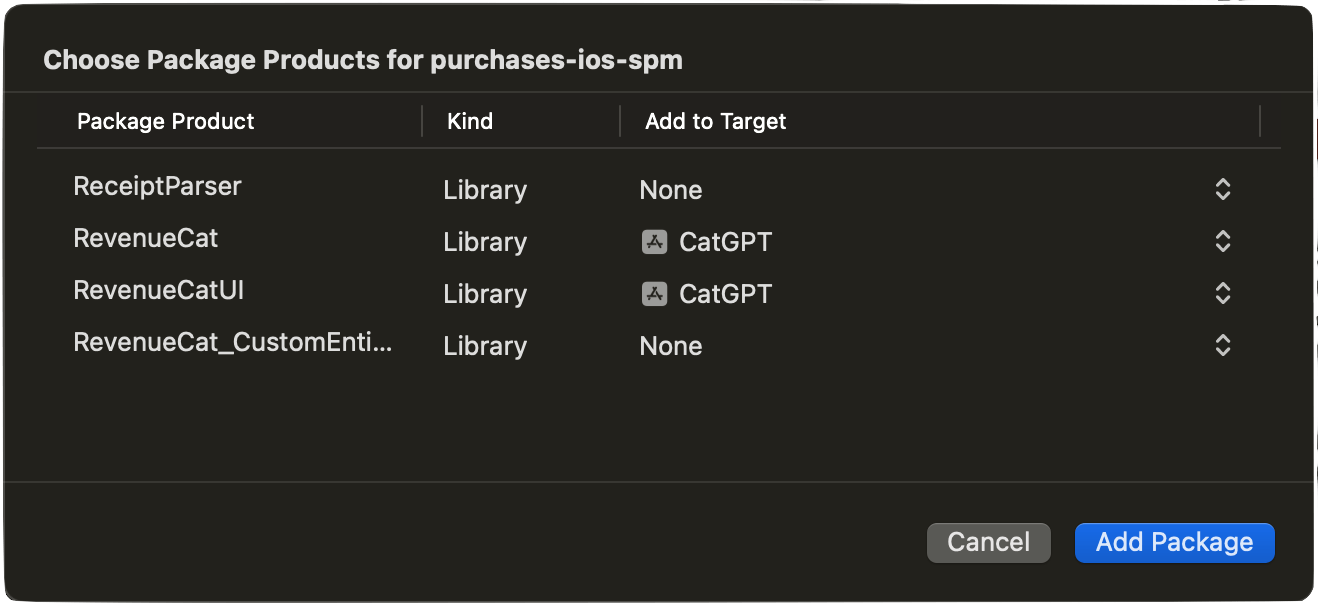
- Click Add Package. The libraries you selected appear under Package Dependencies in the project navigator.
Your project now includes the SDK. Continue to Import the SDK to verify the installation.
Other installation methods
Swift Package Manager is the recommended way to install the SDK. Use CocoaPods or Carthage only if your project already manages its dependencies with them.
Install via CocoaPods
- Add the SDK to your Podfile. To always use the latest release:
- Podfile
pod 'RevenueCat'
Alternatively, pin to a specific minor version:
- Ruby
pod 'RevenueCat', '~> 5.2'
- Run the install:
- Terminal
pod install
This adds RevenueCat.framework to your workspace.
Install via Carthage
- Add the SDK to your Cartfile. To always use the latest release:
- Cartfile
github "revenuecat/purchases-ios"
Alternatively, pin to a specific minor version:
- Text
github "revenuecat/purchases-ios" ~> 5.2.3
- Build with XCFrameworks (Carthage 0.37 or later). This skips build-phase setup entirely:
- Terminal
carthage update --use-xcframeworks
For more on using XCFrameworks with Carthage, see the Carthage documentation.
If you're on an older Carthage version, build with regular frameworks instead:
- Text
carthage update
Under certain configurations, using po to print objects to the console while debugging might result in the error "Couldn't IRGen Expression". If you run into this, add a single empty Objective-C file to your project and create a bridging header. For more information, see this write-up on the IRGen error.
2. Import the SDK
- Add the import to any source file that uses the SDK:
- Swift
- Objective-C
import RevenueCat
@import RevenueCat;

// or

#import "Purchases.h"
- Build your project (Product > Build). If the build succeeds with the import in place, the SDK is installed correctly.
3. Enable the In-App Purchase capability
Your app needs the In-App Purchase capability to make purchases through the App Store, in both the sandbox and production environments. Purchases made through the Test Store don't go through the App Store, so if you're starting there, you can come back to this step when you connect the App Store.
Before you add the capability, sign in to Xcode with your Apple Account and assign your project to a team, so Xcode can create a provisioning profile that includes the capability. With the default automatic signing, Xcode handles this configuration for you.
- In the Project navigator, select your project, then select your app target in the project editor sidebar.
- Open the Signing & Capabilities tab.
- Click + Capability to open the Capabilities library. The library only lists capabilities available to your platform and Apple Developer Program membership.
- Search for and double-click In-App Purchase. The capability appears below the Signing section, and Xcode updates your signing assets automatically.
For more detail, see Apple's Adding capabilities to your app.
Before purchases can work, the Account Holder must accept the Paid Apps Agreement and provide banking and tax information in App Store Connect, and your app's bundle identifier in Xcode must match your App Store Connect app record. See our App Store product setup guide.
Next steps
You've installed the RevenueCat SDK and verified your project builds.
- Configure the SDK with your project's API key — the next step in the Quickstart.
- Testing without an App Store Connect setup? Purchases work out of the box with the Test Store.