Hard Paywalls
This guide illustrates the setup and optimization of your Hard Paywall monetization strategy, focusing on its configuration and display to ensure a simple and effective implementation.
When to Use
A hard paywall strategy is straightforward: users must purchase to access specific content or features. This model works well when:
- Your app provides high-value content or functionality
- Your app operates with high unit economics (e.g., AI-driven features with significant per-user costs)
- You have a clear value proposition
- Your target audience has a high willingness to pay
Subscription Configuration Steps
1. Entitlement
RevenueCat Entitlements represent a level of access, features, or content that a user is "entitled" to. Entitlements are scoped to a project, and are typically unlocked after a user purchases a product. Entitlements are used to ensure a user has appropriate access to content based on their purchases, without having to manage all of the product identifiers in your app code.
Taking into consideration the fact that hard paywalls block the main feature access of your app, we recommend creating a single-tier access level or entitlement that grants access to all features of the application.
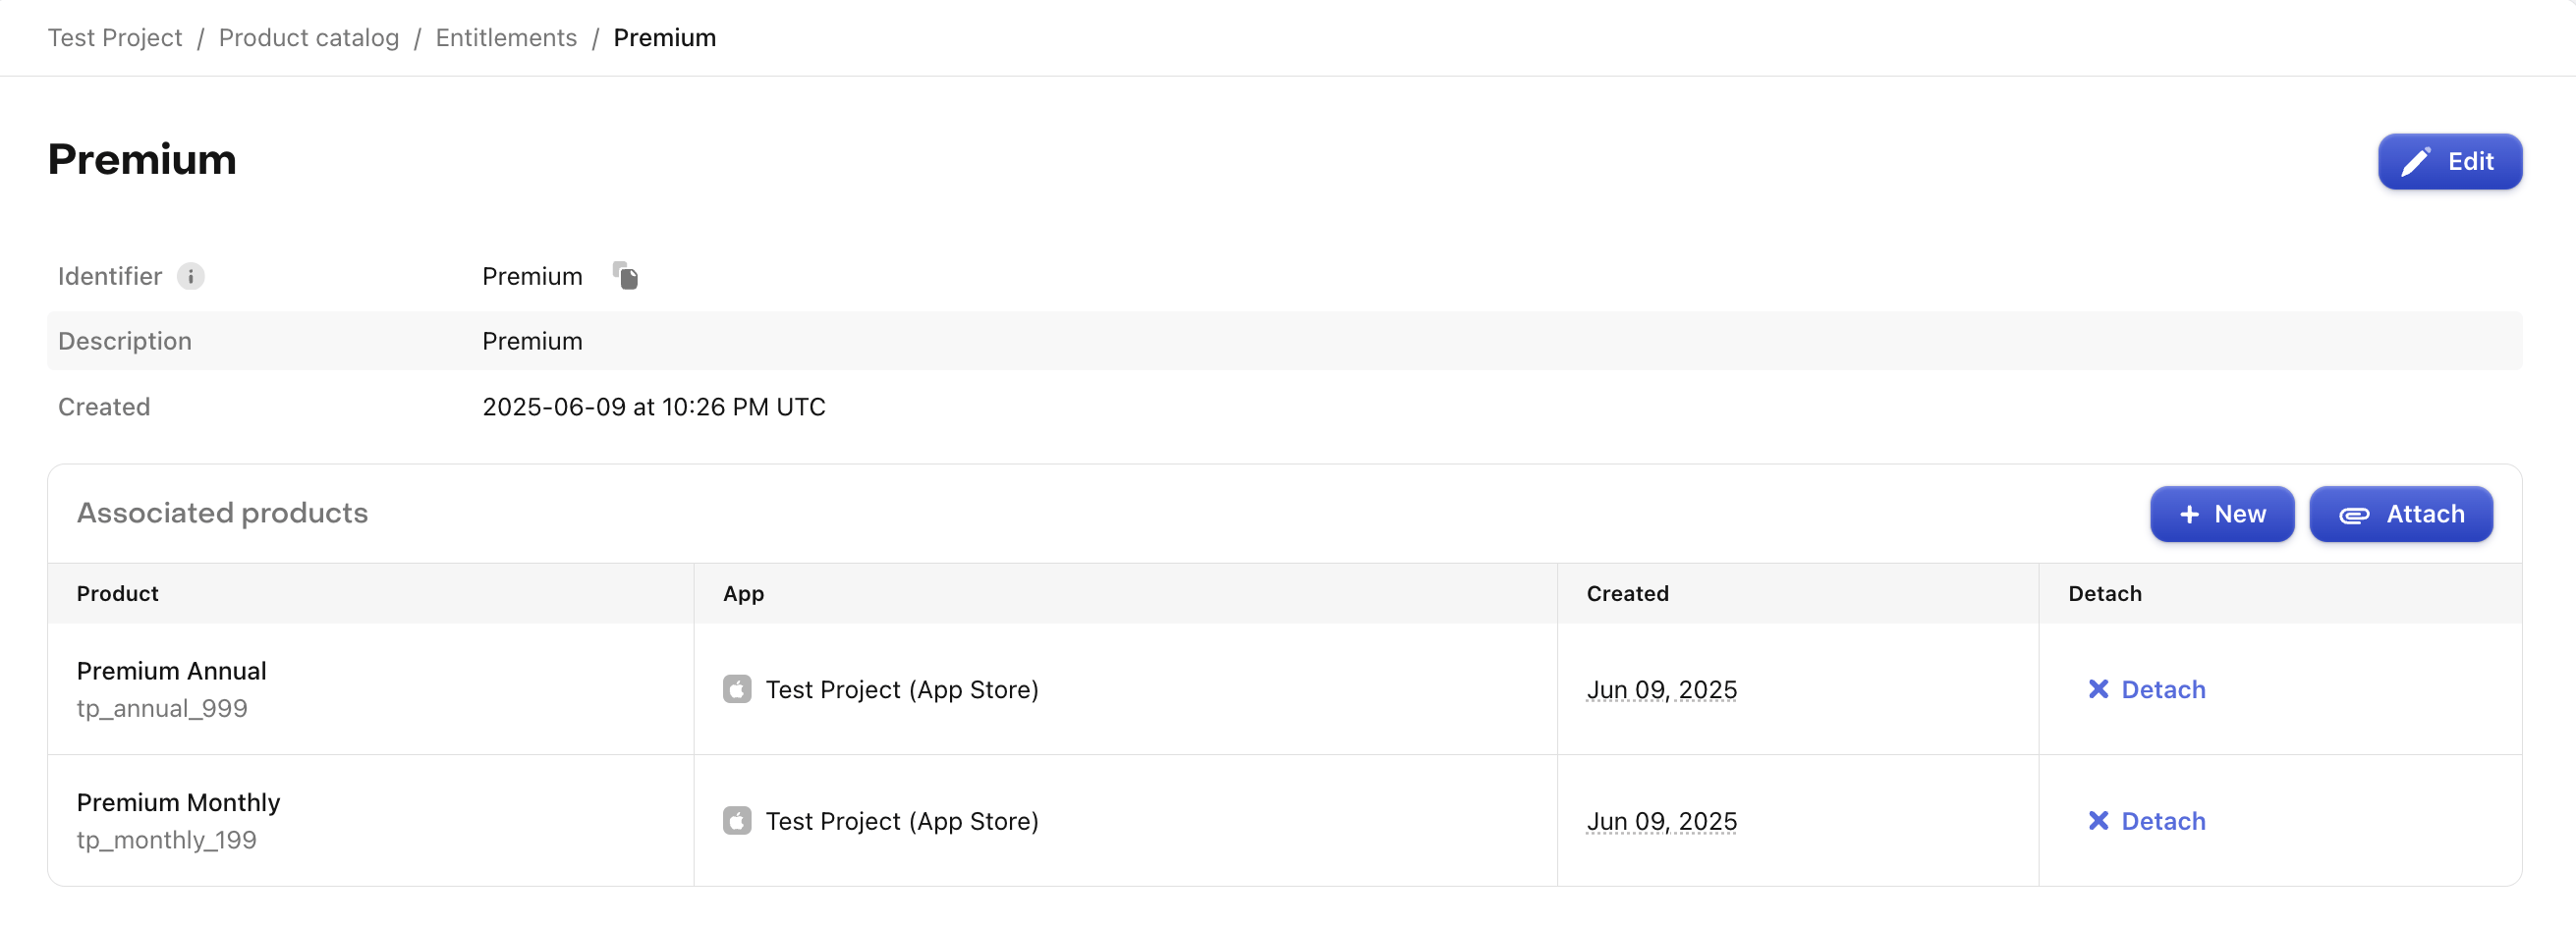
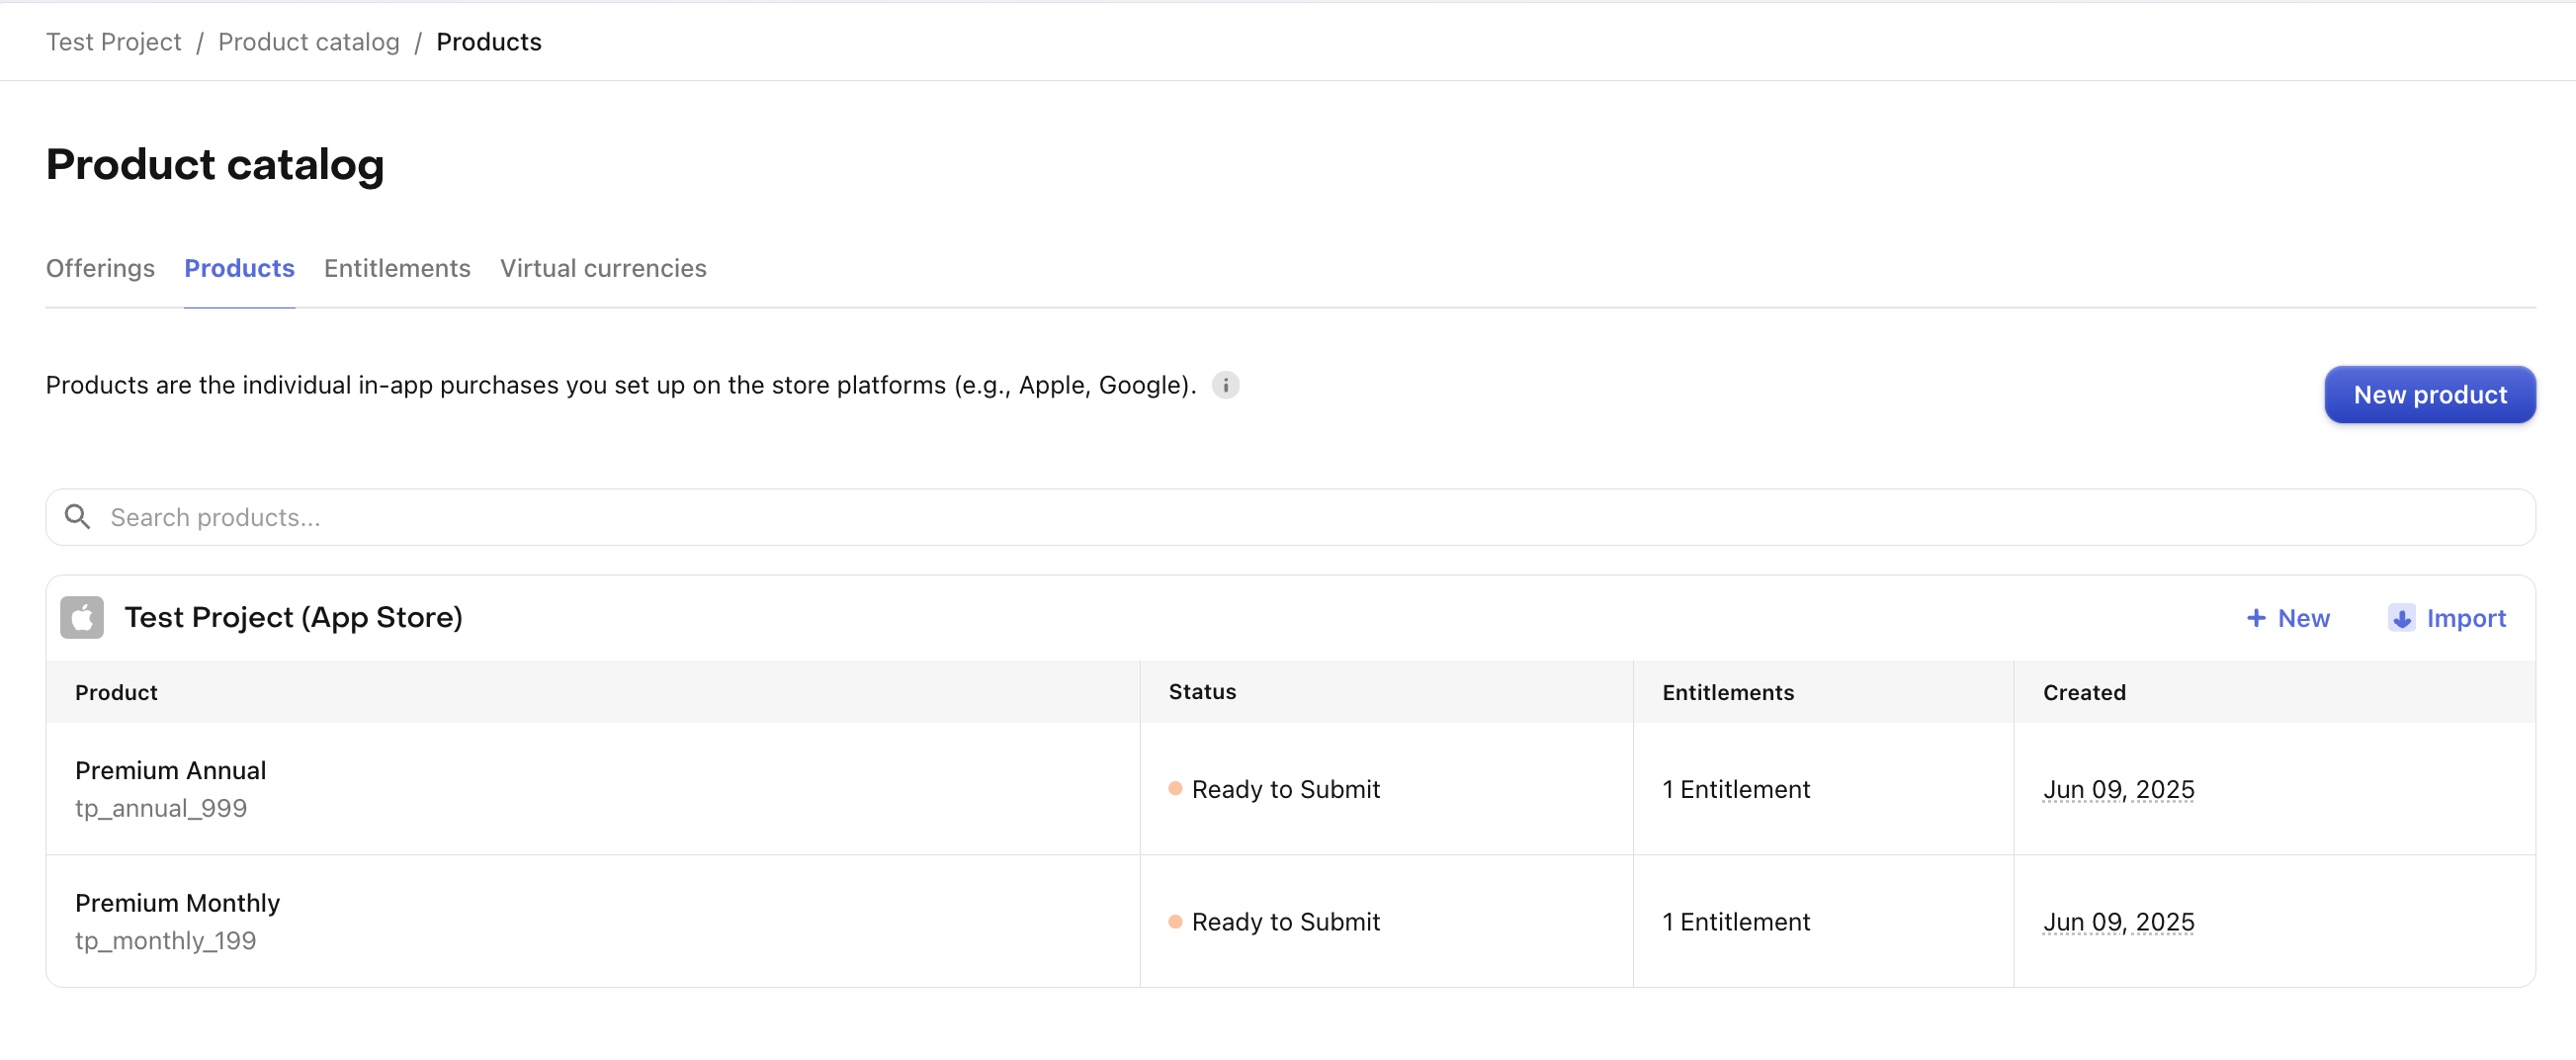
2. Products
Products are the individual SKUs that users actually purchase from your app. The stores (Apple, Google, Stripe, etc.) process these SKUs and charge the user.
For more information on how to set this up, please refer to our product setup documentation.
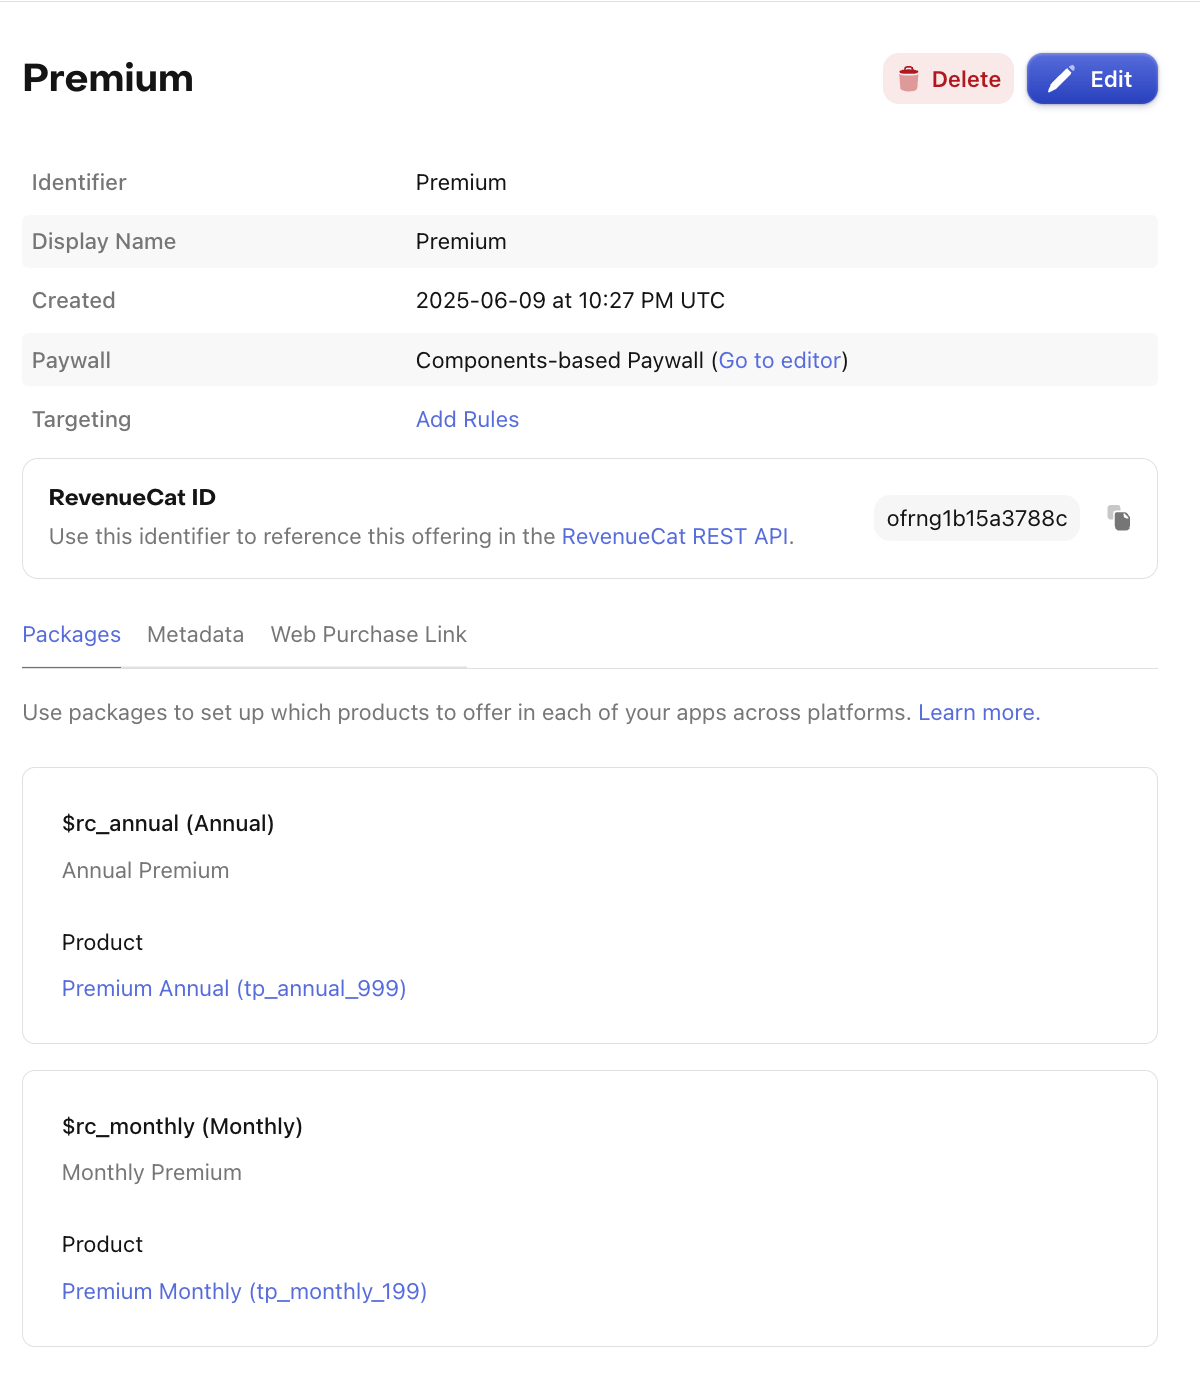
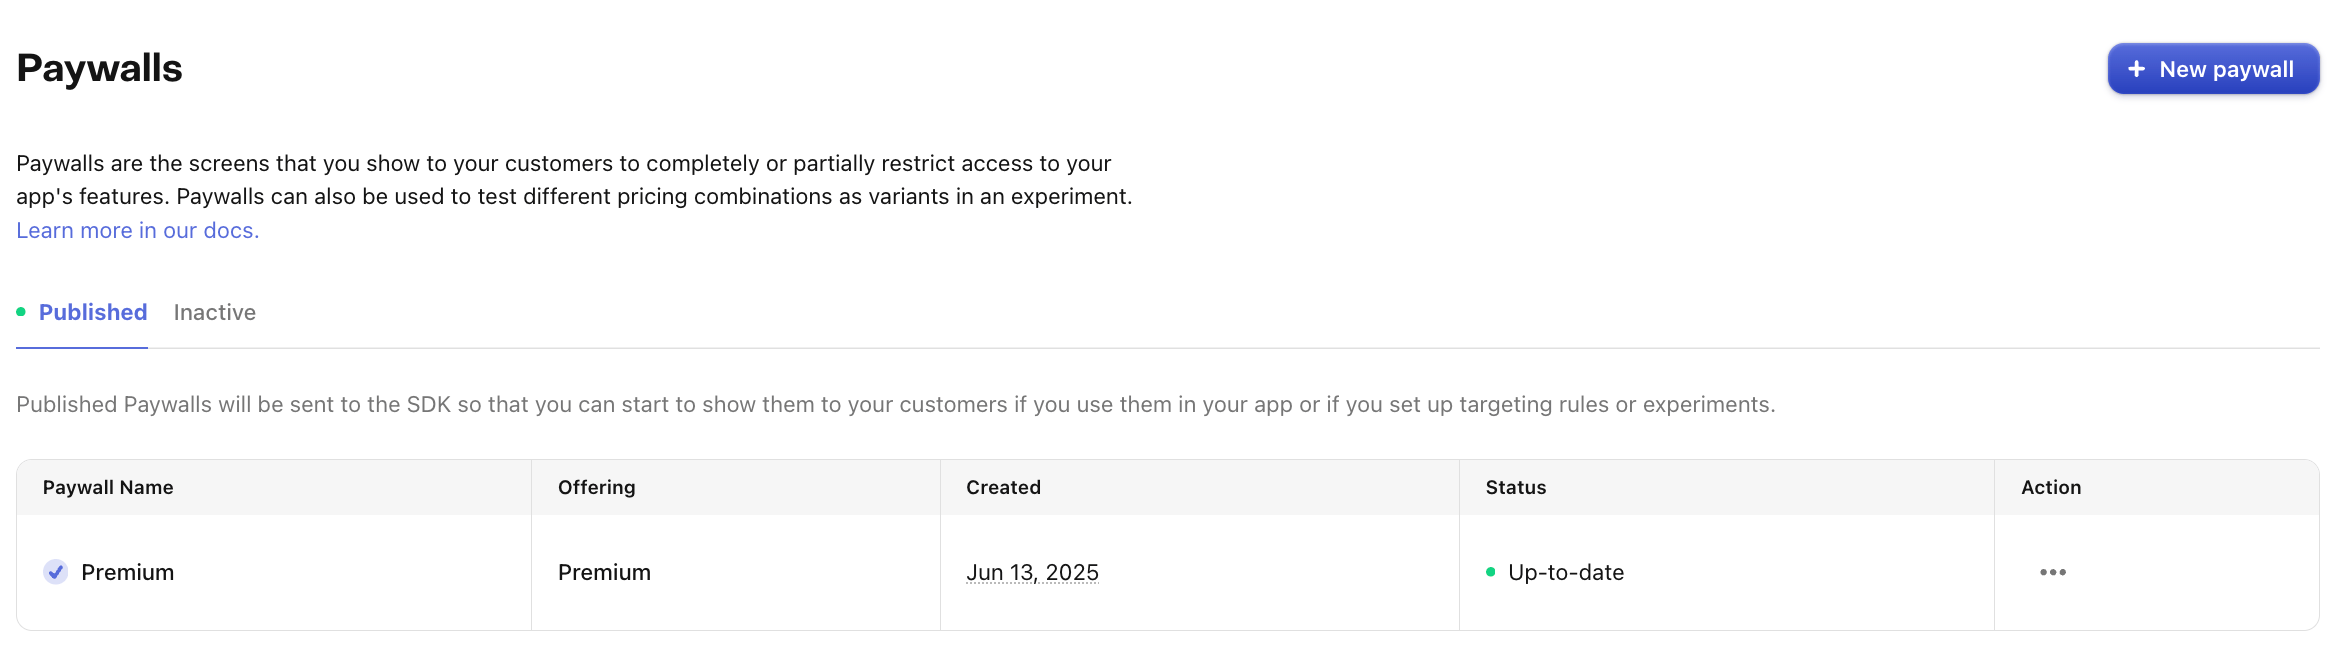
3. Offering
Offerings are the selection of products that are "offered" to a user on your paywall. Using RevenueCat Offerings is optional, but enable features like Paywalls, Experiments, and Targeting.
For more information on how to set this up, please refer to our offering setup documentation.
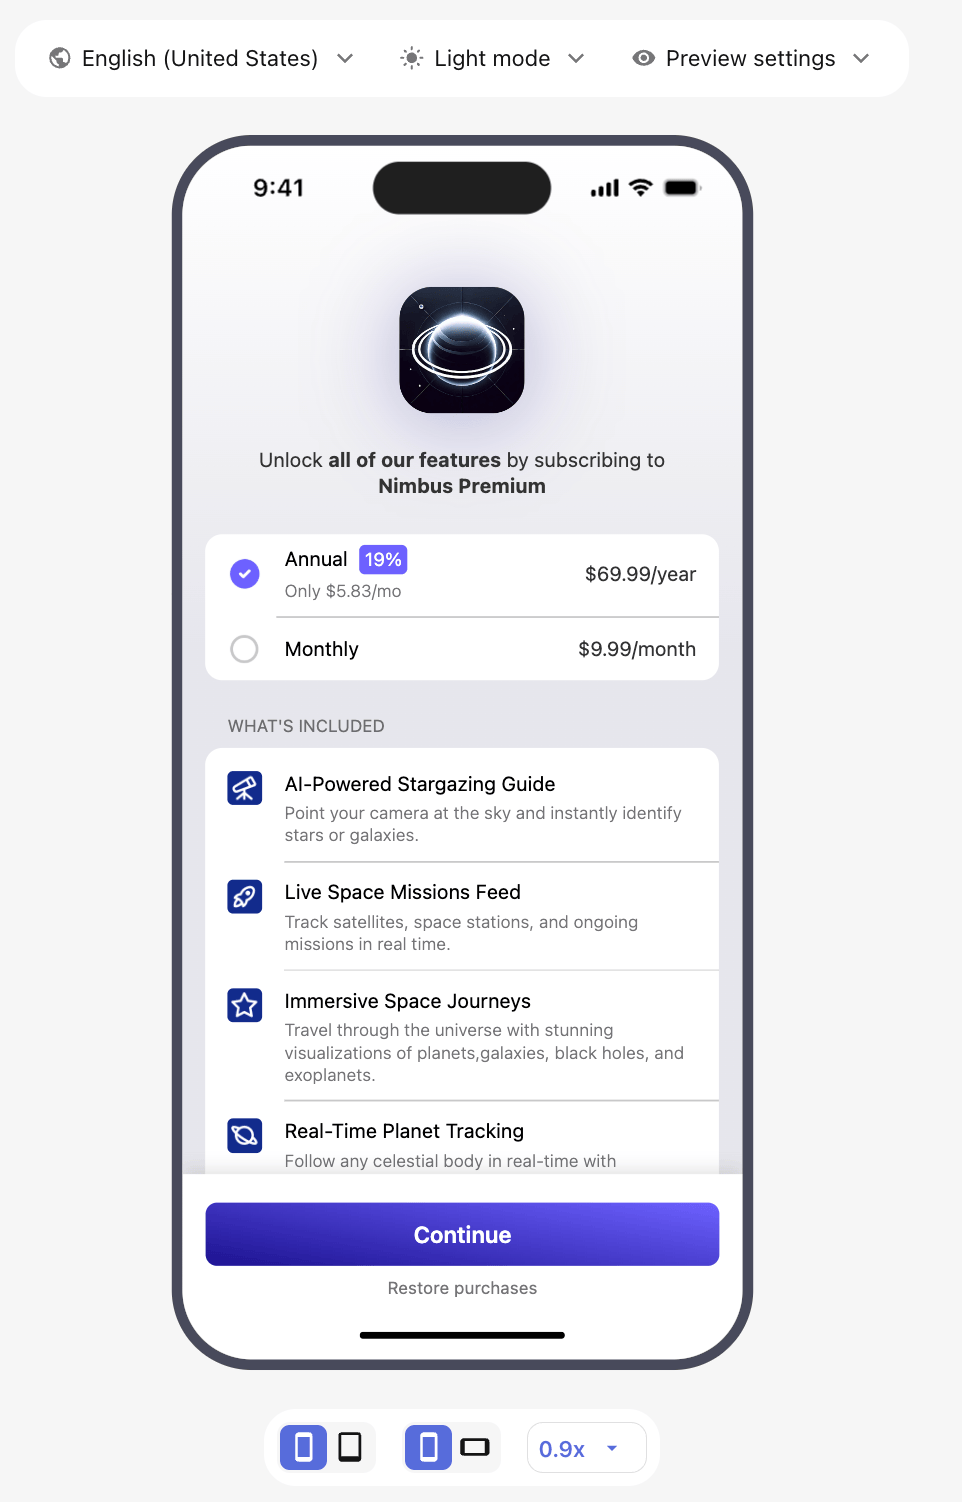
Building your Paywall
Now that you have everything set up, it's time to build your paywall. Take advantage of RevenueCat's Paywalls and start creating your own.
Below you can find an example of a Hard Paywall.
Presenting your Paywall
Implementation
Given that you want to block any user's access to your app features if they have no subscription, your paywall should be presented as full screen, not giving the user the possibility to bypass it. Below you can find some code snippets on how to accomplish this. Please refer to this document to get more detailed information on how to present paywalls.
- SwiftUI
- Kotlin
- React Native
- Flutter
- Kotlin Multiplatform
import SwiftUI

import RevenueCat
import RevenueCatUI

struct App: View {
    var body: some View {
        ContentView()
            .presentPaywallIfNeeded(
                requiredEntitlementIdentifier: Constants.ENTITLEMENT_ID,
                presentationMode: .fullScreen,
                purchaseCompleted: { customerInfo in
                    print("Purchase completed: \(customerInfo.entitlements)")
                },
                restoreCompleted: { customerInfo in
                    // Paywall will be dismissed automatically if the entitlement is now active.
                    print("Purchases restored: \(customerInfo.entitlements)")
                }
            )
    }
}
@OptIn(ExperimentalPreviewRevenueCatUIPurchasesAPI::class)
@Composable
private fun LockedScreen() {
    YourContent()

    PaywallDialog(
        PaywallDialogOptions.Builder()
            .setRequiredEntitlementIdentifier(Constants.ENTITLEMENT_ID)
            .setShouldDisplayDismissButton(false)
            .setListener(
                object : PaywallListener {
                    override fun onPurchaseCompleted(customerInfo: CustomerInfo, storeTransaction: StoreTransaction) {}
                    override fun onRestoreCompleted(customerInfo: CustomerInfo) {}
                }
            )
            .build()
    )
}
import React from 'react';
import { View } from 'react-native';

import RevenueCatUI from 'react-native-purchases-ui';

// Display current offering
return (
    <View style={{ flex: 1 }}>
        <RevenueCatUI.Paywall
            options={{ displayCloseButton: false }} // setting this property to `false` will remove the close button from Legacy Paywalls only
        />
    </View>
);

// If you need to display a specific offering:
return (
    <View style={{ flex: 1 }}>
        <RevenueCatUI.Paywall
          options={{
            offering: offering, // Optional Offering object obtained through getOfferings
            displayCloseButton: false // setting this property to `false` will remove the close button from Legacy Paywalls only
          }}
          onRestoreCompleted={({customerInfo}: { customerInfo: CustomerInfo }) => {
            // Optional listener. Called when a restore has been completed.
            // This may be called even if no entitlements have been granted.
          }
          onDismiss={() => {
            // Dismiss the paywall, i.e. remove the view, navigate to another screen, etc.
            // Will be called when a purchase succeeds.
          }}
        />
    </View>
);
import 'package:purchases_ui_flutter/purchases_ui_flutter.dart';
// Note: Avoid placing PaywallView inside a modal or bottom sheet (e.g., using showModalBottomSheet).
// Instead, include it directly in your widget.
Widget build(BuildContext context) {
return Scaffold(
body: SafeArea(
child: Center(
child: PaywallView(
offering: offering, // Optional Offering object obtained through getOfferings
onRestoreCompleted: (CustomerInfo customerInfo) {
// Optional listener. Called when a restore has been completed.
// This may be called even if no entitlements have been granted.
}
onDismiss: () {
// Dismiss the paywall, i.e. remove the view, navigate to another screen, etc.
// Will be called when the close button is pressed (if enabled) or when a purchase succeeds.
},
),
),
),
);
}
val options = remember {
    PaywallOptions {
        shouldDisplayDismissButton = false
    }
}

Paywall(options)
Implementation considerations
When implementing a hard paywall, it's essential to ensure that users cannot dismiss or bypass the paywall, as it's designed to restrict access to your app's core features until a subscription or trial is activated.
The implementation varies slightly depending on the type of paywall template you're using:
Using Legacy Paywall Templates
- React Native:
Set
displayCloseButton: falsein your paywalloptionsconfiguration to remove the close button.
Using New Paywall Templates
- All platforms: Remove the close button directly within the Paywall Editor.
Best Practices
-
Clear Value Proposition
- Clearly communicate what users get with their purchase and why they need to purchase to use the app. Being transparent can help mitigate these risks:
- Avoid store negative reviews.
- Prevent Apple Review rejections.
- Highlight key features and benefits.
- Use compelling visuals and copy.
- Clearly communicate what users get with their purchase and why they need to purchase to use the app. Being transparent can help mitigate these risks:
-
Pricing Strategy
- Test different price points.
- Consider offering multiple subscription durations.
- Use price localization for different markets.
-
User Experience
- Make the purchase flow smooth and intuitive.
- Provide clear purchase confirmation.
- Implement restore purchases functionality.
Test your Paywall
- Ensure that the user has sufficient context about what your app offers before displaying the paywall.
- Ensure that the paywall cannot be bypassed by either swiping down or dismissing it.
- When Android is one of your targeted platforms, be sure to account for the physical back button by implementing appropriate navigation listeners.
- Double-check that your paywall displays all the products you configured.
- Make sure the restore purchase option is provided to the user.
Review our Testing Guide to fine-tune your test cases and make sure everything is working as expected.
Next Steps
- Use Experiments to try out different Offerings and Pricing Strategies.
- Integrate our Customer Center feature to help users manage their subscriptions.
- Once you're ready to launch, review this App Subscription Launch Checklist.