
Paywalls are the critical touchpoint between your app and revenue. While pre-built templates can get you started quickly, there are compelling reasons to build custom paywalls that match your brand identity and create memorable user experiences. An animated paywall that responds to user context, like one that transitions between day and night themes, can create an emotional connection that static templates simply cannot achieve. The psychological impact of a well-crafted paywall extends beyond mere aesthetics; it signals to users that your app is polished, professional, and worth their investment.
In this article, you’ll explore how to build sophisticated animated paywalls in Jetpack Compose. We’ll dive deep into a “Day & Night” paywall implementation, examining each animation technique step by step. You’ll also learn how to use Firebase for agile A/B testing of your custom paywall content, and discover when RevenueCat’s Paywall Builder might be the better choice. By the end, you’ll have a complete understanding of when and how to build custom paywalls that convert.
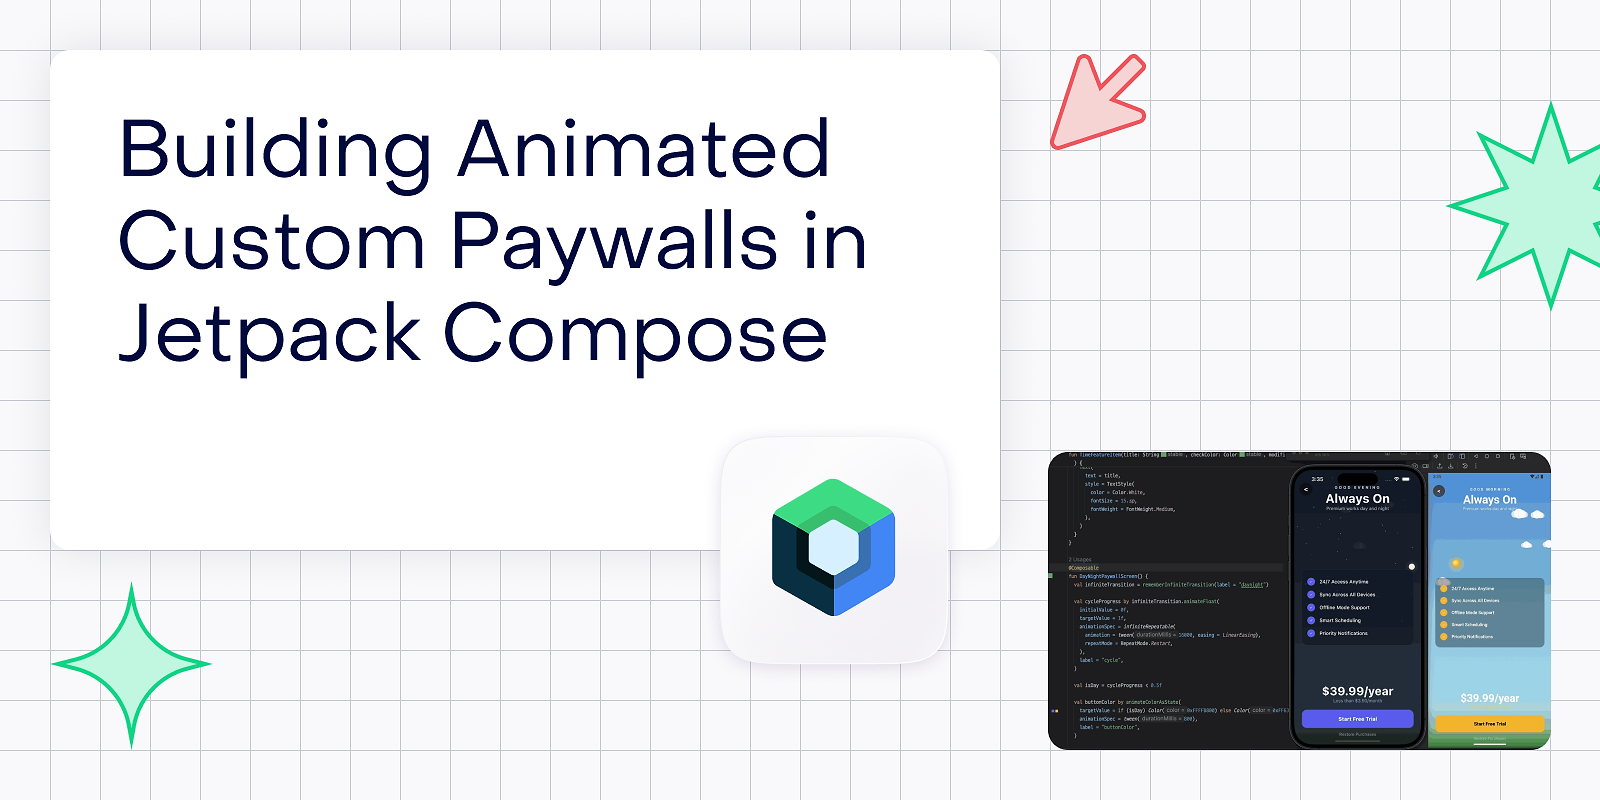
Building custom paywalls: Day & Night deep dive
Let’s examine a production-quality animated paywall that transitions between day and night themes on a 16-second cycle. This implementation demonstrates several advanced Compose animation techniques working together harmoniously. The paywall creates an immersive environment that changes dynamically, with the sun rising and setting, stars twinkling into view, clouds drifting across the sky, and UI elements adapting their colors to match the time of day. This continuous cycle captures attention and creates emotional engagement that static paywalls cannot achieve.

Architecture overview
The Day & Night paywall follows a layered architecture that separates concerns cleanly. At the foundation sits the DayNightBackground composable, which handles all environmental animations including the sky gradient transitions, the procedurally generated star field with individual twinkling behaviors, the sun and moon following arc trajectories across the sky, a parallax cloud layer that drifts continuously, and a landscape gradient that grounds the scene.
Above this animated background, the content overlay presents the actual paywall information: a greeting that crossfades between “GOOD MORNING” and “GOOD EVENING” based on the cycle, a feature list with animated checkmarks whose colors shift with the day/night state, price display with an animated accent color, and a call-to-action button that transitions between warm golden tones during the day and cool indigo at night.
This layered architecture provides several benefits. The background animation logic remains isolated from the content presentation, making both easier to modify independently. The background can be reused in other contexts if needed, and the content layer can be updated without touching the complex animation code. This separation also improves performance by allowing Compose to optimize recomposition independently for each layer.
Setting up the animation cycle
The entire paywall is driven by a single cycleProgress value that loops from 0 to 1 over 16 seconds. This duration was chosen carefully, long enough to appreciate the transitions without feeling rushed, but short enough that users experience the full cycle during a typical paywall viewing session:
This pattern is important for complex animations: use a single progress value as the source of truth, then derive all other animations from it. This ensures perfect synchronization and makes the animation easy to reason about. When multiple animations need to coordinate, as they do in this paywall, having a single driver eliminates timing drift and makes the relationship between elements explicit.
The LinearEasing choice is deliberate. For a continuous cycle representing time passing, linear progression feels most natural. Non-linear easing would make certain parts of the day feel faster or slower than others, which would break the metaphor. The RepeatMode.Restart ensures the cycle loops seamlessly from midnight back to sunrise.
The cycle splits into two phases. The day phase spans from 0.0 to 0.5, during which the sun rises, crosses the sky, and sets. The night phase covers 0.5 to 1.0, when the moon performs the same journey. This symmetrical division creates a balanced experience where users spend equal time in day and night modes, maximizing exposure to both visual treatments.
Implementing the animated background
The DayNightBackground composable handles all environmental animations. This is where the magic happens, transforming a simple progress value into a living, breathing scene. Let’s break down each layer and understand how they work together.
Procedural star generation
Stars are generated once and remembered, with randomized properties for natural variation. The procedural approach means every session produces a unique star field, adding subtle variety to the experience:
Each star has its own twinkle phase and speed, ensuring they don’t twinkle in unison. This desynchronization is critical for realism, synchronized twinkling would look artificial and mechanical. The y coordinate is capped at 0.6 to keep stars in the upper portion of the sky where they belong, preventing stars from appearing in the landscape area at the bottom of the screen.
The 60-star count balances visual density with performance. Fewer stars would make the night sky feel sparse, while significantly more could impact rendering performance on lower-end devices. The size range of 1 to 3 pixels (from Random.nextFloat() * 2f + 1f) creates a sense of depth, with smaller stars appearing more distant.
The remember block ensures stars are generated only once per composition, maintaining consistency as the paywall cycles. Without this, stars would regenerate on every recomposition, creating a chaotic flickering effect.
Frame-accurate delta time
For smooth animations independent of frame rate, we track actual elapsed time. This technique is fundamental to professional-quality animation and ensures consistent behavior across devices with varying performance characteristics:
This approach has two benefits. First, animations remain smooth regardless of device performance, a device running at 30fps will show the same animation speed as one running at 120fps. Second, animation speed is consistent across devices, so users see the same experience whether they’re on budget hardware or flagship phones.
The coerceIn(0f, 0.1f) prevents animation jumps when the app returns from background. Without this cap, the delta time could be several seconds if the app was suspended, causing jarring jumps in continuous animations like cloud movement. By capping at 0.1 seconds (100ms), we ensure smooth recovery even after brief suspensions.
The withFrameNanos function is key here, it suspends until the next frame and provides the precise frame timestamp in nanoseconds. This is more accurate than alternatives like delay() which can accumulate timing errors over long running animations.
Multi-phase sky gradients
The sky transitions through eight distinct color phases, creating a believable progression from dawn through day through dusk through night and back. Each phase uses a three-color gradient to add depth to the sky:
The color choices are intentional and based on observation of real skies. Sunrise features warm oranges and golds, transitioning through the top of the gradient to paler tones. Day uses familiar sky blues with lighter tones toward the horizon. Sunset intensifies the warm colors with deeper oranges and reds. Dusk introduces muted blue-grays as light fades. Night reaches deep navy and near-black at the top, while dawn adds hints of warm tones as the cycle prepares to restart.
The phase calculation normalizes progress within each half-cycle, creating a local progress value that runs from 0 to 1 within either the day or night phase:
This normalization simplifies the transition logic, each phase can work with a consistent 0-to-1 range regardless of where it falls in the overall cycle. The day phase occurs when cycleProgress is below 0.5, while the night phase covers the upper half.
Then each phase transitions smoothly using lerp (linear interpolation), which blends between color values based on a progress parameter:
This creates natural-feeling transitions with quick sunrise/sunset phases occupying 20% of each half-cycle and stable midday/midnight periods holding steady for the remaining 60%. This pacing mimics real daylight patterns where transitions happen relatively quickly at the horizon while the bulk of day and night are stable. The 20/60/20 split also ensures that users spending even brief time on the paywall will likely see some transition, keeping the experience dynamic.
Star twinkling with fade transitions
Stars need to fade in and out at dawn and dusk, while also twinkling individually throughout the night. This dual-animation requirement demonstrates how to layer effects cleanly:
The fade timing uses 15% windows at the edges of each phase, creating smooth transitions. The multiplier of 6 (derived from 1/0.15) ensures the fade completes exactly within the window. During the day phase, stars are invisible (alpha 0) for 70% of the time, only appearing during the dawn and dusk transitions.
The twinkle effect uses a sine wave offset by each star’s unique phase. The sine function naturally oscillates between -1 and 1, so (sin(...) + 1f) / 2f normalizes this to 0-1. Multiplying by starAlpha creates the overall fade effect, while the inner calculation (0.4f + twinkle * 0.6f) ensures stars never fully disappear, they oscillate between 40% and 100% brightness, mimicking the atmospheric twinkling of real stars.
The performance optimization if (starAlpha > 0f) skips the star drawing loop entirely during the day, avoiding unnecessary computation when stars aren’t visible.
Sun and moon arc trajectories
The sun and moon follow identical arc paths across the sky, creating a believable celestial motion. The trigonometry here creates a natural horizon-to-horizon path:
The trigonometry creates a smooth arc through parametric calculation. At dayProgress = 0, the angle is PI (180 degrees), so the sun is at the left side of the screen since cos(PI) = -1. At dayProgress = 0.5, the angle is PI/2 (90 degrees), placing the sun at the center top since cos(PI/2) = 0 and sin(PI/2) = 1. At dayProgress = 1, the angle is 0, positioning the sun at the right side since cos(0) = 1.
The 0.5f multiplier on the Y component creates an elliptical arc rather than circular, giving a more natural horizon-to-horizon path that doesn’t extend too high into the sky. The height * 0.1f offset shifts the entire arc downward so the sun and moon rise from and set to below the visible area, creating a proper horizon effect.
The horizon check if (sunY < height * 0.7f) prevents drawing the celestial body when it’s below the landscape area. This simple culling ensures clean transitions at sunrise and sunset, with the sun and moon appearing to rise from and sink below the horizon naturally.
Sun rendering with animated rays
The sun is composed of multiple layers for a luminous, living effect. Each layer serves a specific purpose in creating the overall impression of radiant warmth:
The outer glow uses a radial gradient that fades to transparent, creating a soft halo effect around the sun. This atmospheric glow adds depth and prevents the sun from looking like a flat circle floating in space.
The main sun body uses an offset gradient center (shifted 8 pixels up and left) to create a subtle 3D effect. This offset makes one edge appear brighter, as if the sun has volume and the light is coming from a consistent direction. The color progression from pale yellow at the center through gold to orange at the edge mimics the color gradation seen in photographs of the sun.
The rays animate in two ways. First, totalTime * 20f in the angle calculation makes them rotate slowly, creating a spinning effect. Second, sin(totalTime * 3f + i) * 5f makes each ray’s length oscillate independently, with the phase offset + i ensuring different rays pulse at different times. This combination creates an organic, breathing quality that makes the sun feel alive.
Parallax cloud movement
Clouds create depth through independent movement speeds, a technique known as parallax that’s fundamental to creating perceived depth in 2D scenes:
The five clouds have varying scales and speeds. Larger, slower clouds appear more distant, while smaller, faster clouds seem closer. This variation creates a sense of atmospheric depth, even in the flat 2D canvas. The Y positions are constrained to the upper third of the screen (0.1 to 0.4 of height), keeping clouds in the sky area where they belong.
Each cloud is rendered as overlapping circles with wrapping horizontal movement:
The wrapping formula % 1.4f - 0.2f ensures clouds exit on the right and re-enter from the left seamlessly. The 1.4 range (140% of screen width) combined with the -0.2 offset means clouds are generated slightly off the left edge of the screen, drift across the entire visible area, and continue slightly past the right edge before wrapping. This creates smooth, continuous motion without visible popping at the edges.
The cloud color and alpha change between day and night. Daytime clouds are bright white at 90% opacity, clearly visible against the blue sky. Nighttime clouds become dark gray at only 15% opacity, creating subtle silhouettes that are visible but don’t dominate the starry sky.
Animating UI elements with the cycle
The UI layer animates in response to the day/night state using animateColorAsState, which provides smooth interpolation between colors whenever the target changes:
The 800ms duration creates smooth transitions that don’t feel rushed. This timing was chosen to match the overall pacing of the paywall, fast enough to feel responsive, but slow enough to be perceivable and pleasing. The color choices reinforce the day/night theme: warm golden tones during the day suggest sunshine and energy, while cool indigo and silver tones at night suggest calm and sophistication.
The label parameters are important for debugging and tooling. When using Android Studio’s Animation Preview or Compose debugging tools, these labels help identify which animation is which in the visualization.
Greeting crossfade animation
The greeting text switches between “GOOD MORNING” and “GOOD EVENING” using Crossfade, which automatically handles the enter and exit animations for content that changes:
The Crossfade composable handles the transition automatically, fading out the old content while simultaneously fading in the new content. This creates a smooth handoff without any jump or flicker. The 800ms duration matches the other UI animations, creating a cohesive feel.
The greeting text itself serves an important purpose beyond decoration, it creates a personal connection with the user. Time-appropriate greetings are a small touch that makes the app feel aware of and responsive to the user’s context. Combined with the animated environment, this creates the impression of a thoughtful, polished experience.
Custom checkmark drawing
Feature list items include animated checkmarks drawn with Canvas, demonstrating how to create custom graphics that respond to animation:
Drawing the checkmark with Canvas instead of an icon gives you precise control and eliminates asset dependencies. The checkmark path is defined using relative coordinates (percentages of the canvas size), making it scale correctly at any size. The StrokeCap.Round and StrokeJoin.Round create smooth, friendly-looking line endings and corners.
The background color comes from the parent composable and animates with the day/night cycle. This means the checkmark circles smoothly transition from warm golden during the day to cool indigo at night, maintaining visual harmony with the rest of the paywall.
Integrating RevenueCat for purchases
The paywall integrates RevenueCat through the rememberPaywallState helper, which encapsulates all purchase logic and provides a clean interface for the UI layer:
The PaywallState class encapsulates all purchase logic, keeping the UI composable focused on presentation:
This separation of concerns follows a clear architectural principle: UI components should be responsible only for presentation, while business logic belongs in separate classes. The PaywallState manages all RevenueCat interactions, loading states, and error handling, exposing only the interface the UI needs. This makes the code easier to test, maintain, and modify—changes to purchase logic don’t require touching the UI code, and vice versa.
Firebase for agile A/B testing
Custom paywalls give you creative control, but testing different messaging and offers requires a mechanism for remote configuration. Firebase Real-Time Database or Firestore provides this capability, enabling you to iterate on paywall content without app updates.
Why Firebase for paywall content
RevenueCat excels at managing subscription products, pricing, and analytics. However, when you’ve built a custom paywall, you need remote control over the content layer, the headlines, subheadlines, feature lists, price display formats, and call-to-action text that influence conversion. These elements often benefit from experimentation, and waiting for app store review cycles to test changes dramatically slows iteration.
Firebase lets you change these values without app updates, enabling rapid experimentation. You can launch a test in the morning, gather data throughout the day, and roll out the winner by evening, a pace impossible with traditional app updates. This agility is particularly valuable in the early stages of monetization when you’re still learning what resonates with your audience.
The combination of custom UI (for brand expression and advanced animation) with remote content (for rapid iteration) gives you the best of both worlds. Your paywall looks and feels unique, but you can still optimize messaging as quickly as teams using templated solutions.
Setting up Remote Config for paywall content
First, define your paywall configuration structure in Firestore. This structure should capture all the text elements you might want to vary:
The default values serve two purposes. First, they provide a fallback if the network request fails, ensuring the paywall always displays something reasonable. Second, they document the expected content, making it clear what each field is for.
The variant field is important for analytics. By including the variant identifier in the configuration itself, you ensure that analytics events always include the correct attribution. This eliminates a common source of A/B testing bugs where the variant assignment and the displayed content become desynchronized.
Fetching configuration at paywall display
The hash-based variant assignment ensures consistency, the same user always sees the same variant across sessions. This is critical for valid A/B testing; if users saw different variants on different visits, you couldn’t accurately measure the effect of any particular treatment.
The fallback to default values (via the ?: PaywallConfig() null coalesce) ensures the paywall always works, even if Firestore is unavailable. This defensive approach prevents network issues from blocking purchases entirely.
Integrating dynamic content into the paywall
Modify the paywall to accept configuration:
By parameterizing the paywall with a config object, you’ve created a flexible system that supports unlimited variations. The animations and visual design remain constant (and distinctive), while the content can be tuned remotely. This separation reflects the insight that users respond to both form and content, the form (design) builds brand perception, while the content (messaging) drives conversion.
Tracking conversion events
To analyze A/B test results, log conversion events with the variant identifier:
These three events create a conversion funnel that lets you analyze where users drop off. By filtering each event by variant, you can compare performance across treatments. The paywall_type parameter supports analysis across different paywall designs if you have multiple.
Analyzing results in Firebase
Create a funnel analysis in Firebase Analytics by examining the progression from paywall_viewed to purchase_started to purchase_completed, filtering each step by variant. Compare conversion rates across variants to determine winners.
When interpreting results, remember that statistical significance matters. Small differences in conversion rates may be noise rather than signal, especially with limited sample sizes. Firebase’s audience features can help you understand segment-specific effects, a variant that works well for new users might underperform for returning users, or vice versa.
Best practices for paywall A/B testing
Several principles help ensure your A/B tests yield actionable insights. First, test one variable at a time whenever possible. Changing the headline, feature list, and CTA simultaneously makes it impossible to know which change drove the result. If you must test multiple changes together, treat the entire bundle as a single variant and don’t draw conclusions about individual elements.
Second, use consistent user assignment so the same user always sees the same variant. This prevents the noise that would come from users experiencing different treatments on different visits. Third, run tests long enough to achieve statistical significance, which typically requires 1000 or more conversions per variant depending on the effect size you’re trying to detect.
Fourth, consider segment-specific testing. New users and returning users often respond differently to messaging, and testing within segments can reveal insights that aggregate analysis misses. Finally, document and archive your results. Over time, you’ll build organizational knowledge about what works for your audience, informing future experiments and reducing the need to retest ideas.
RevenueCat Paywall Builder: Beyond custom
While custom paywalls offer maximum flexibility, RevenueCat’s Paywall Builder provides compelling advantages for many scenarios. Understanding when each approach makes sense helps you allocate development resources effectively.
What Paywall Builder offers
RevenueCat’s Paywall Builder is a server-driven UI system that lets you design paywalls without code changes, using a visual editor in the RevenueCat dashboard. Once designed, paywalls can be updated remotely without app updates, you can change colors, fonts, layouts, images, and copy at any time. Built-in A/B testing lets you test different designs with statistical rigor, automatically allocating traffic and tracking results.
Localization support manages translations in one place, with automatic serving based on user locale. Analytics integration provides automatic conversion tracking without additional instrumentation. And a template library gives you proven starting points that you can customize.
Server-driven UI advantages
The key advantage of Paywall Builder is server-driven UI. Your app renders whatever configuration the server provides, decoupling the paywall appearance from the app release cycle:
This single composable renders any paywall design you configure in the RevenueCat dashboard. No app update required to change colors, fonts, or layouts, swap images or icons, modify copy or pricing display, launch A/B tests, or roll out winning variants.
The operational implications are significant. Your product team can iterate on paywalls independently of engineering, accelerating the experimentation cycle. Bugs in paywall content can be fixed immediately rather than waiting for app store review. Seasonal promotions can be created and removed on exact schedules without app update coordination.
When to choose Paywall Builder
Paywall Builder is often the better choice when iteration speed matters most. If you’re optimizing for conversion and need to test many variations quickly, the visual editor and built-in A/B testing dramatically accelerate the feedback loop. The product team can create and launch tests without engineering involvement, freeing developers for other work.
Engineering resource constraints also favor Paywall Builder. Custom paywalls require development time for initial implementation and ongoing maintenance. Paywall Builder shifts this work to product and design teams, who can work in the visual editor without writing code.
If you don’t need advanced animations, Paywall Builder supports basic animations and transitions. If your paywall concept doesn’t require complex custom effects, the templates may be sufficient. Many successful apps use straightforward paywalls that focus on clear messaging rather than elaborate motion design.
Cross-platform consistency is another consideration. Paywall Builder renders consistently across iOS, Android, and web. Custom implementations require separate development for each platform, multiplying the engineering investment.
When custom paywalls still win
Custom paywalls remain the right choice when brand expression is paramount. If your paywall must match a distinctive visual identity with custom animations, templates can’t replicate that. The Day & Night paywall we examined could never be created in a templated system, the procedural star generation, trigonometric sun/moon paths, and synchronized multi-layer animation require custom code.
You need unique interactions that templates don’t support. Gamified paywalls, AR previews, gesture-based navigation, or mini-demos of premium features require custom implementation. These interactive elements can significantly impact conversion by letting users experience value before committing.
Sometimes the paywall is a product differentiator. If the paywall experience itself is a selling point, like a meditation app’s calming paywall that sets the tone for the premium experience, custom development is worthwhile. First impressions matter, and a distinctive paywall can signal the quality users should expect from the premium tier.
Hybrid approach
Many successful apps use both approaches strategically. A custom implementation for the primary conversion flow provides the brand expression and distinctive experience that first-time subscribers see. Paywall Builder handles promotional paywalls for seasonal offers, win-back campaigns, or experiment variations where rapid iteration matters more than custom design. Secondary surfaces like settings screen upsells or feature-gated prompts also use Paywall Builder, since these are seen less frequently and benefit more from easy configurability than custom treatment.
This hybrid approach maximizes both brand expression and iteration speed. The primary paywall creates the distinctive first impression, while Paywall Builder provides flexibility for ongoing optimization and promotional needs.
Conclusion
Building animated custom paywalls in Jetpack Compose opens creative possibilities that templated solutions cannot match. The Day & Night paywall demonstrates how layered animations, sky gradients, twinkling stars, celestial body trajectories, parallax clouds, and synchronized UI elements, can create an immersive experience that engages users emotionally. These techniques transform the conversion moment from a transaction into an experience, potentially improving both conversion rates and brand perception.
Firebase provides the remote configuration layer needed for agile A/B testing of paywall content. By externalizing headlines, features, pricing display, and CTA text, you can iterate on messaging without app updates while maintaining your custom animated experience. This combination, custom design with remote content, gives you both brand distinctiveness and operational agility.
However, custom paywalls aren’t always the right choice. RevenueCat’s Paywall Builder offers server-driven UI, built-in A/B testing, and rapid iteration capabilities that often outweigh the benefits of custom development. Consider your team’s resources, iteration needs, and brand requirements when choosing between custom and templated approaches. Many successful apps use both, custom for the primary experience, templates for promotional and secondary surfaces.
For complete documentation on RevenueCat’s SDK integration, refer to the official RevenueCat documentation. For full source-code covered in this blog post, check out the GitHub repository.