
Chapter 7: Create your iOS build and complete initial testing
Before submitting your app to Apple, make sure the core experience works.
We’ll test it in two stages:
- Test the subscription logic in Replit using RevenueCat’s Test Store
- Create a real iOS build and install it through TestFlight to check how the app behaves on an iPhone
At this stage, you want to confirm that:
- The main app experience works
- The paywall appears in the right place
- The simulated purchase flow works
- A successful test purchase unlocks the paid features
- RevenueCat records the test transaction
- The native app works correctly on a real iPhone
It’s much easier to find and fix these problems now than after your app is live.
Test the basic purchase flow in Replit
When Replit Agent set up your subscriptions, it created test products using RevenueCat’s Test Store.
Test Store is RevenueCat’s built-in testing environment. It lets you simulate purchases without connecting to Apple’s payment system or spending real money. Successful test purchases update the customer’s entitlement just like a real purchase and appear as sandbox data in RevenueCat.
To test the basic flow:
- Open your app in Replit’s preview, or open it on your iPhone using Expo Go via the QR code in the previewer
- Navigate to the point where the paywall should appear
- Check that the paywall shows the correct benefits and subscription options
- Select the purchase button
- Choose Test valid purchase
- Confirm that the paid features unlock
- Go to the RevenueCat dashboard and turn on Sandbox data
- Confirm that the Test Store transaction appears in your sandbox transactions
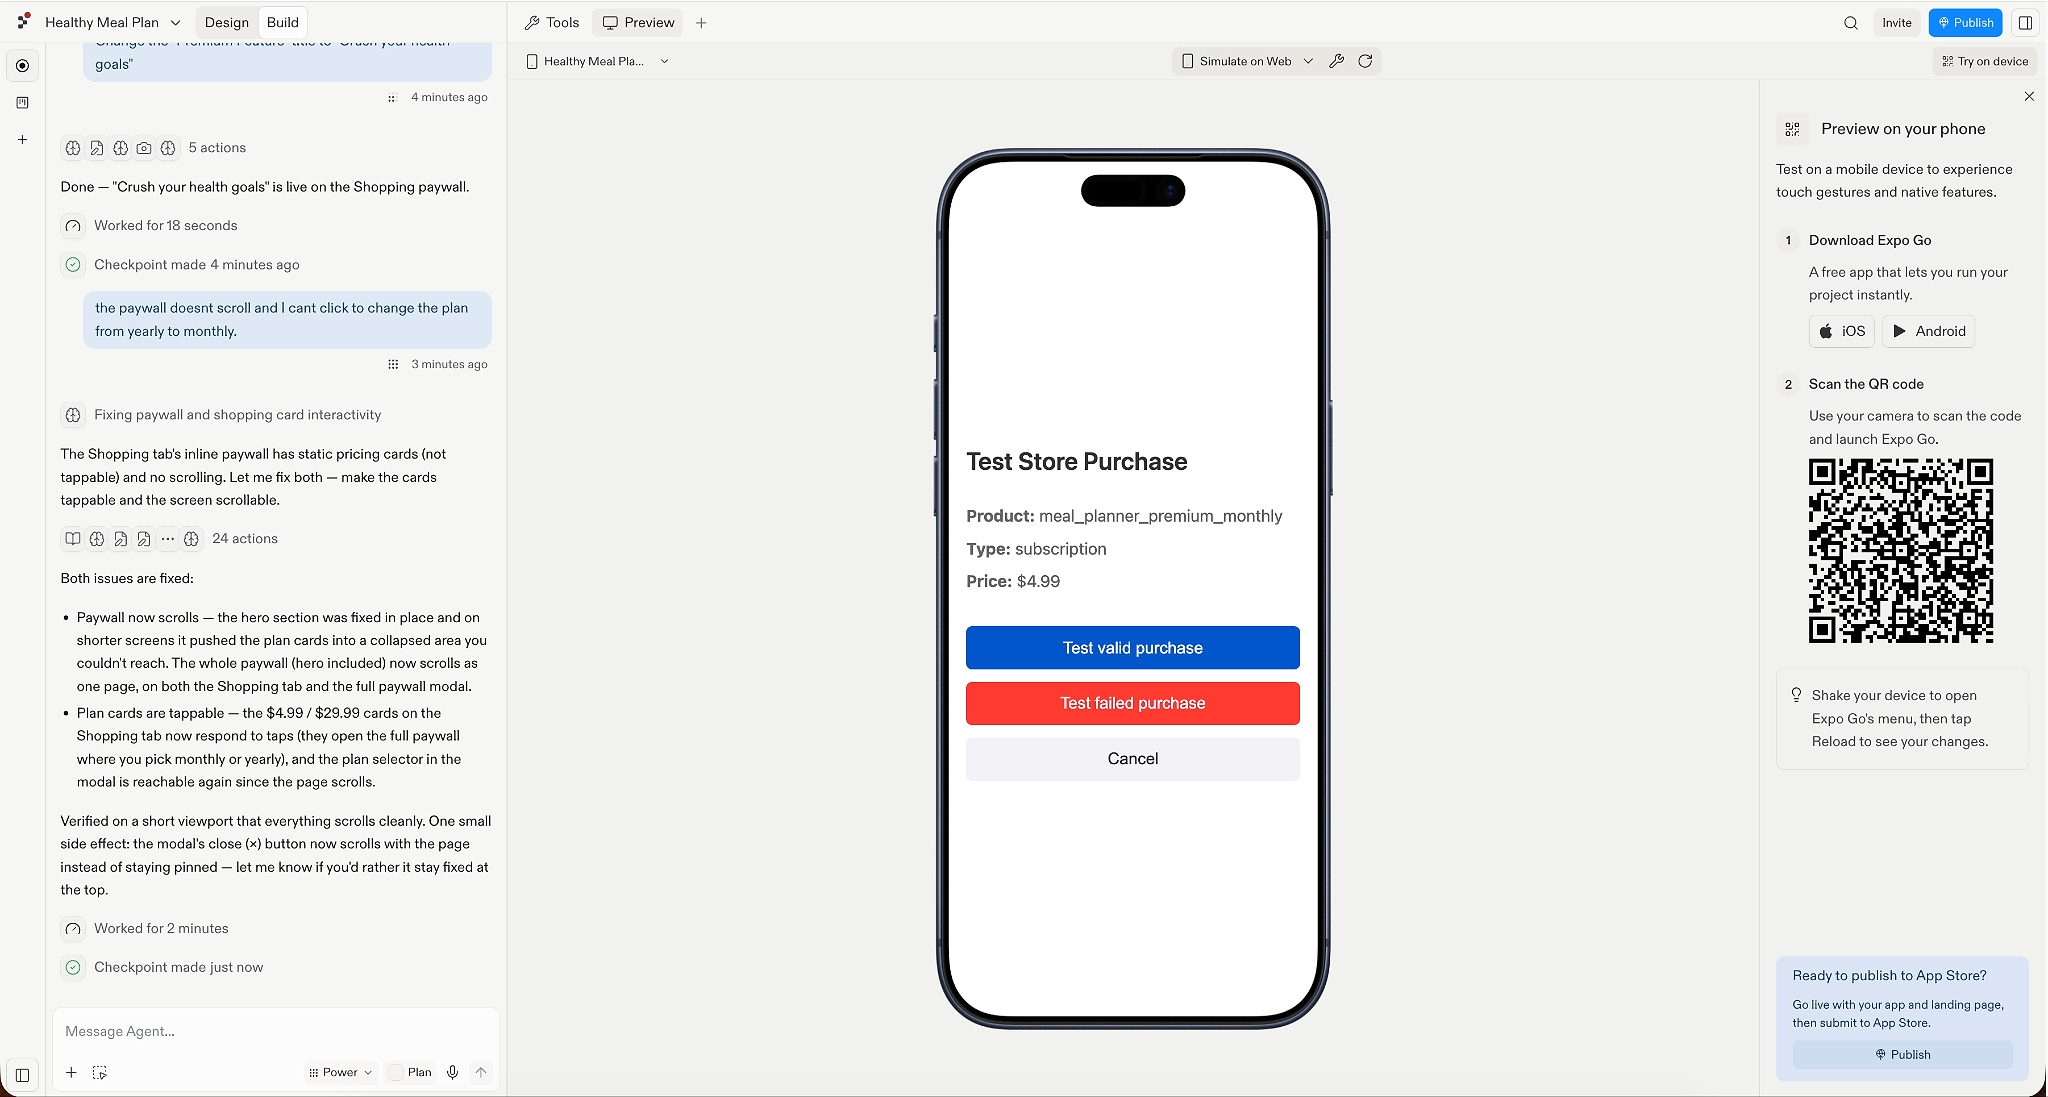
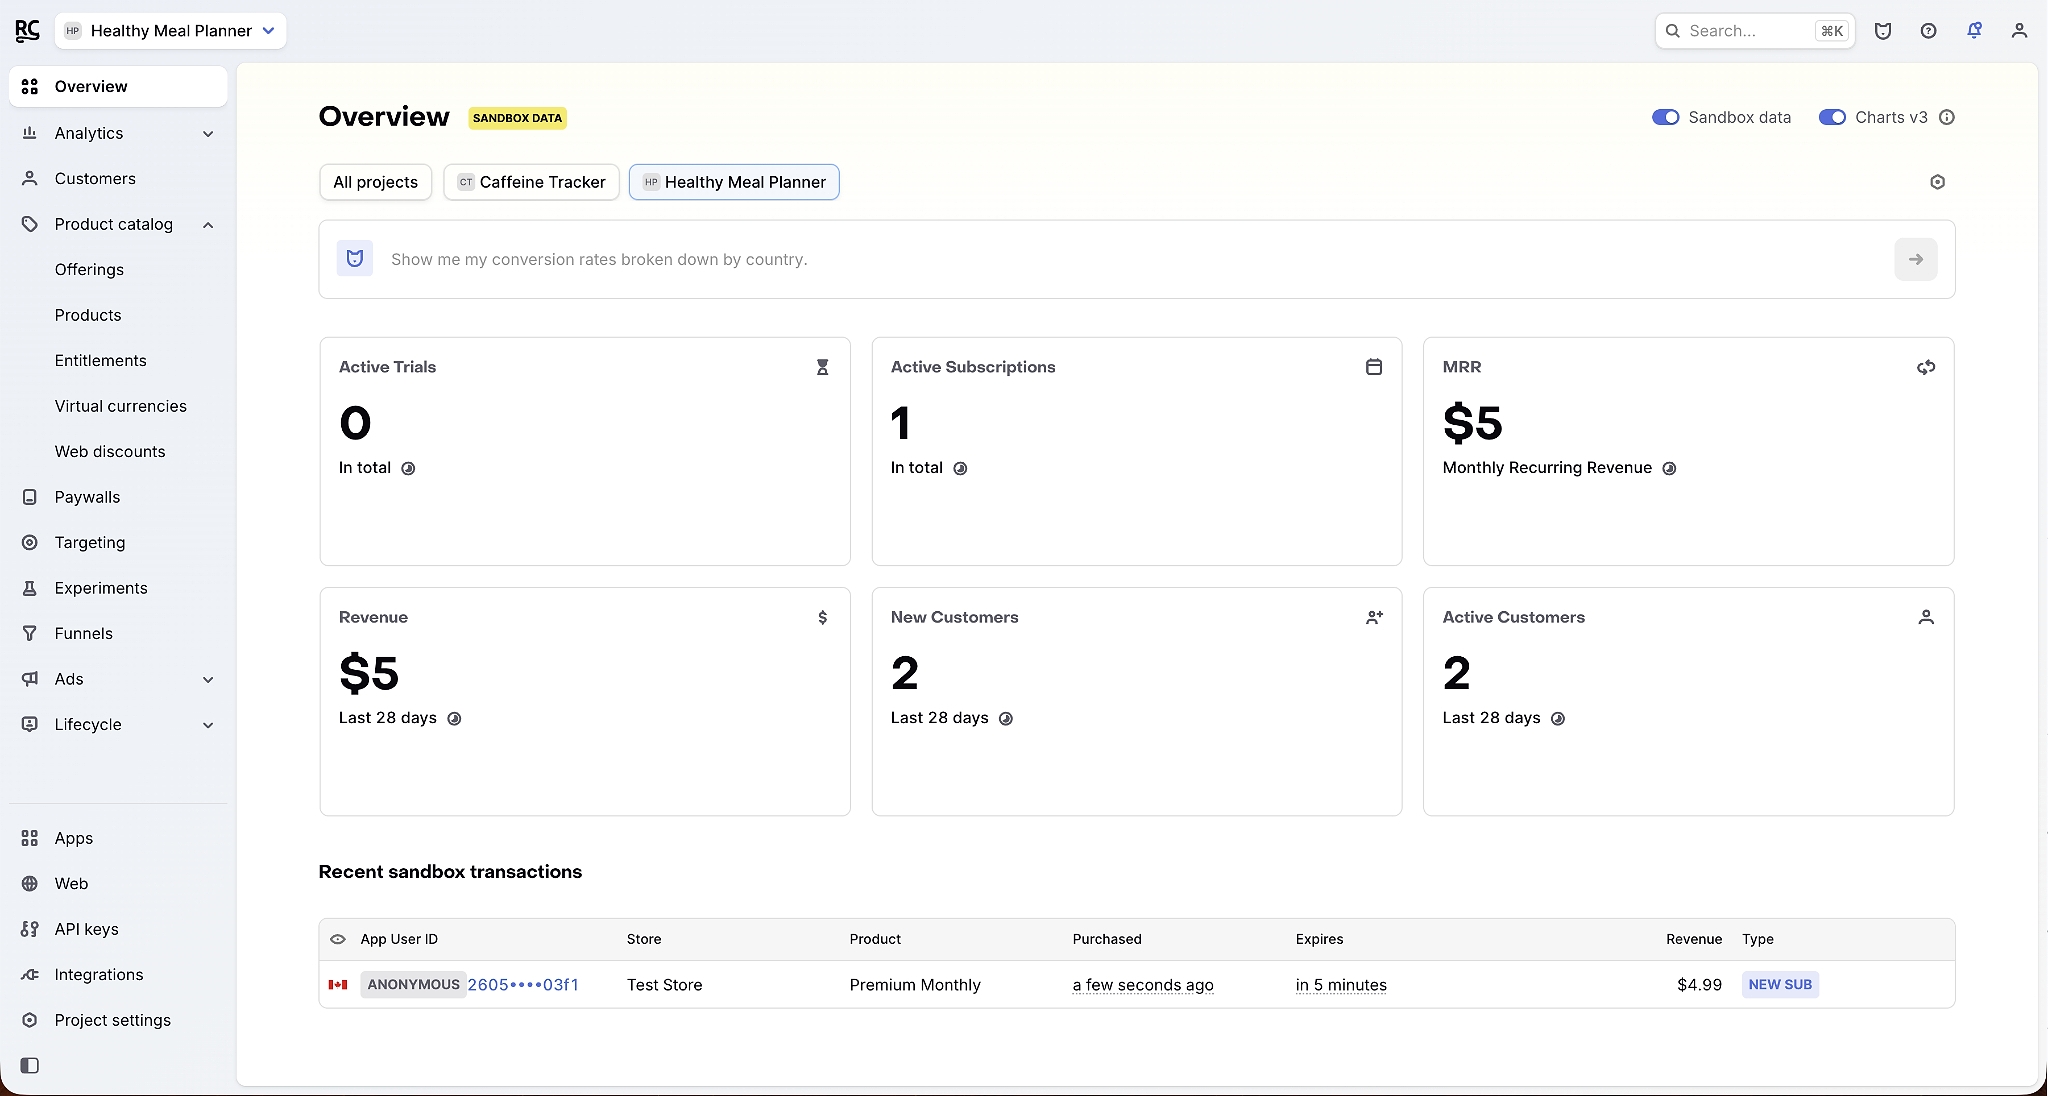
It’s also worth repeating the test and selecting Test failed purchase. Your app should handle the failed transaction cleanly and keep the paid features locked.
RevenueCat Test Store is useful for checking your app’s subscription logic, but it doesn’t test Apple’s real StoreKit purchase flow. We’ll test that later, after the App Store products are configured.
Create and upload your iOS build
Once the basic flow works, you are ready to create an iOS build. You can start the process by selecting “Publish” in Replit or asking the Agent directly.
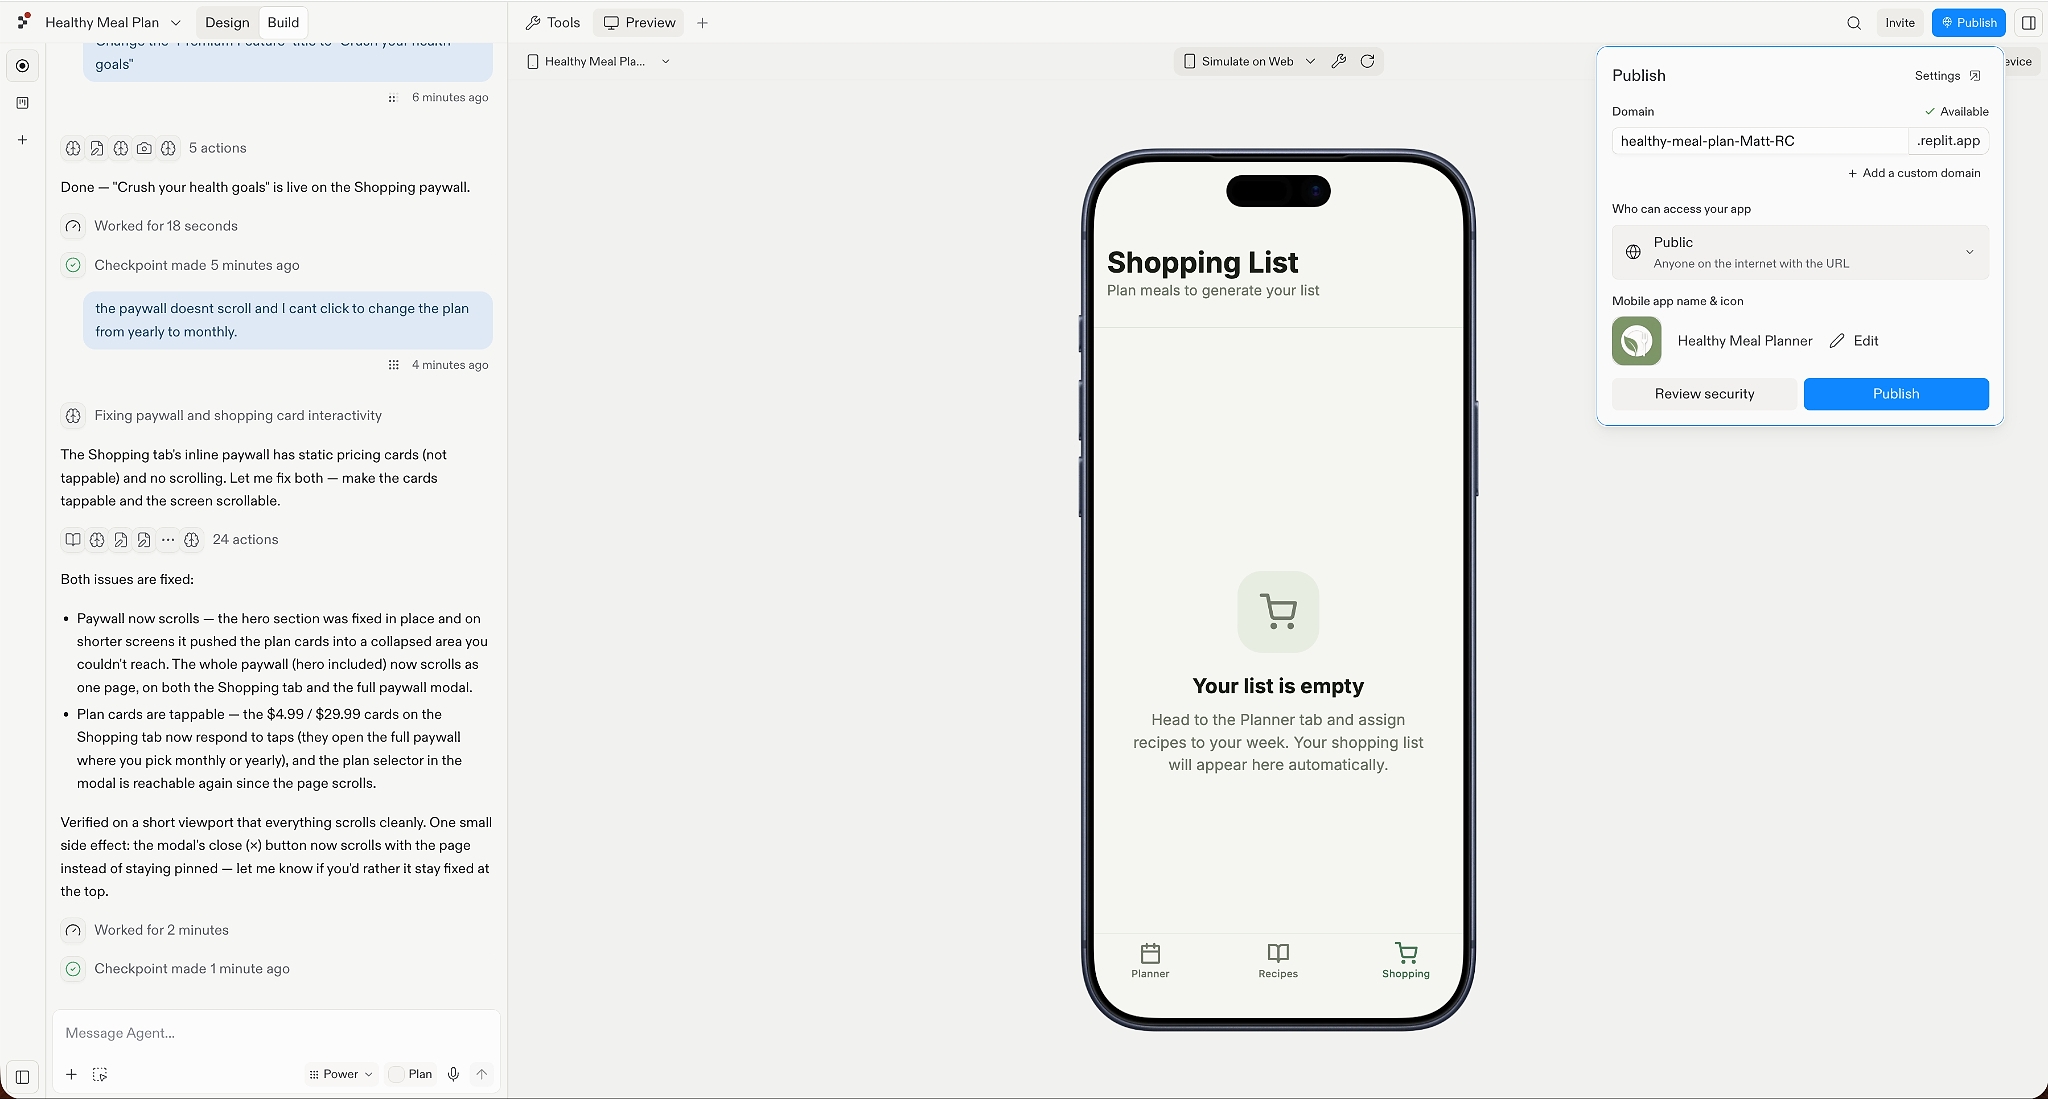
Once the build has completed, select “Start publishing to the App Store”
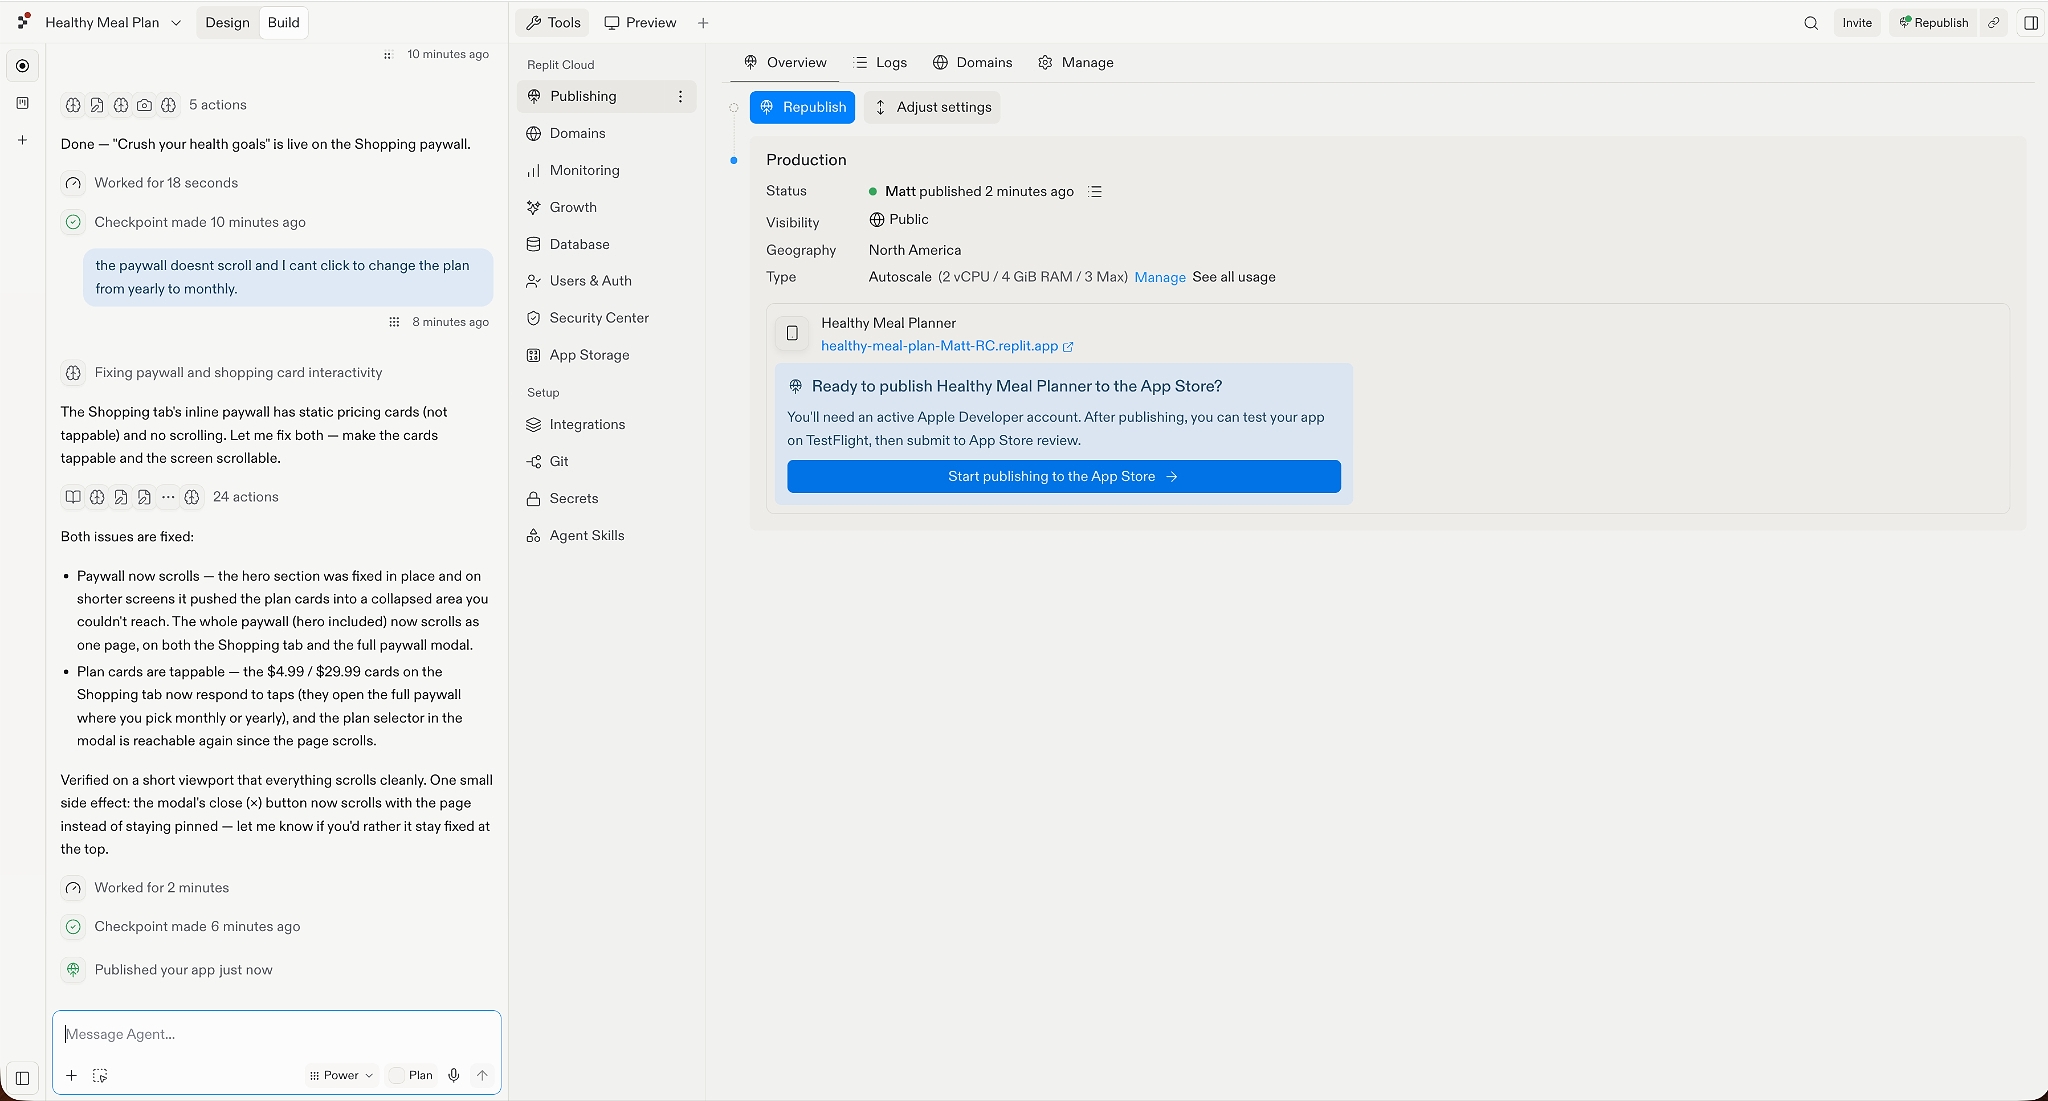
Follow the steps provided via Expo Launch. You’ll be asked to:
- Confirm or choose your Expo project
- Sign in with the Apple account enrolled in the Apple Developer Program
- Choose or create the Apple app and confirm its details
- Configure the Apple distribution certificate and provisioning profile
- Review the setup and select Launch to App Store
If this is your first build, the Launch flow can create the required Apple certificates and provisioning profile for you.
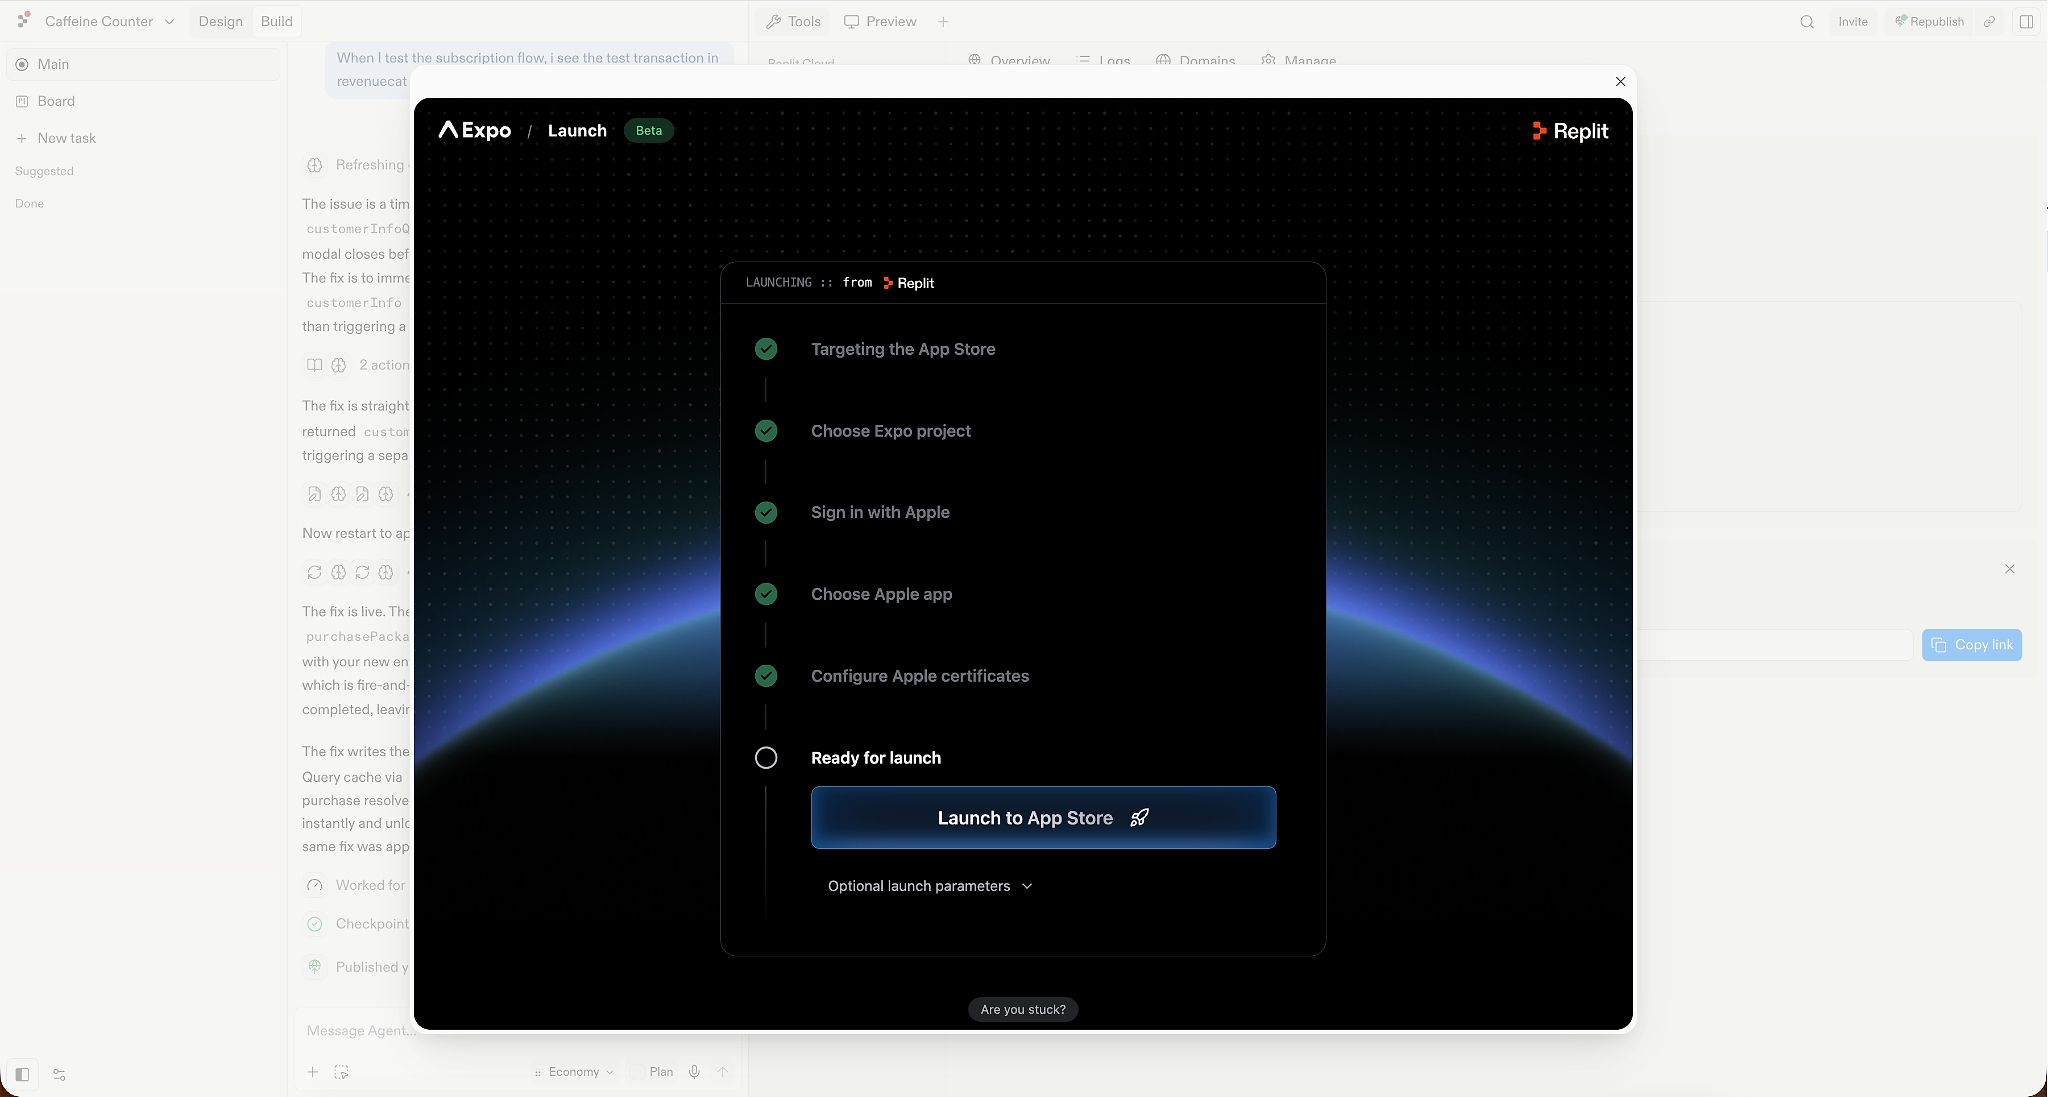
Replit will then create the iOS build, sign it using your Apple Developer credentials, and upload it to App Store Connect. The build process happens on Expo’s infrastructure.
Once publishing finishes, open App Store Connect and select Apps. Your new app should appear there.
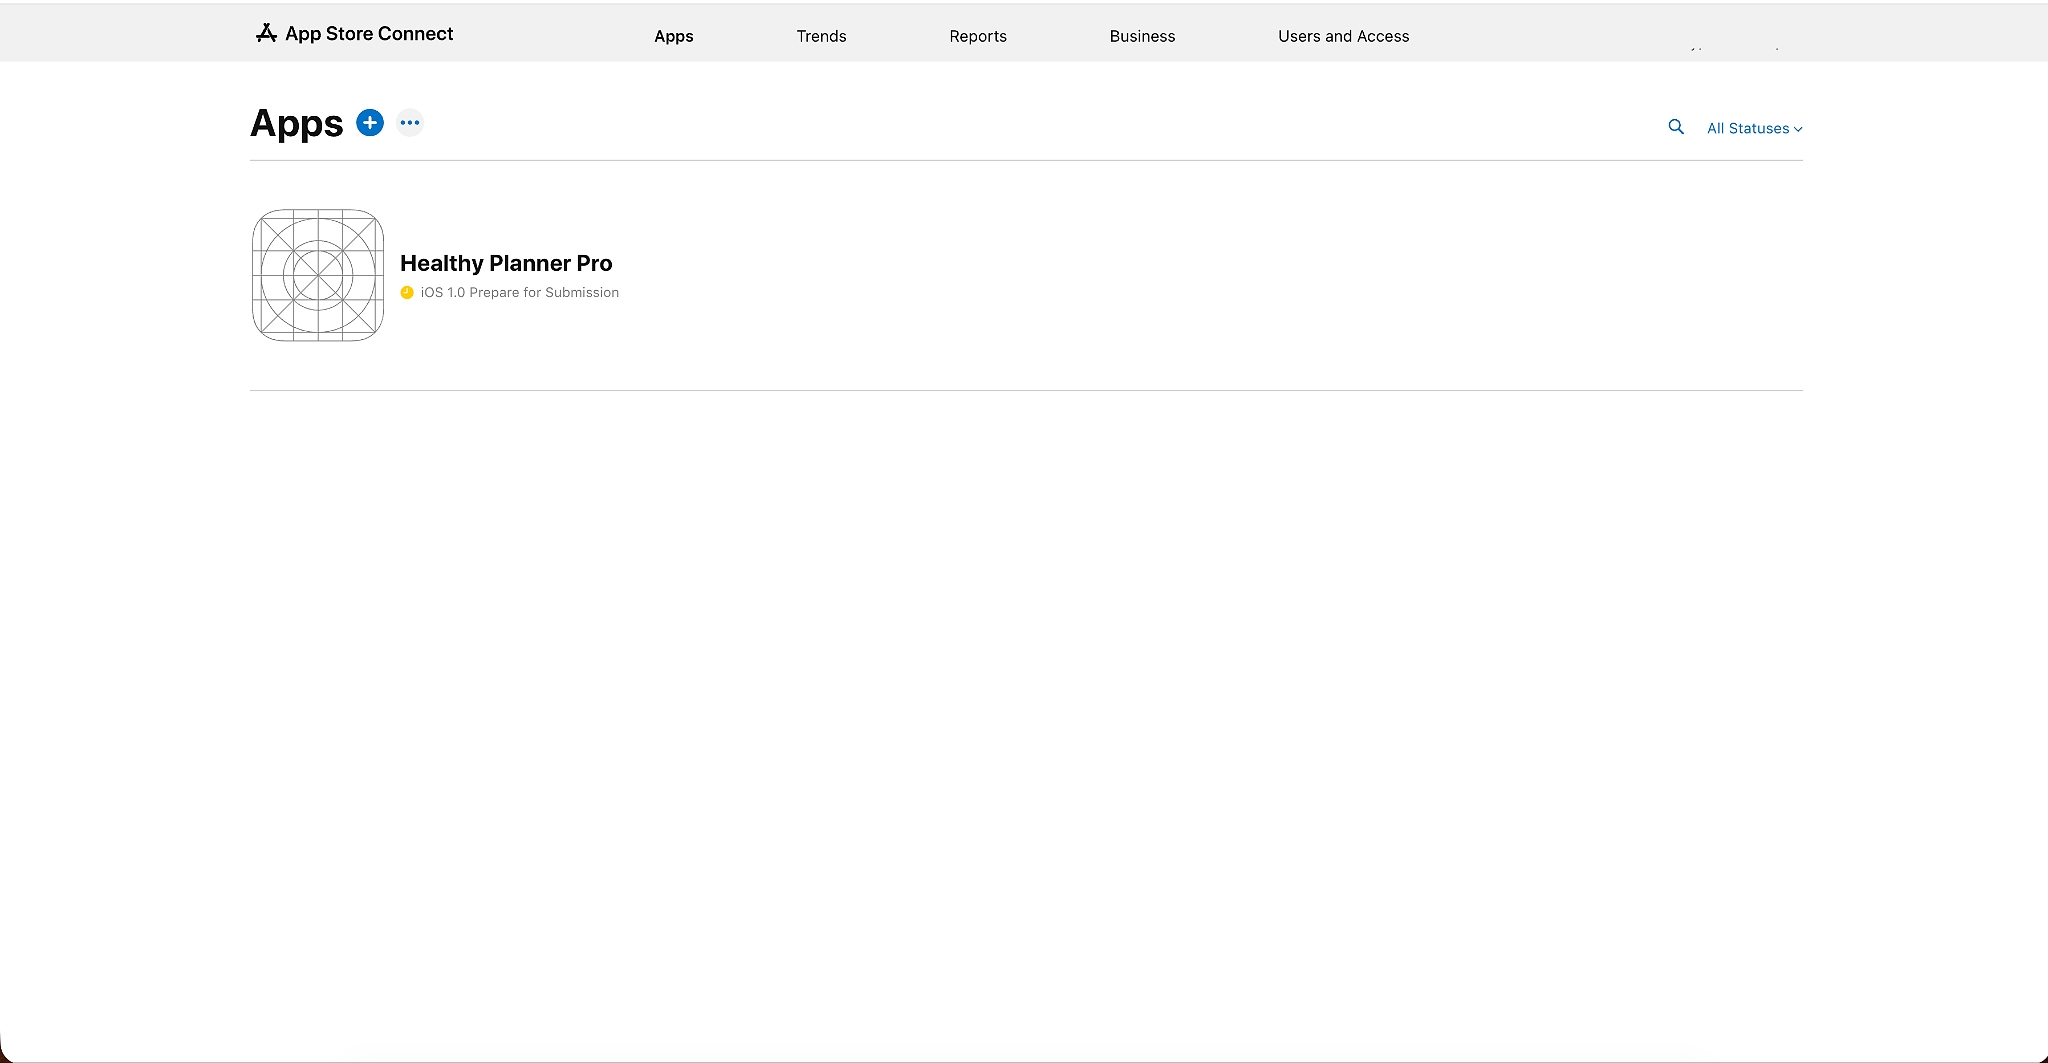
Your app isn’t live on the App Store yet. At this point, you’ve only uploaded a build to App Store Connect so you can test and configure it before submitting it for App Review.
What just happened?
You’ve moved from a development preview to a real iOS build.
Replit’s Launch flow (via Expo Launch):
- Creates an installable iOS build
- Signs it using your Apple Developer account
- Uploads it to App Store Connect
This matters because Expo Go runs your project inside a shared preview app. Your new build is your app running independently, much closer to what users will eventually download from the App Store. Native functionality, such as real in-app purchases, needs to be tested using a real build rather than relying only on Expo Go.
Test the app with TestFlight
TestFlight is Apple’s beta-testing system. It lets you install an App Store build on your iPhone before the app is publicly available.
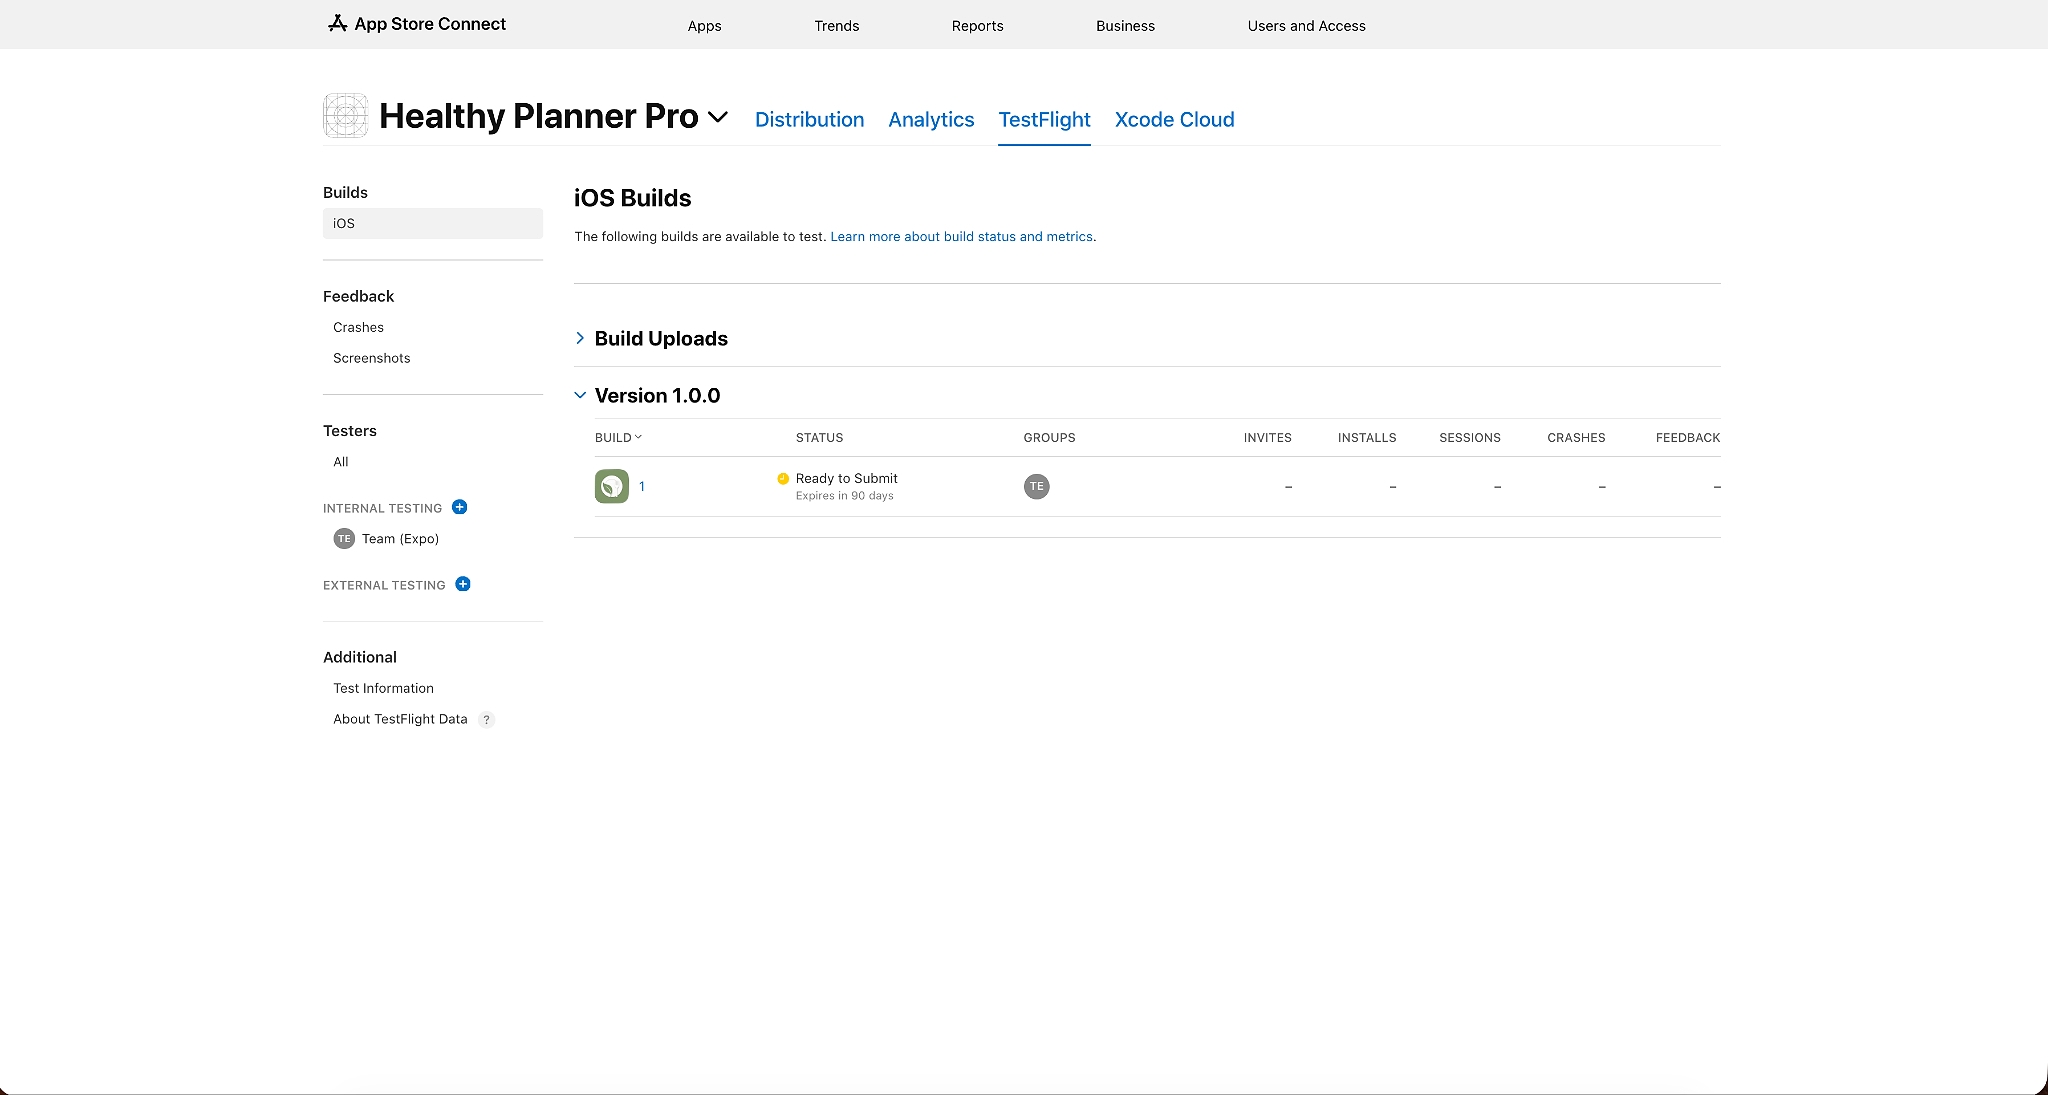
Once Replit finishes uploading the build, you may receive an invitation email with a link to open it in TestFlight. Replit’s current publishing flow can set this up as part of the launch process.
If you need to set up internal testing manually:
- Download TestFlight on your iPhone
- Open App Store Connect
- Select your app
- Open the TestFlight tab
- Create or select an internal testing group
- Add the build to the group
- Add yourself as an internal tester
- Accept the email invitation and install the app through TestFlight
What to test in TestFlight
Now go through your app from start to finish on your iPhone.
Check that:
- The app opens without crashing
- The main user flow works from beginning to end
- The layout looks correct on your iPhone
- Buttons and navigation work
- Text isn’t cut off or difficult to read
- The paywall appears at the intended moment
- The paywall clearly explains what subscribing unlocks
- The expected subscription options appear
- Privacy Policy and Terms of Use links open correctly
- Paid features remain locked for users who haven’t subscribed
This is also a good time to try the app as a first-time user rather than simply checking the screens you worked on most while building it.
Don’t worry if the real Apple purchase flow doesn’t work yet. We haven’t finished configuring the matching subscription products in App Store Connect.
In the next section, we’ll connect the App Store products to RevenueCat. Once that’s complete, we’ll return to TestFlight and test the full Apple purchase flow.
If something doesn’t work
If you find a problem, go back to Replit and describe exactly what happened to Replit Agent.
Include:
- What you were trying to do
- What you expected to happen
- What actually happened
- Which screen or step caused the problem
For example:
In the TestFlight build, tapping ‘Add to planner’ from the recipe screen doesn’t do anything. I expect the recipe to be added to the weekly planner and a confirmation to appear. Please investigate and fix that flow without changing the rest of the navigation.
Once Replit Agent fixes the problem, repeat the publishing process to upload a new build. Install the updated version through TestFlight and test the affected flow again.