
Chapter 6: Your paywall: show users what they’re buying
The paywall is the screen where users decide whether to subscribe.
Replit Agent created a basic paywall when it connected RevenueCat to your app. Now you need to review where it appears, what it says, and whether it clearly explains what users get when they pay.
Don’t worry about making it perfect before launch. Start with something simple and clear. You can improve it later as you learn what works.
When to show your paywall
Your paywall should appear at a point where users understand what your app does and have a reason to want more.
Two common moments are:
After onboarding
Show the paywall after you’ve introduced the app and explained its value. This works best when your onboarding gives users enough context to understand what subscribing will help them achieve.
When a user reaches a paid feature
Show the paywall when someone tries to use a premium feature or reaches the limit of what they can do for free.
For example, our meal-planning app might let users browse recipes for free, then show the paywall when they try to create an unlimited meal plan or generate a shopping list.
Two ways to build your paywall
For most first-time vibe coders, we recommend starting with the paywall Replit Agent already created. It’s the quickest route to a working, monetized app and means you can keep building everything from Replit.
If you later want to update and experiment with your paywall more frequently, you can switch to RevenueCat Paywalls, which lets you manage and publish the paywall remotely from the RevenueCat dashboard.
Option 1: Keep the paywall Replit Agent created
When you asked Replit Agent to add RevenueCat, it created a paywall as part of your app and connected its subscription options to RevenueCat.
This is completely fine for your first version, and it’s the simplest way to get your app ready to launch.
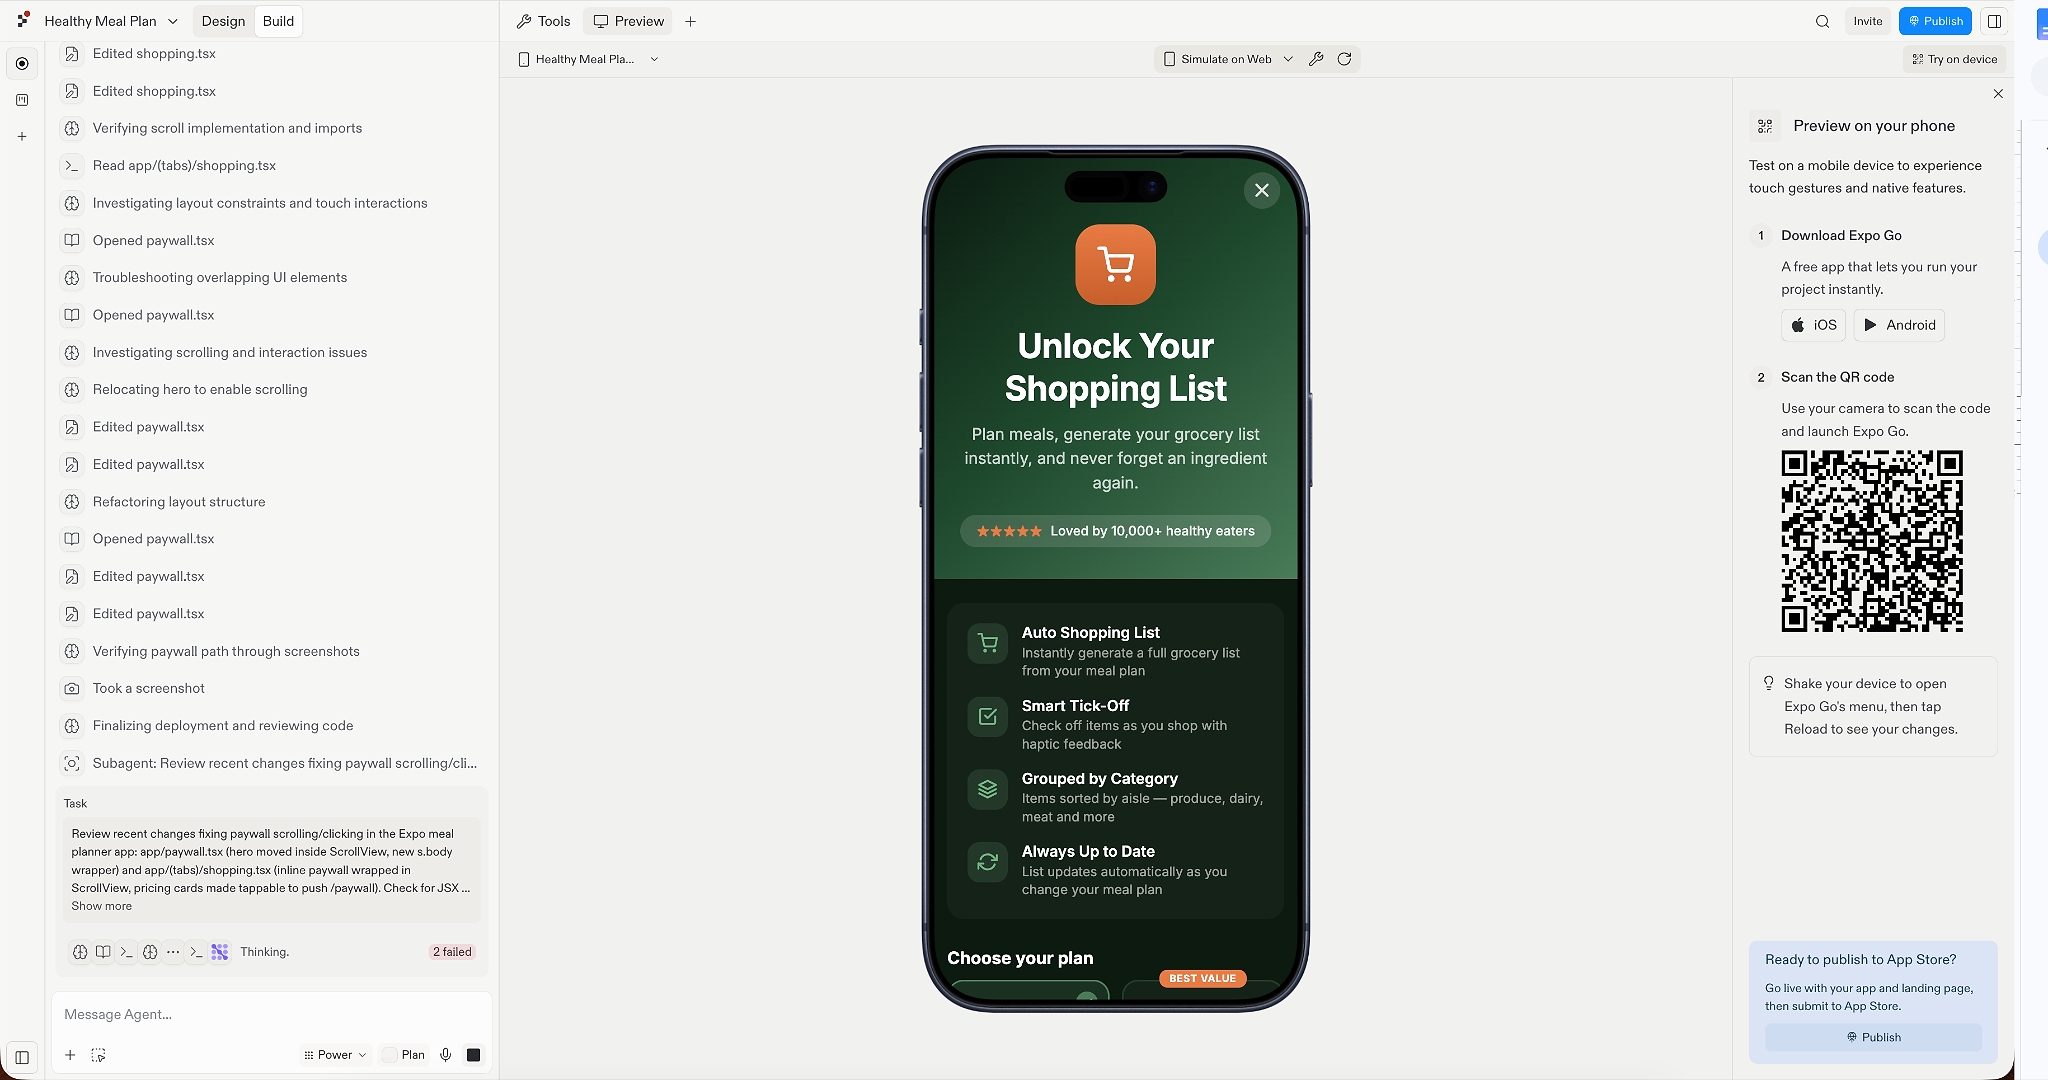
For a quick change, describe exactly what you want the Agent to update.
For example:
Simplify the paywall. Make the headline focus on the benefit of planning meals for the whole week, reduce the amount of text, and make the yearly subscription the most prominent option. Keep the existing subscription products and purchase logic unchanged.
The important thing to understand is that this paywall is part of your app’s code.
That means if you want to change its design or wording after your app has launched, you’ll normally need to:
- Make the change in Replit
- Create a new app build
- Upload the new build to App Store Connect
- Submit the updated version for App Review
- Release the new version once it’s approved
That extra work isn’t necessarily a problem for your first app. If your goal is simply to get something useful and monetized into the App Store, this is probably the right place to start.
Option 2: Switch to RevenueCat paywalls
Once your app is working, you may want more flexibility to update and improve your paywall.
RevenueCat Paywalls let you build and manage the paywall from the RevenueCat dashboard instead of keeping the paywall design inside your app’s code.
The important difference is that your app now loads the RevenueCat Paywall when it needs to show one.
Once that implementation has been added to your app and released, you can make many future paywall changes from the RevenueCat dashboard and publish them remotely.
That means you can update things such as:
- Paywall copy
- Images
- Layout and design
- Which subscription options are displayed
- How benefits are presented
You can publish those changes without creating a new app build or submitting the paywall itself through App Review again.
This is useful once you want to experiment with your paywall more regularly, but you don’t need to set it up before launching your first app.
Switch to RevenueCat Paywalls
When you’re ready to switch, ask Replit Agent:
Replace my current paywall with a RevenueCat Paywall. Keep the existing RevenueCat products, entitlement, and offering connected.
The Agent will update the app so that, instead of displaying the paywall it previously built into the app, it displays the RevenueCat Paywall associated with your offering.
Once the Agent has made the change:
- Open the RevenueCat dashboard
- Select Paywalls
- Choose how you want to start:
- Edit a paywall created during setup, if one is available
- Generate a paywall with AI
- Choose a pre-built template
- Create one from scratch
- Update the copy, benefits, images, and design
- Make sure the paywall is connected to the correct offering
- Select Publish
Learn more about RevenueCat paywalls and how to build them here.
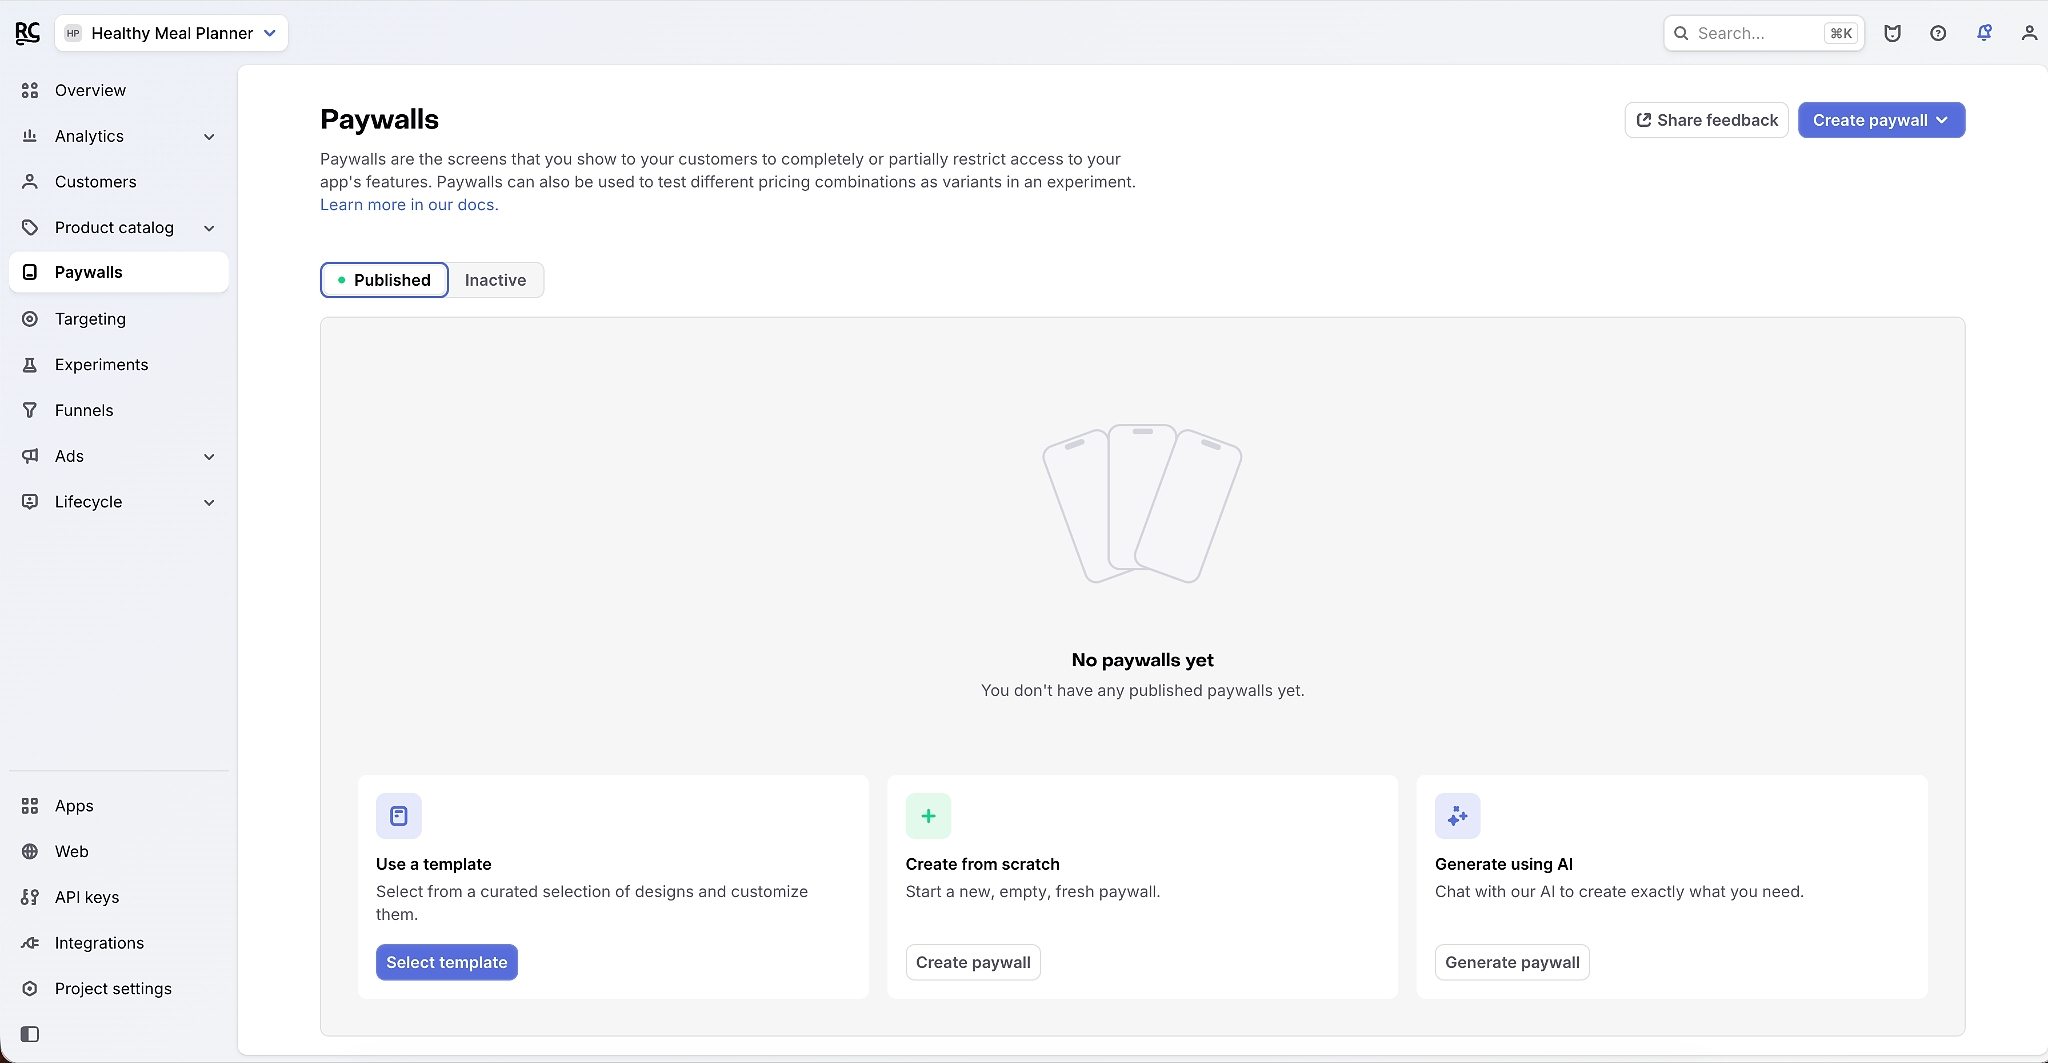
From this point on, you can manage the paywall from RevenueCat rather than asking Replit Agent to redesign it every time.
You’ll still need the RevenueCat Paywalls implementation to remain in your app, but changes to the paywall itself can be published remotely.
Test your paywall
Whichever option you choose, test the paywall before you launch.
Check:
- Does it appear at the right moment?
- Is it immediately clear what subscribing unlocks?
- Are the correct subscription options shown?
- Are the prices correct?
- Does the purchase button work?
- Does the premium experience unlock after a successful test purchase?
- Can an existing subscriber restore their purchase?
You can use Replit’s development environment to check the basic flow. Later in the guide, we’ll test the full iOS purchase experience using a real app build in TestFlight.
What to put on your paywall
A good first paywall doesn’t need dozens of elements. It needs to answer a few important questions quickly:
- What do I get?
- How much does it cost?
- How long does the subscription last?
- What happens when I subscribe?
Here are the main elements to include.
A benefit-focused headline
Lead with what the user can achieve rather than a generic instruction to upgrade.
For our meal-planning example:
Clear benefits
Explain what users receive after subscribing in concrete terms.
Subscription options
Show the subscription options you decided on earlier in the guide.
If the yearly plan offers a meaningful saving, make that comparison easy to understand. But make sure any discount or ‘best value’ claim is accurate.
Your paywall should use the current product information returned through RevenueCat rather than hardcoding prices into the interface.
You can ask Replit Agent:
Make sure the paywall displays the live monthly and yearly prices from RevenueCat. Do not hardcode the prices.
If you use RevenueCat Paywalls, the paywall will use the products and packages configured through your RevenueCat offering.
A clear purchase button
The button should make it obvious that tapping it continues toward a purchase.
Simple options include:
- Continue
- Subscribe
- Start free trial - if the subscription actually includes one
Avoid clever wording that makes it unclear what will happen next.
Restore purchases
Include a way for existing subscribers to restore their purchases.
This matters when someone reinstalls the app, changes devices, or needs the app to recognize a subscription they’ve already bought.
Privacy Policy and Terms of Use
Apple requires that users can easily access your Privacy Policy and Terms of Use from within the app.
Your Privacy Policy should accurately explain:
- What data your app collects
- How that data is used
- Which third-party services receive or process that data
- How users can request deletion where applicable
Use a stable, publicly accessible webpage that users can open without signing in.
For the Terms of Use, you can create your own terms or link to Apple’s Standard End User License Agreement if you are using Apple’s default terms.
You can ask Replit Agent to add the appropriate links and subscription information to your paywall, but check the result yourself. Your Privacy Policy needs to describe what your app actually does, so don’t rely on AI-generated wording you haven’t verified.